Updated November 10, 2026
GPT Image 2.6 prompts for photo edits and GIFs
55 prompts, each run on YepShot with GPT Image 2.6: 7 turn a photo into a looping GIF and 48 edit a still photo. They are edit instructions, not text-to-image prompts: upload a photo, paste the prompt, and the model changes what the prompt describes. Every result below is real. The stills ran on November 6, 2026 (Flare, medium quality, 1K) and the GIFs on November 5 (9 frames). The still prompts are the ones we use for Nano Banana 2.1, word for word, so you can compare the two models on every one.
GIF prompts
Each prompt names the subject, one small action, that it loops, and what must stay the same. A GIF on YepShot is 9 frames (1.8 seconds), so one action is all that fits.
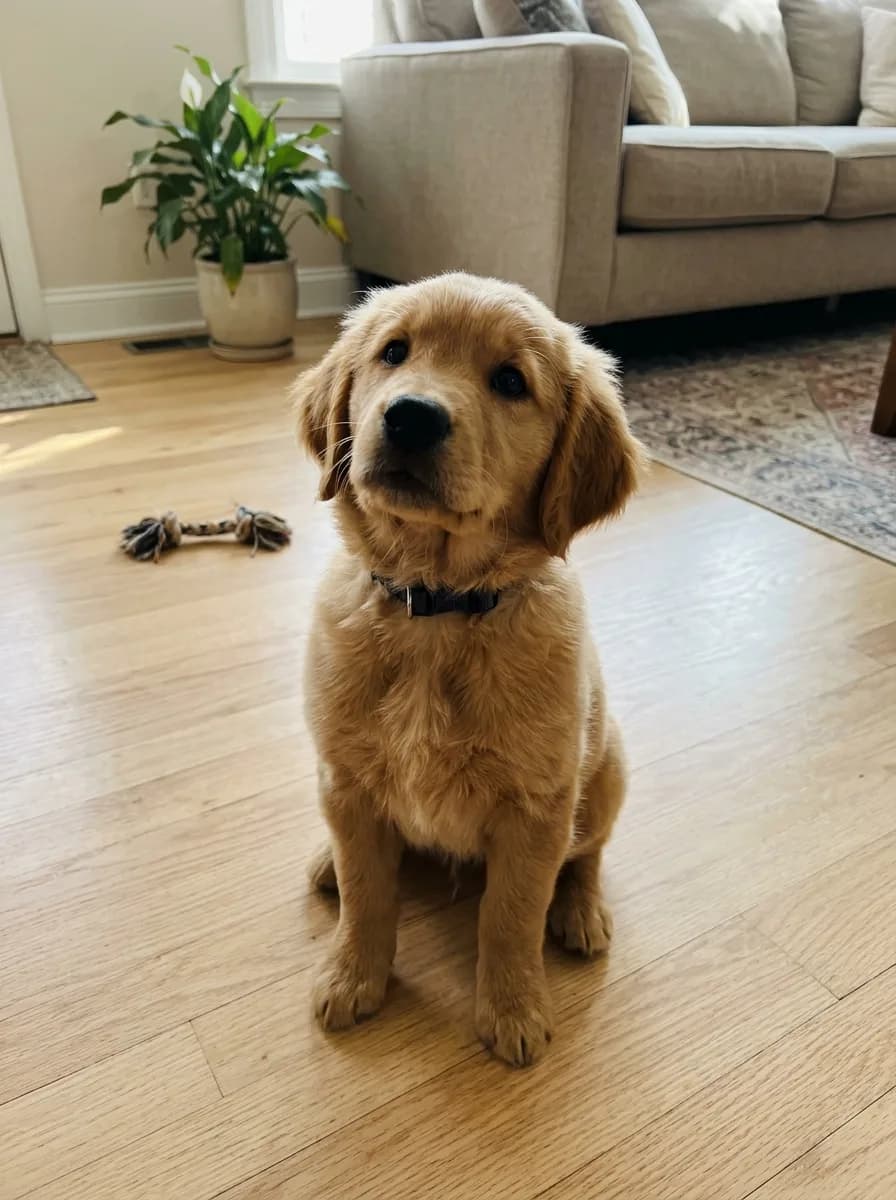
Before 
GPT Image 2.6 GIF Pet Photo to Head-Tilt GIF
Turn this photo into a looping animated GIF: the pet tilts its head to one side, blinks once, then tilts back to where it started. Keep its fur, collar, pose and the background exactly as in the photo, and keep the camera still.
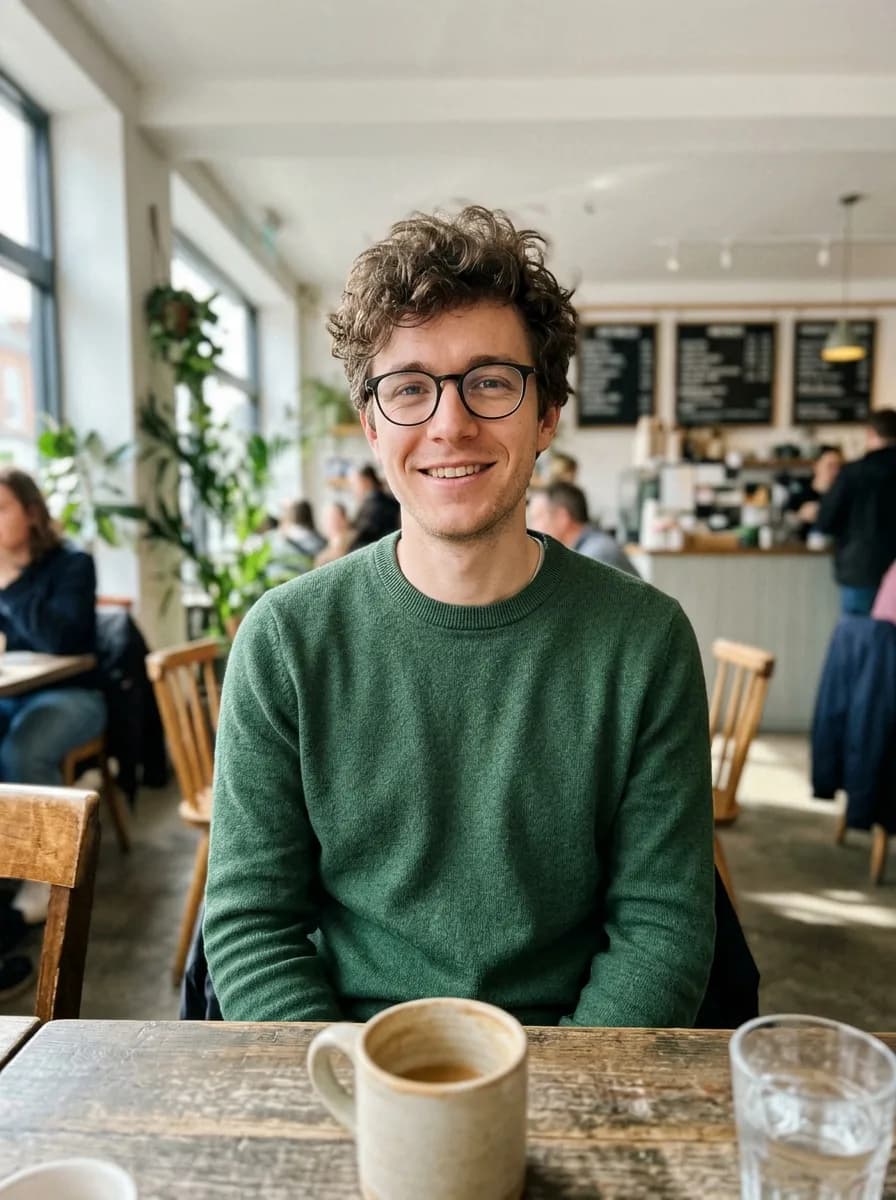
Before 
GPT Image 2.6 GIF Photo to Waving Chibi Sticker GIF
Turn the person in this photo into a cute chibi cartoon sticker with a thick white die-cut border on a plain light grey background, and animate it as a looping GIF: the character waves hello, gives a thumbs up, then returns to the first pose. Keep their hairstyle, glasses and outfit colors recognizable in every frame.
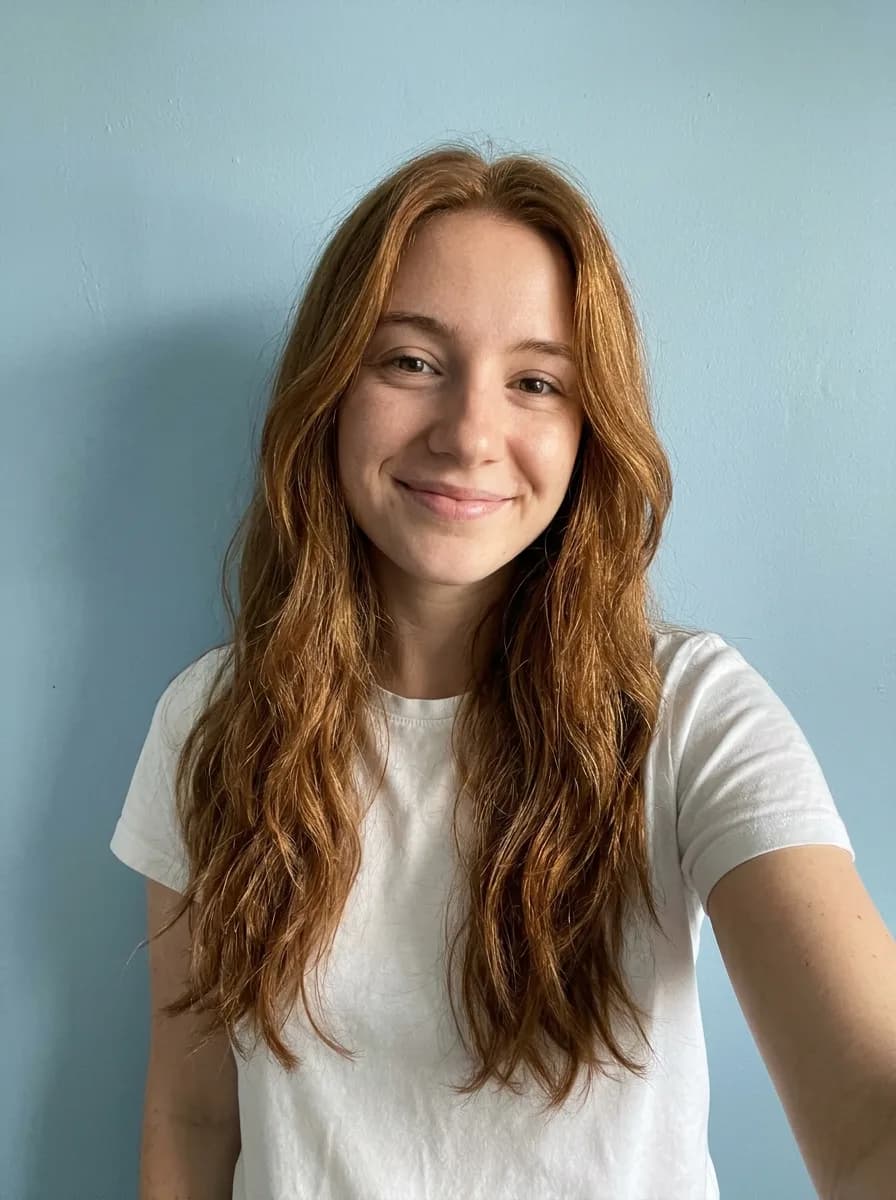
Before 
GPT Image 2.6 GIF Selfie to Sunglasses Reaction GIF
Turn this photo into a looping reaction GIF: the person puts on a pair of black sunglasses, nods once with a confident smirk, then takes them off again. Keep the face, hair, clothes and background exactly as in the photo, and keep the camera still.
Before 
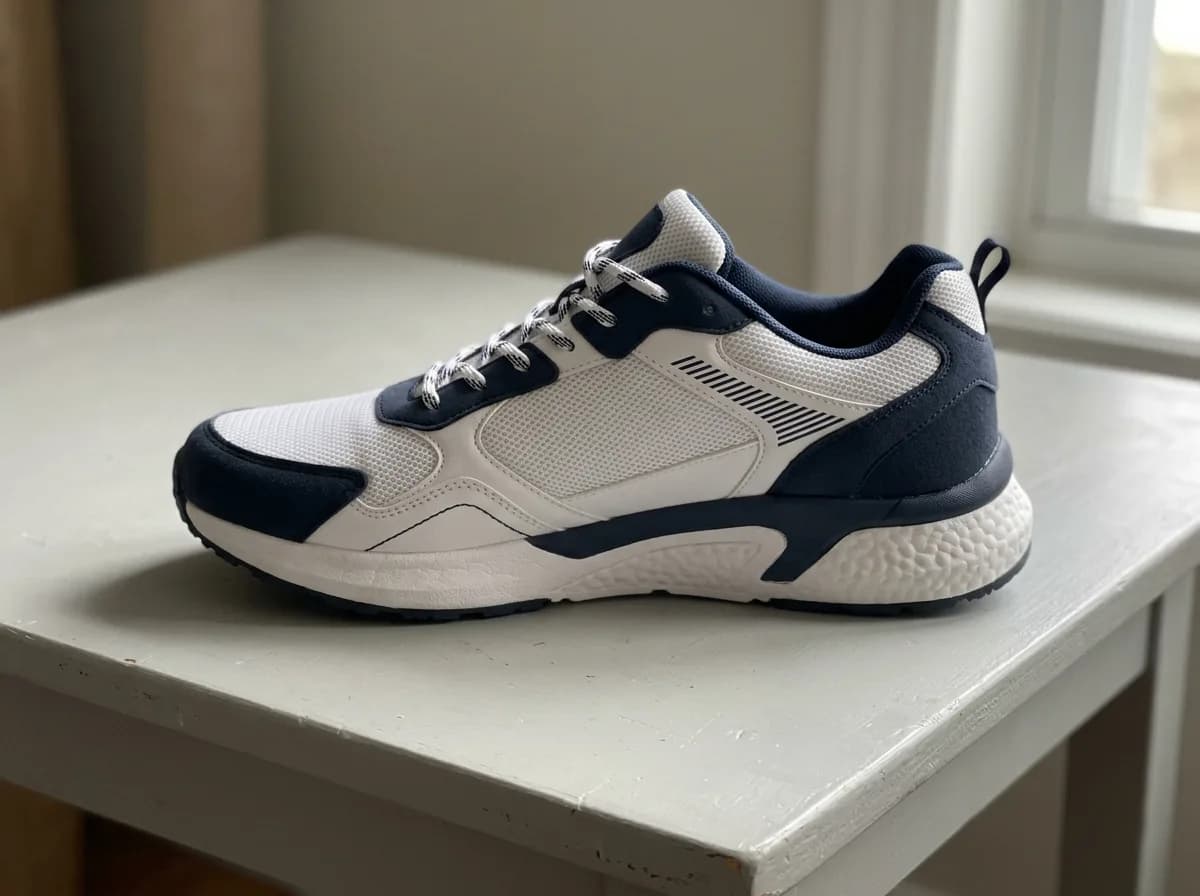
GPT Image 2.6 GIF Product Photo to 360° Spin GIF
Turn this product photo into a looping animated GIF of the product on a turntable against a plain light grey background, turning one full circle in the same direction: each frame turns it about 40 degrees further than the frame before, so the frames play as one smooth spin. Keep its shape, colors, materials and any text the same, and keep the lighting and camera still.
Before 
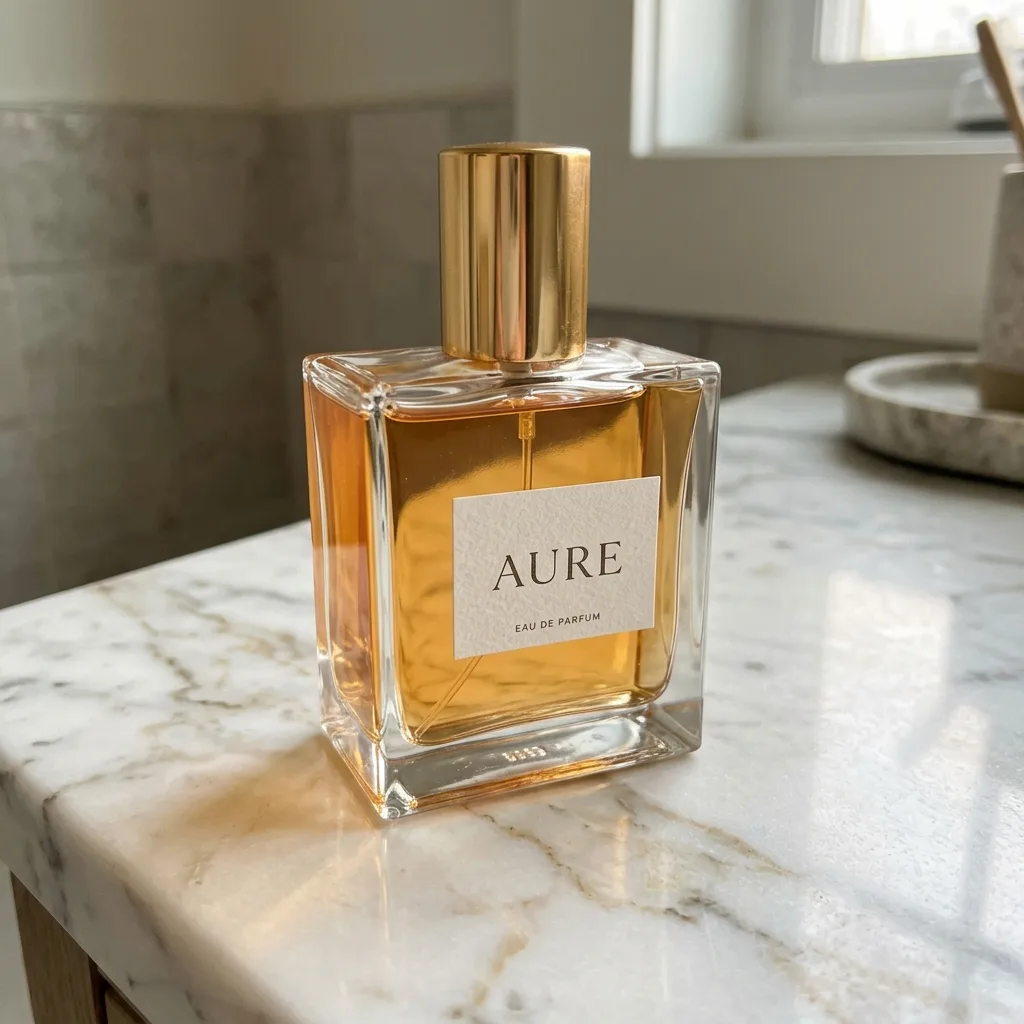
GPT Image 2.6 GIF Product Shine and Sparkle GIF
Turn this product photo into a looping animated GIF: a soft band of light sweeps across the product from left to right and a few small sparkles twinkle around it. The product, its label and the background stay perfectly still and unchanged.
Before 
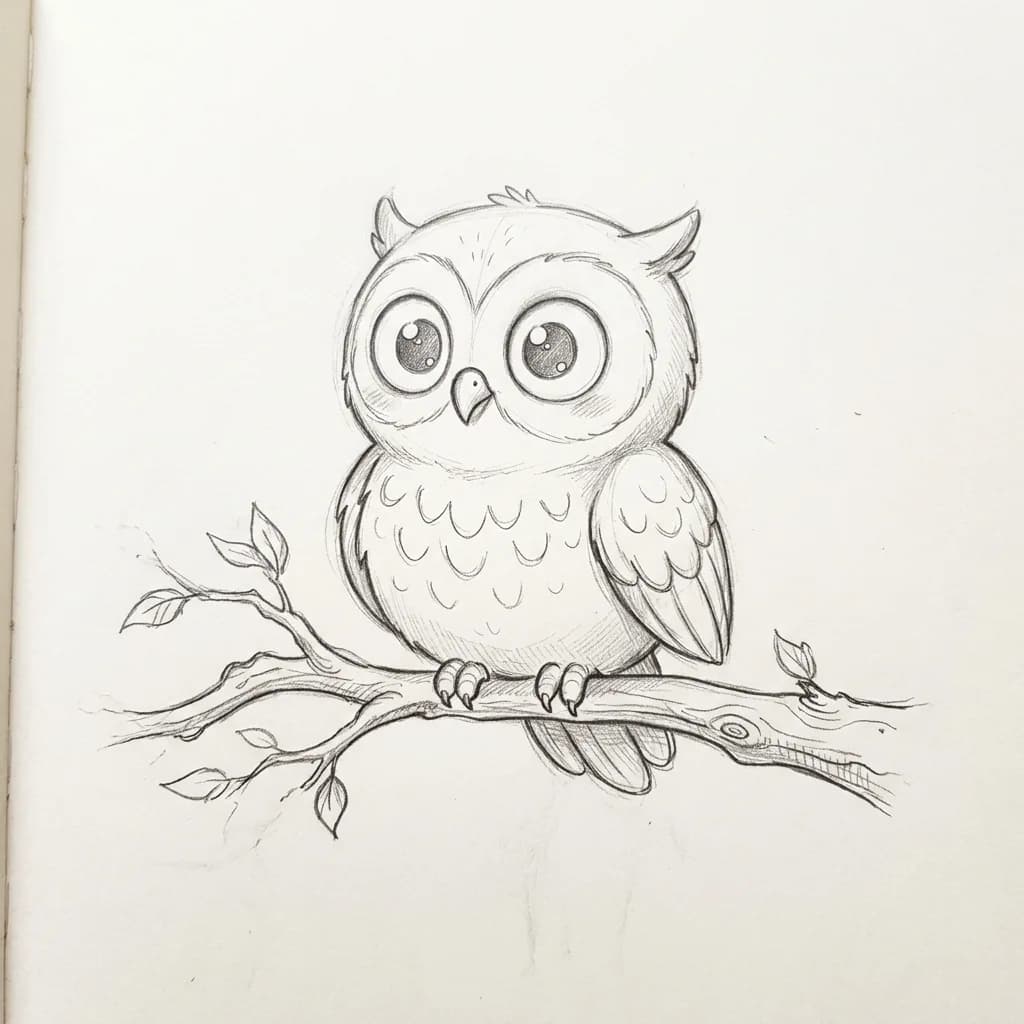
GPT Image 2.6 GIF Drawing Comes to Life GIF
Bring this drawing to life as a looping animated GIF: the character blinks, makes one small friendly move such as a wave or a flap, and settles back into its starting pose. Keep the drawing style, line weight and paper texture exactly as they are, and don't add color.
Before 
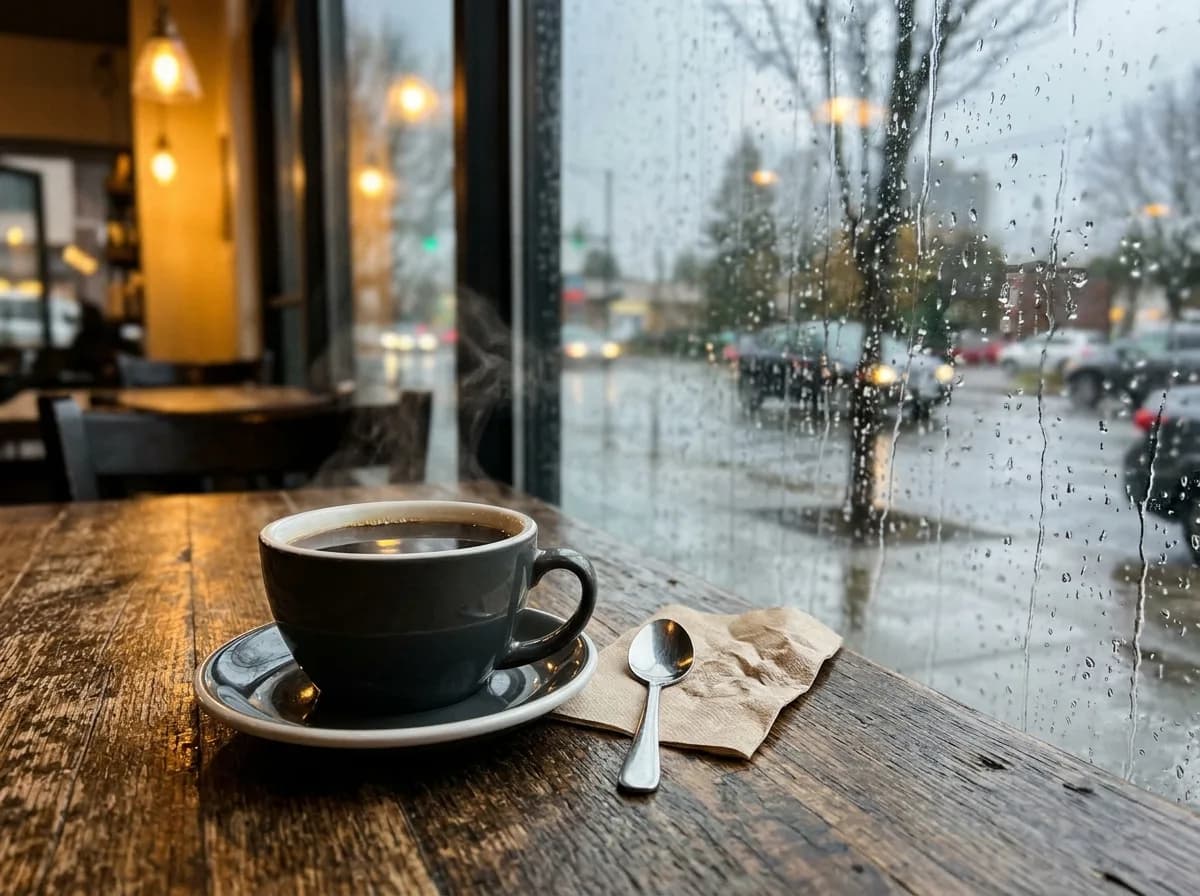
GPT Image 2.6 GIF Photo to Cinemagraph GIF
Turn this photo into a cinemagraph-style looping GIF: only small natural things move, such as rising steam, flowing water, falling rain or leaves swaying in the wind. Everything else stays perfectly still, and the last frame flows smoothly back into the first.
Product backgrounds and scenes
Say the product stays unchanged, then name one surface, a couple of props and where the light comes from. GPT Image 2.6 printed real brand names in two of these scenes: book titles in the living room and a logo on the headset at the gaming desk, both blurred here. Check props for real names before you publish.
Before 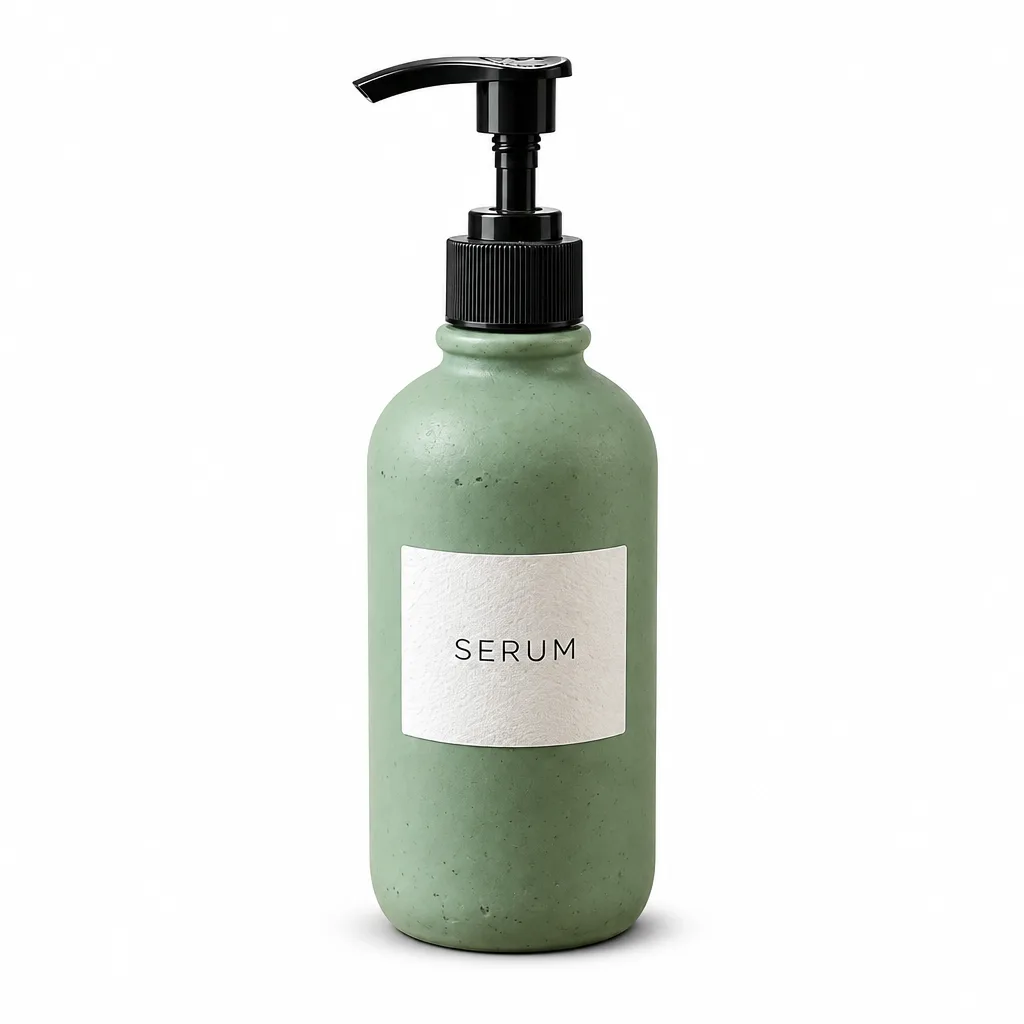
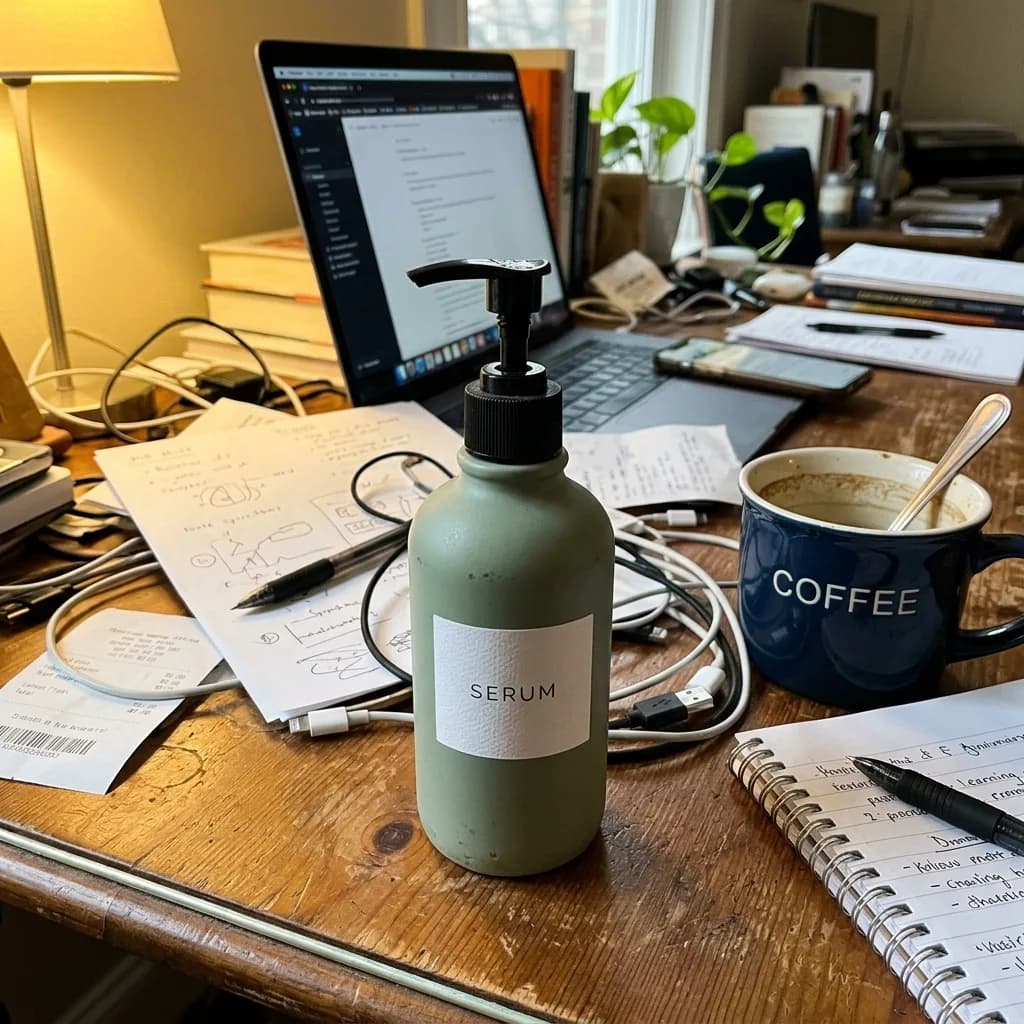
GPT Image 2.6 Pure White Marketplace Packshot
Keep the product exactly as it is, including its shape, label, colors and proportions. Replace the background with pure white (#FFFFFF) and center the product. Light it with soft, even studio light from both sides and add a subtle natural contact shadow under its base. Crisp edges, no color spill, clean e-commerce packshot.
Before 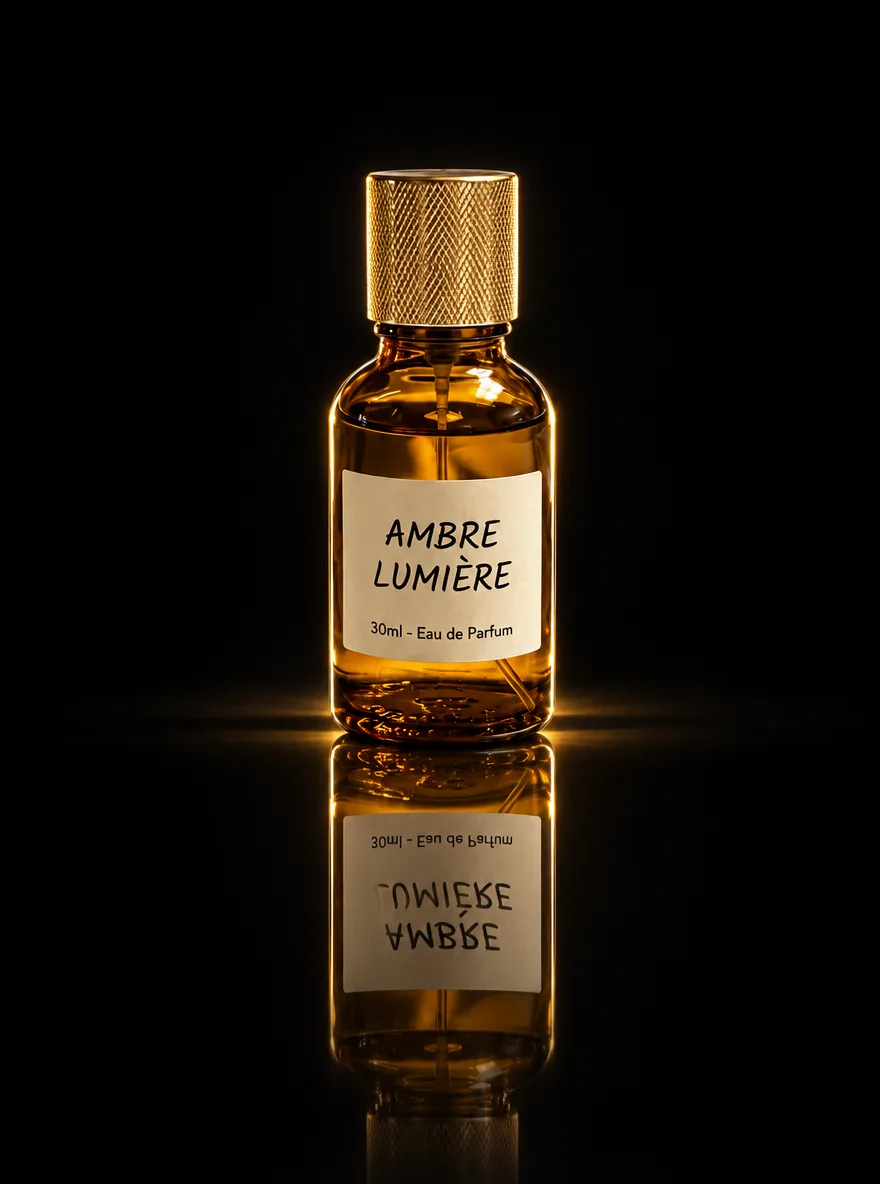
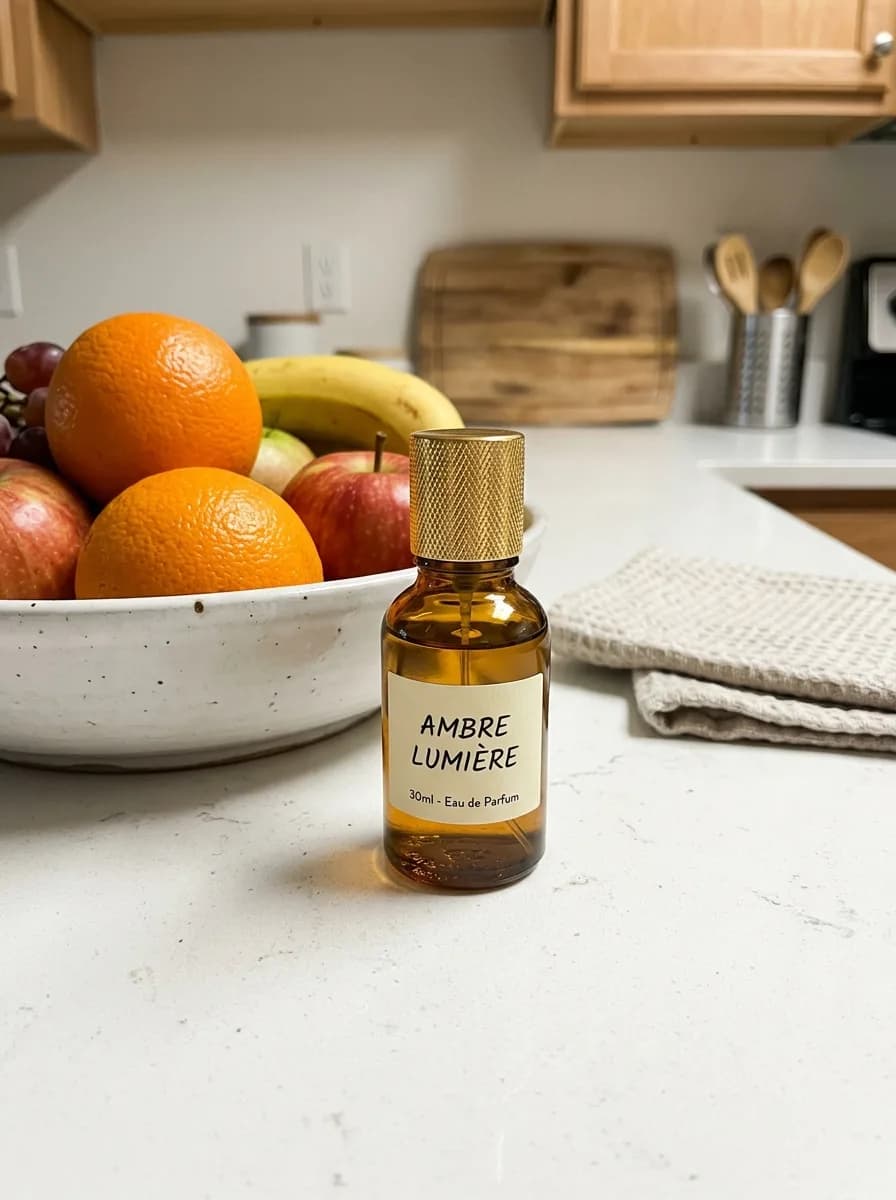
GPT Image 2.6 Black Acrylic Mirror Reflection
Keep the product unchanged. Place it on glossy black acrylic with a crisp mirror reflection that fades downward. Use a dark, seamless background and a dramatic rim light along both edges of the product. Deep contrast, luxury brand look, ultra-sharp detail.
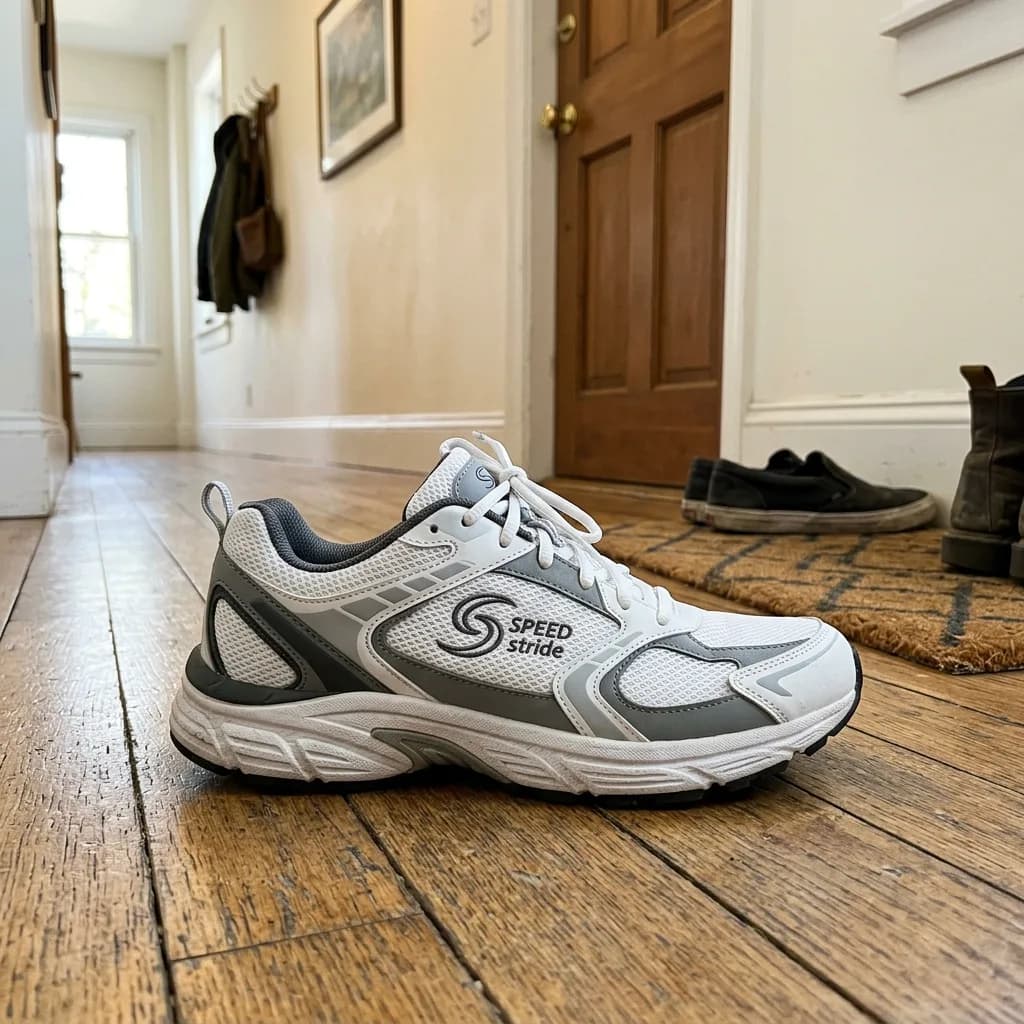
Before 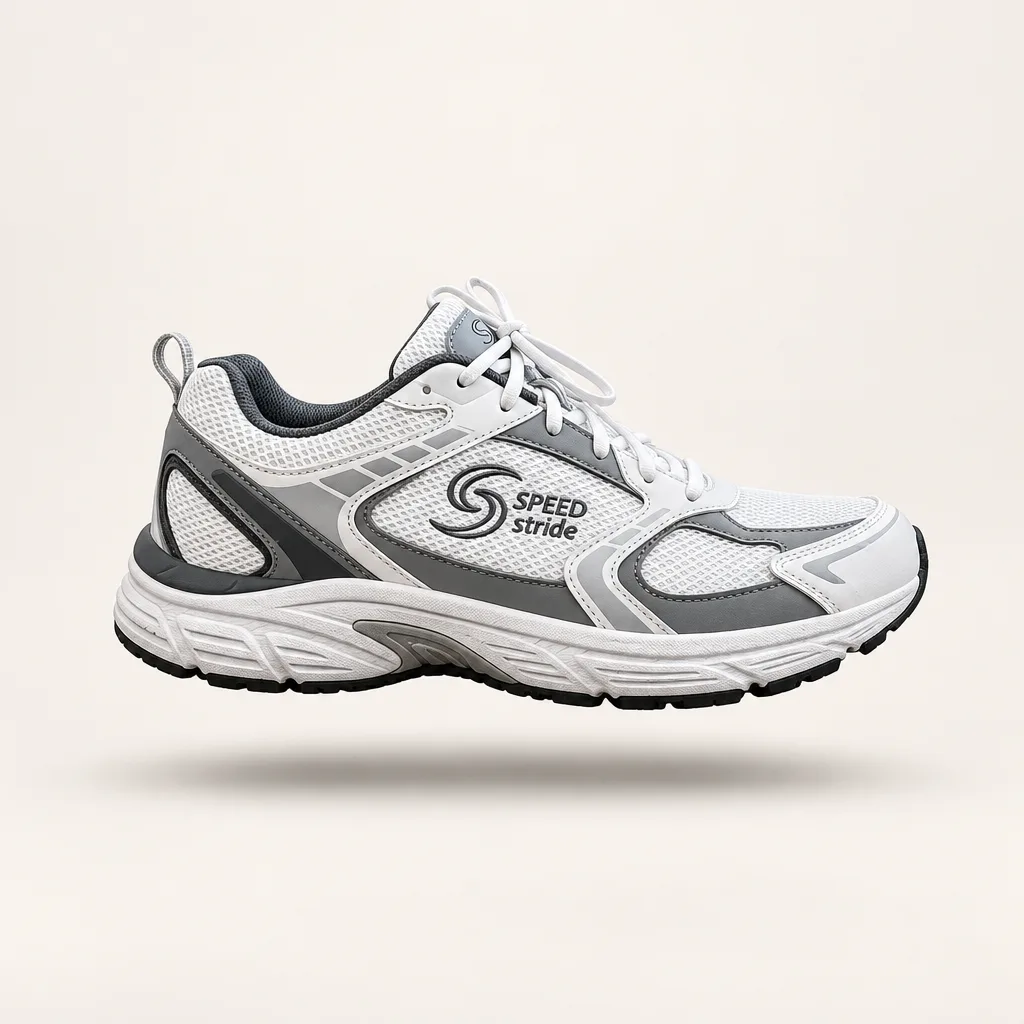
GPT Image 2.6 Floating Hero Shot
Keep the product unchanged. Make it float about 2 cm above a seamless off-white studio backdrop, with a soft, diffused shadow on the floor directly beneath it. Soft overhead lighting, clean and minimal catalog style.
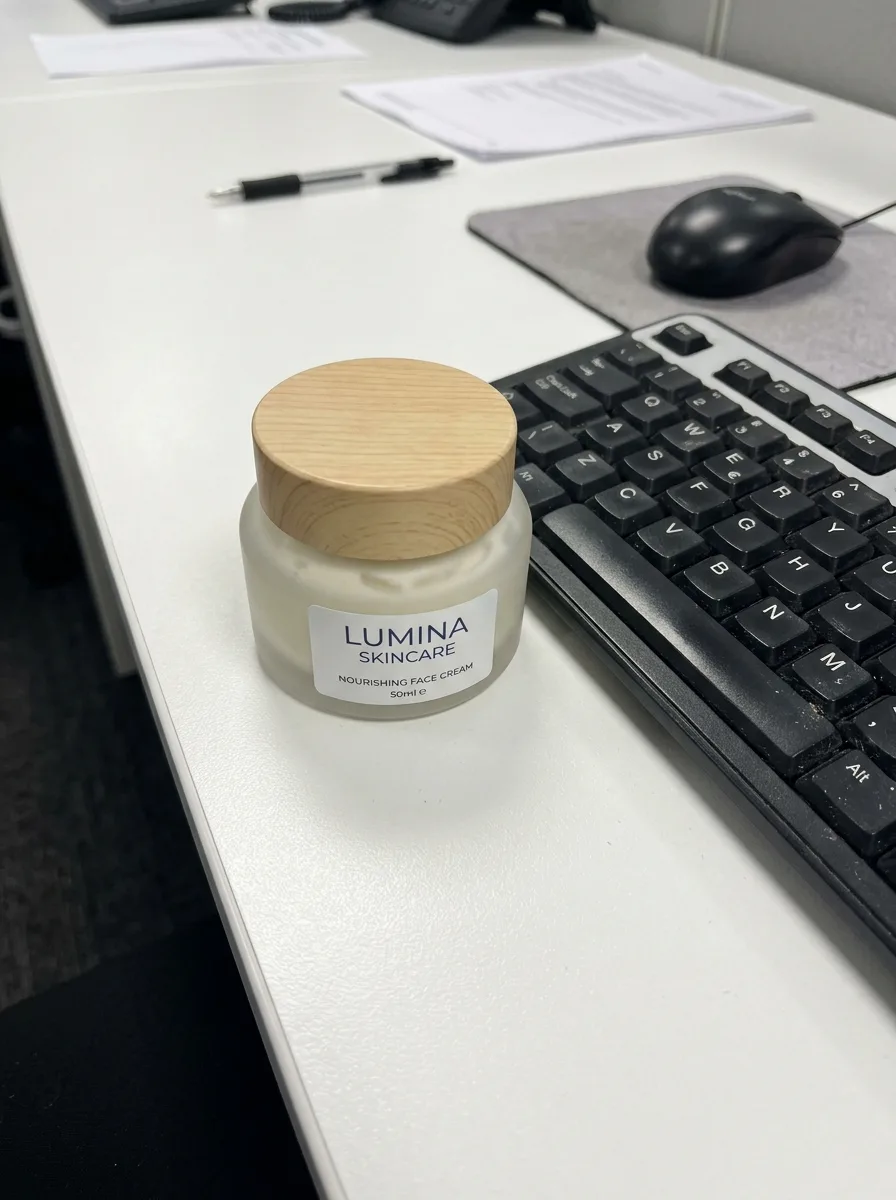
Before 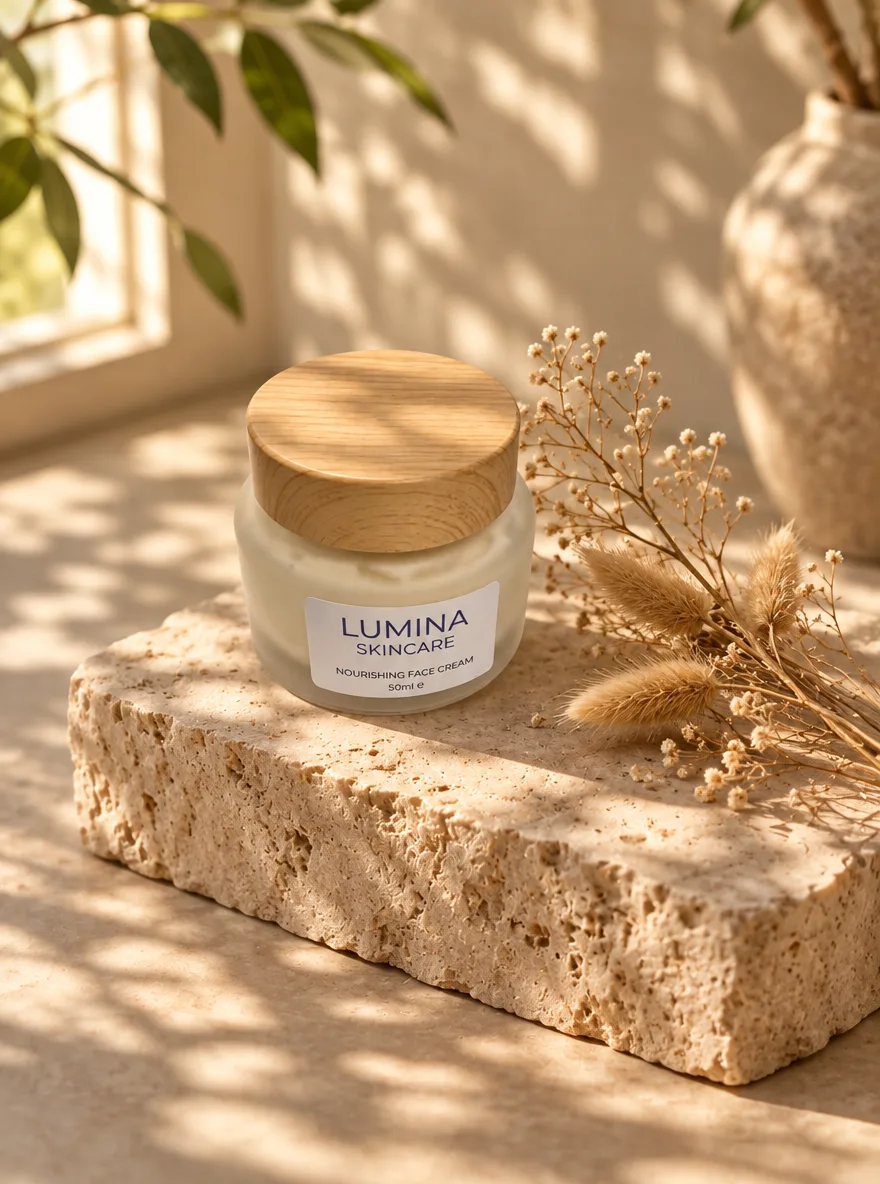
GPT Image 2.6 Travertine Block in Morning Light
Keep the product exactly as it is, including its shape, label and colors. Place it on a raw-cut beige travertine block with a few dried botanical stems beside it. Soft morning window light casts dappled leaf shadows across the scene. Warm, organic mood, shallow depth of field, editorial lifestyle photo.
Before 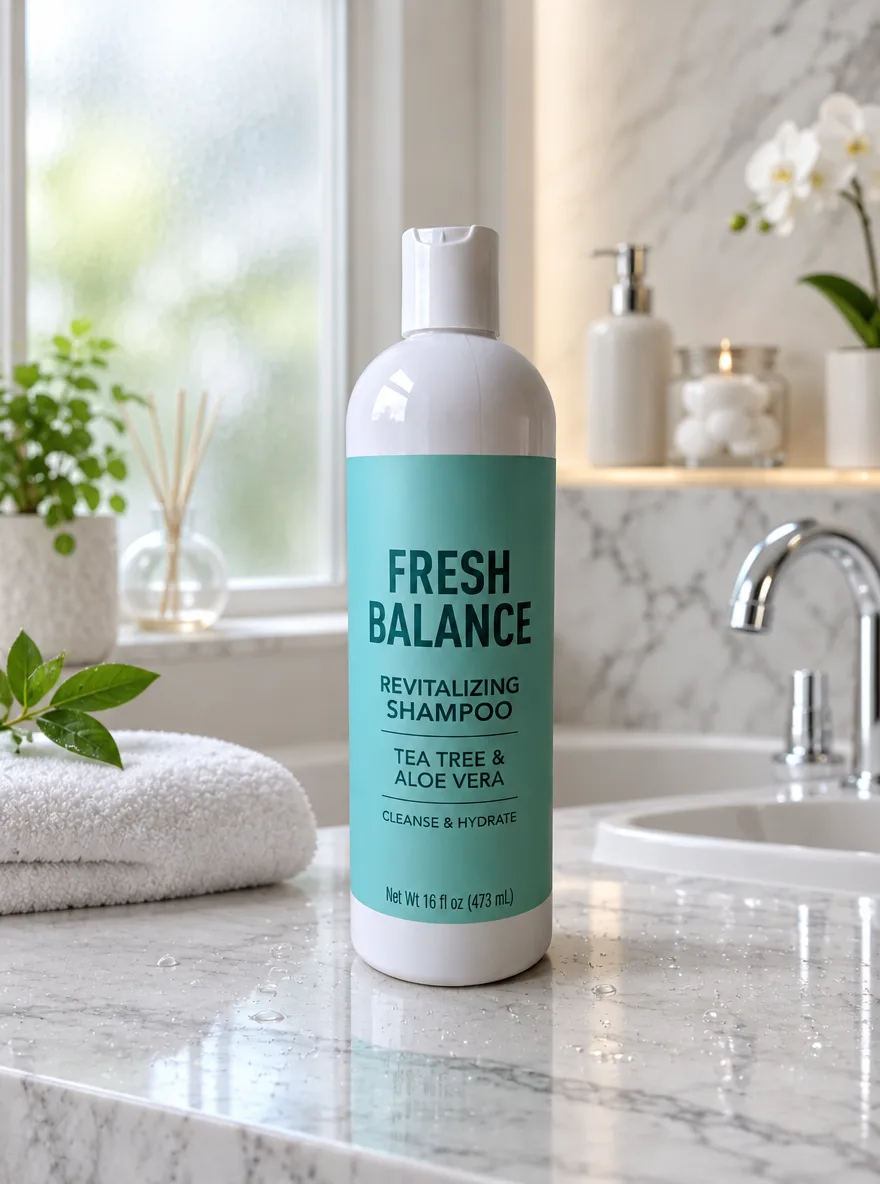
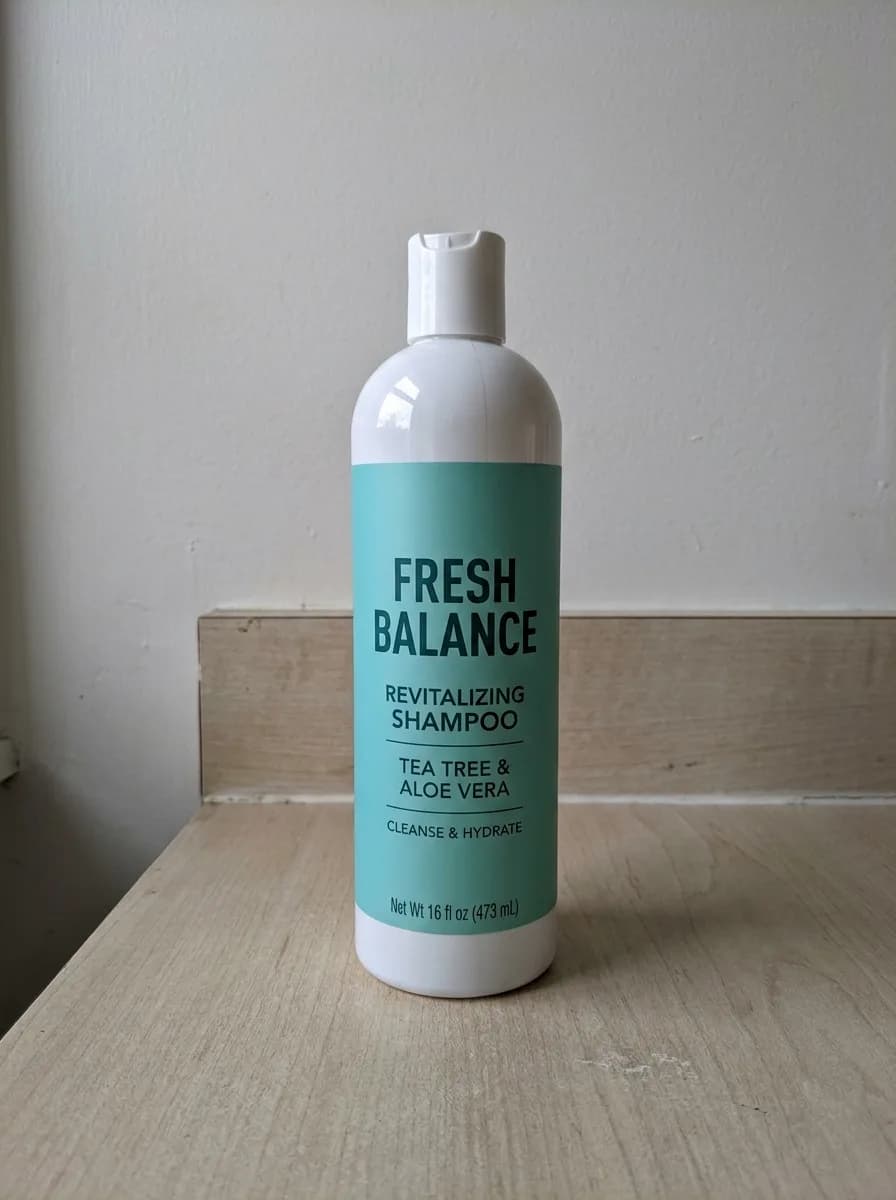
GPT Image 2.6 Marble Vanity with Water Droplets
Keep the product unchanged. Place it on a polished white Carrara marble bathroom vanity with fine water droplets on the surface. Soft light through a frosted window, a blurred luxury spa bathroom in the background. Fresh, clean skincare advertising look with crisp focus on the product.
Before 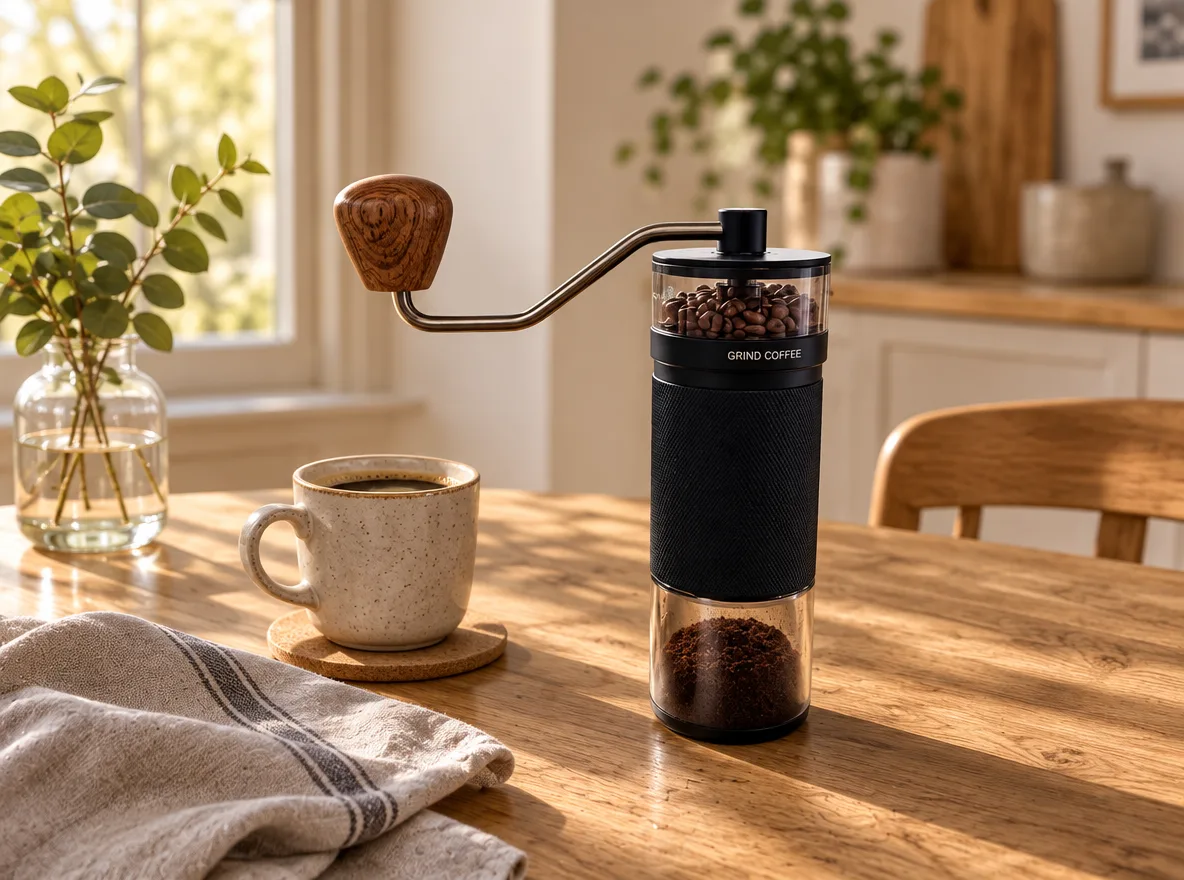
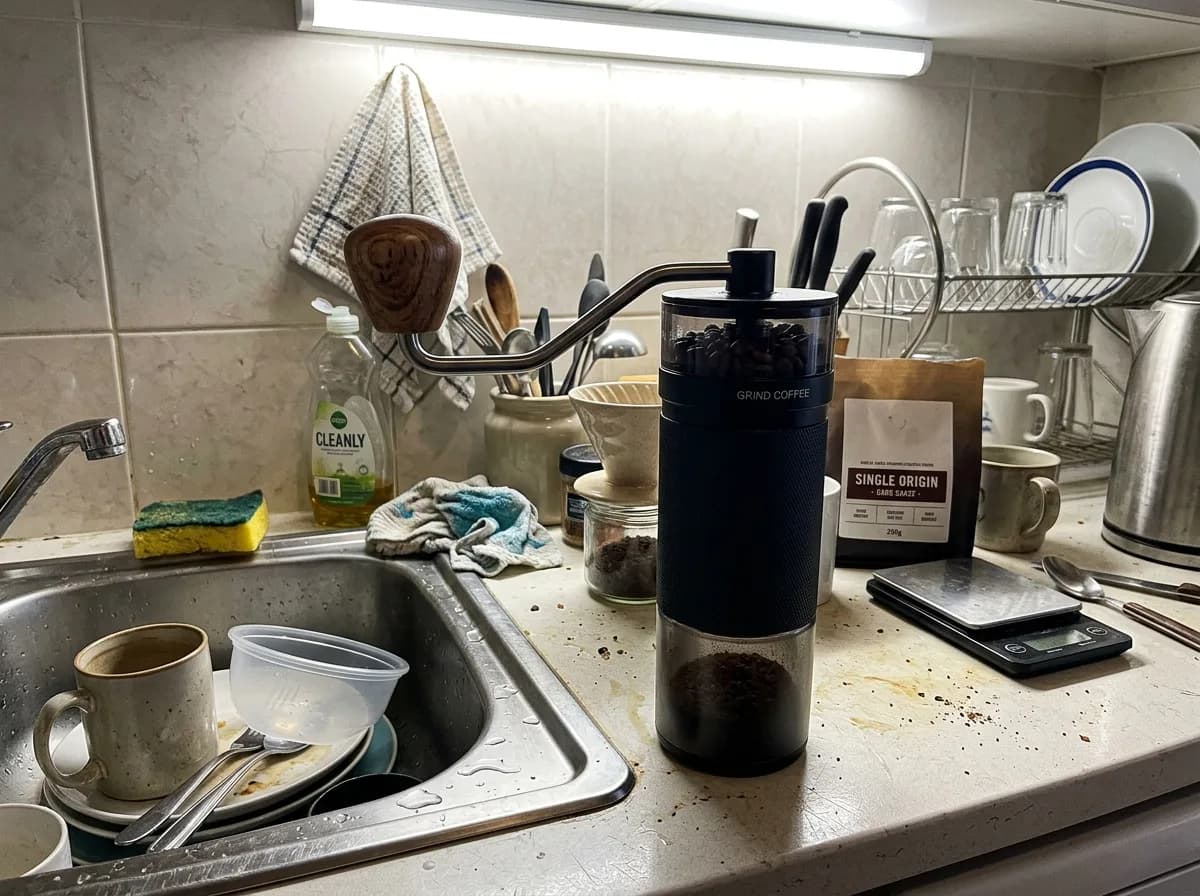
GPT Image 2.6 Oak Table with Kitchen Props
Keep the product unchanged. Place it on a natural oak tabletop with visible wood grain, with a ceramic cup and a linen napkin nearby. Warm daylight from a side window, authentic Scandinavian home atmosphere, f/4 depth of field, product in sharp focus.
Before 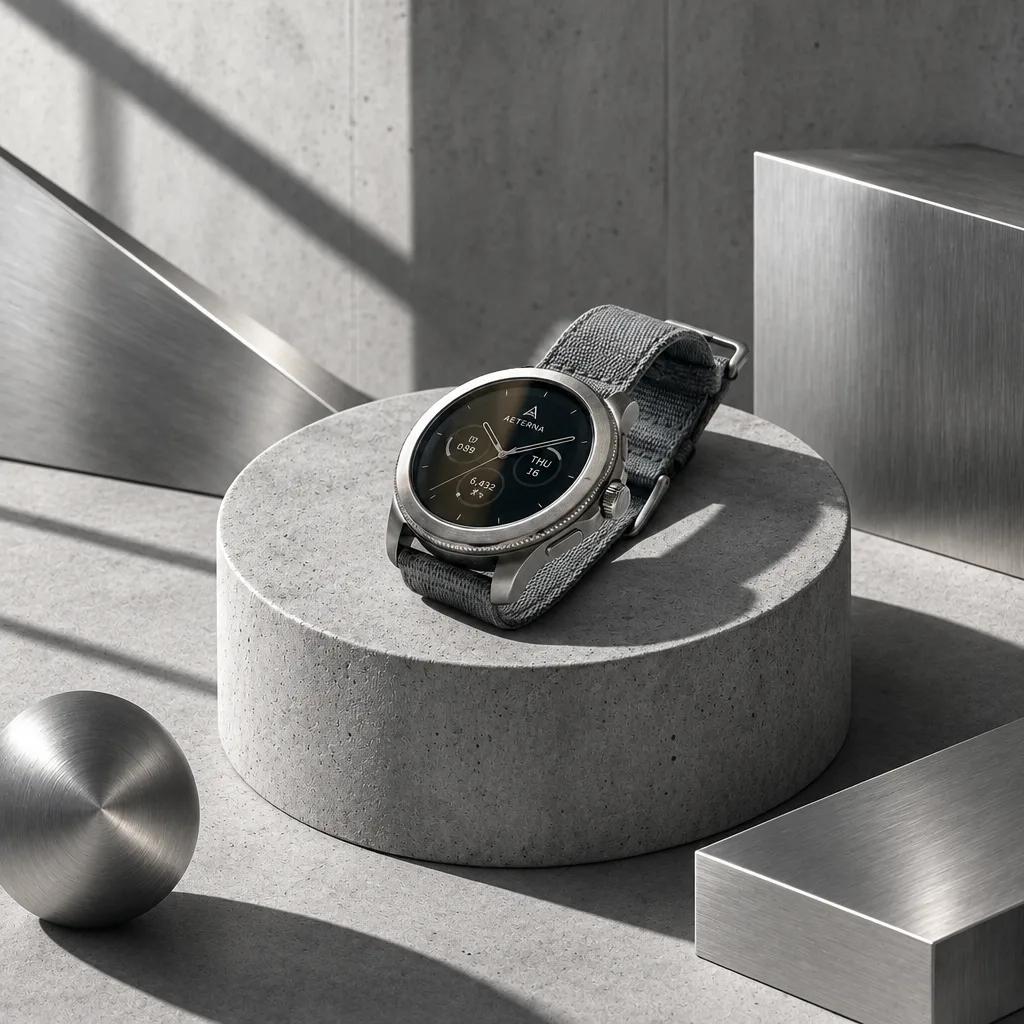
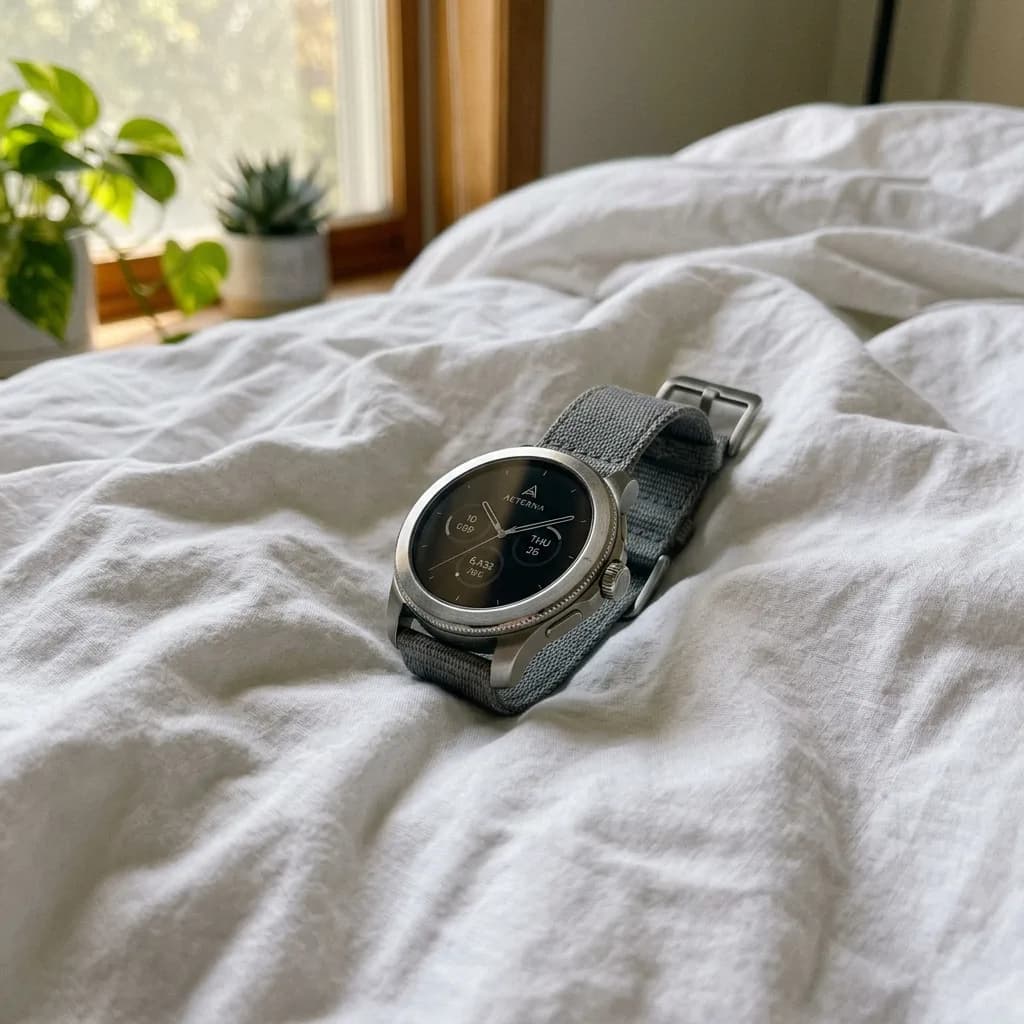
GPT Image 2.6 Concrete Podium, Tech Style
Keep the product unchanged. Place it on a minimalist raw gray concrete cylinder podium with a few brushed-metal geometric shapes around it. Cool architectural light with sharp, angular shadows. Modern industrial look for tech accessories, high detail.
Before 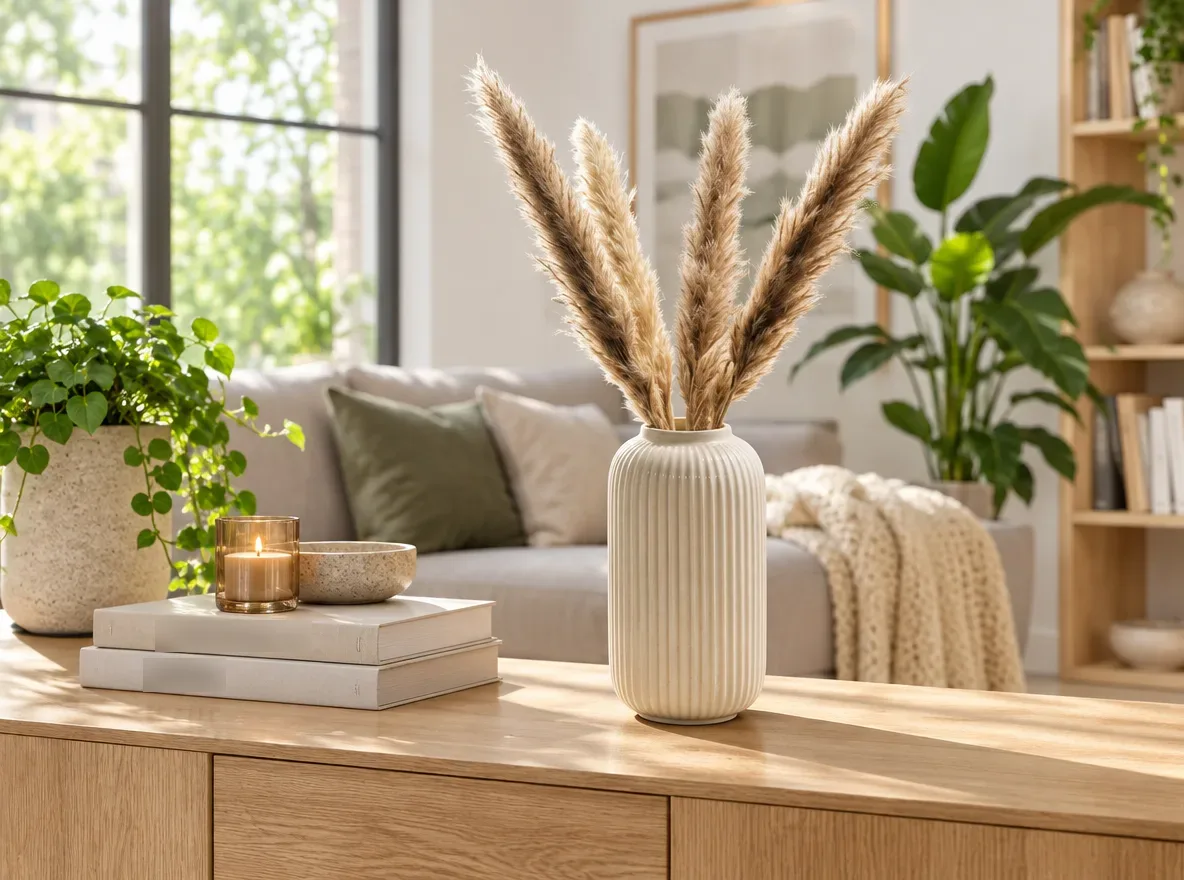
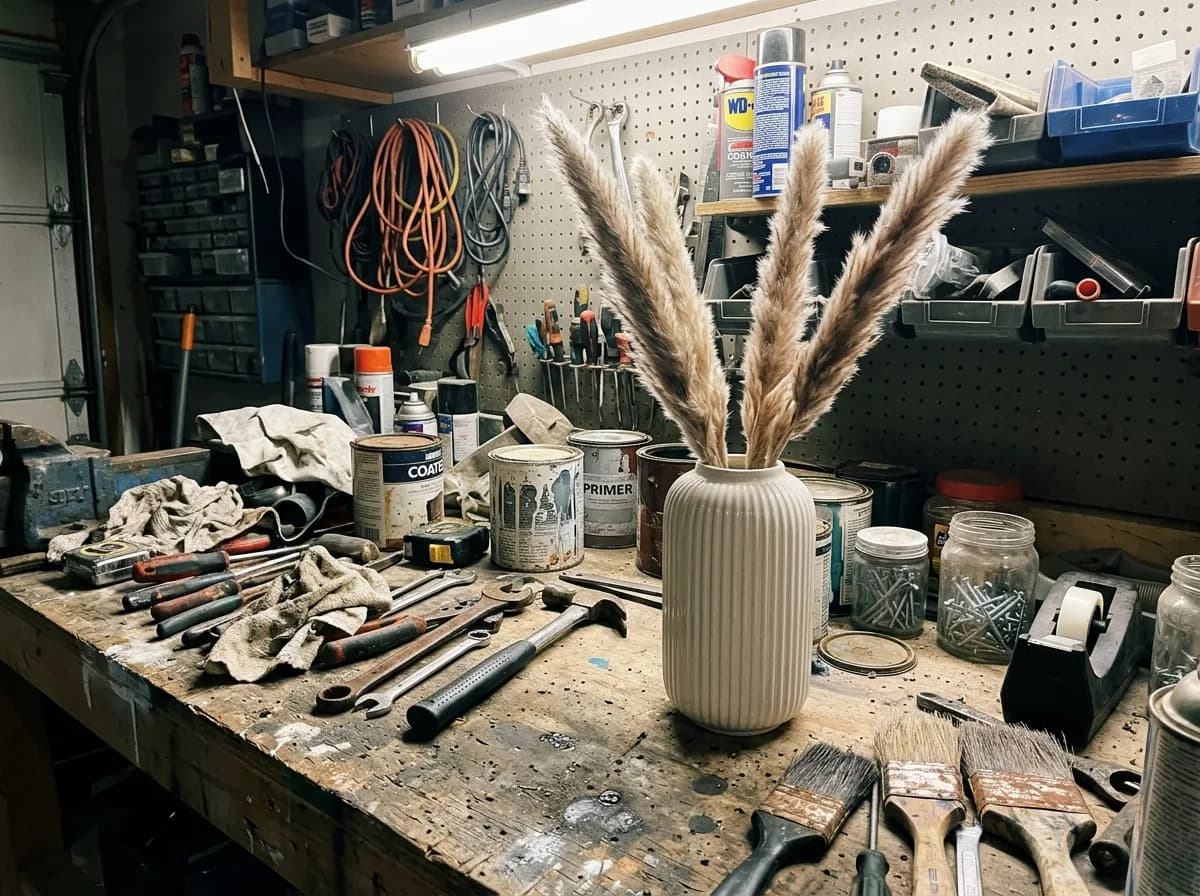
GPT Image 2.6 Bright Modern Living Room
Keep the product exactly as it is, including its shape, finish and colors. Place it on a light oak sideboard in a bright, modern living room, with a sofa and green plants softly blurred behind it. Natural daylight from a large window, shadows that match the light, photorealistic interior catalog photo.
Before 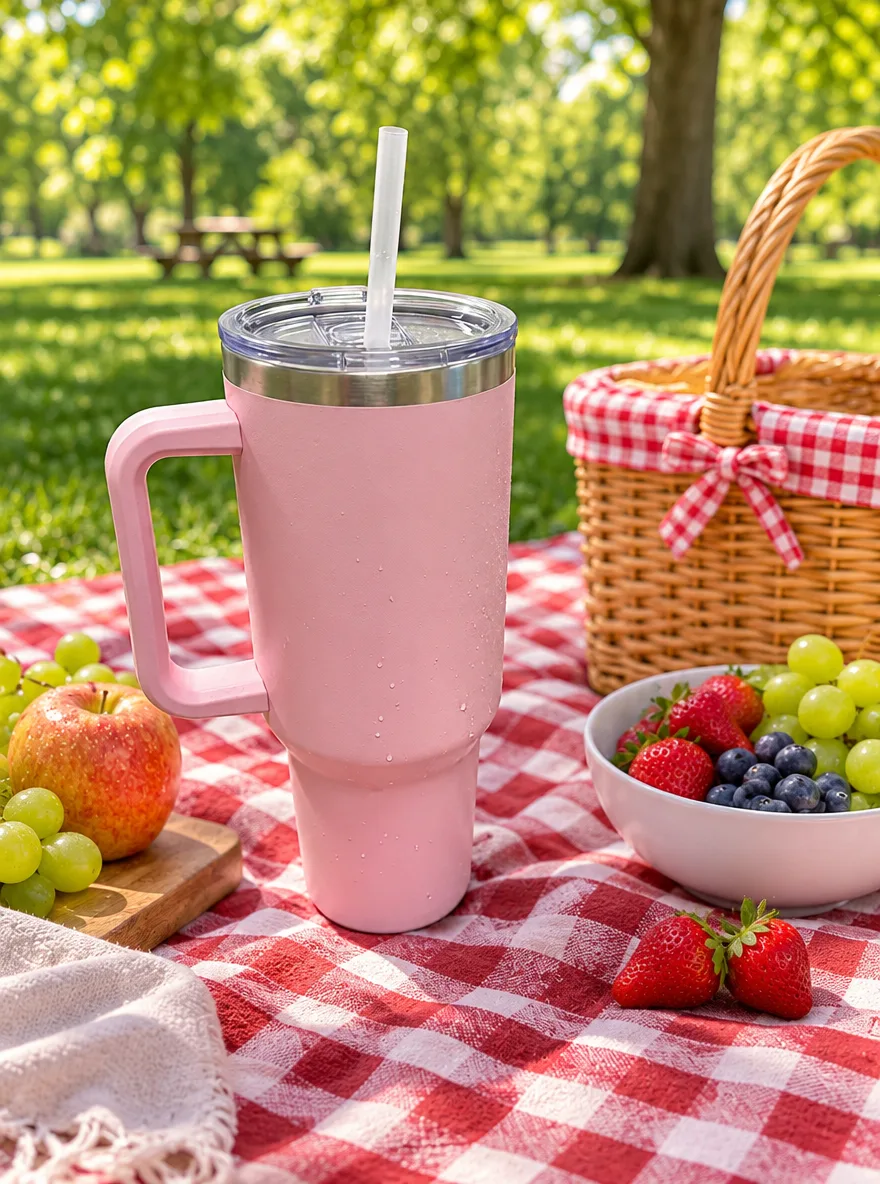
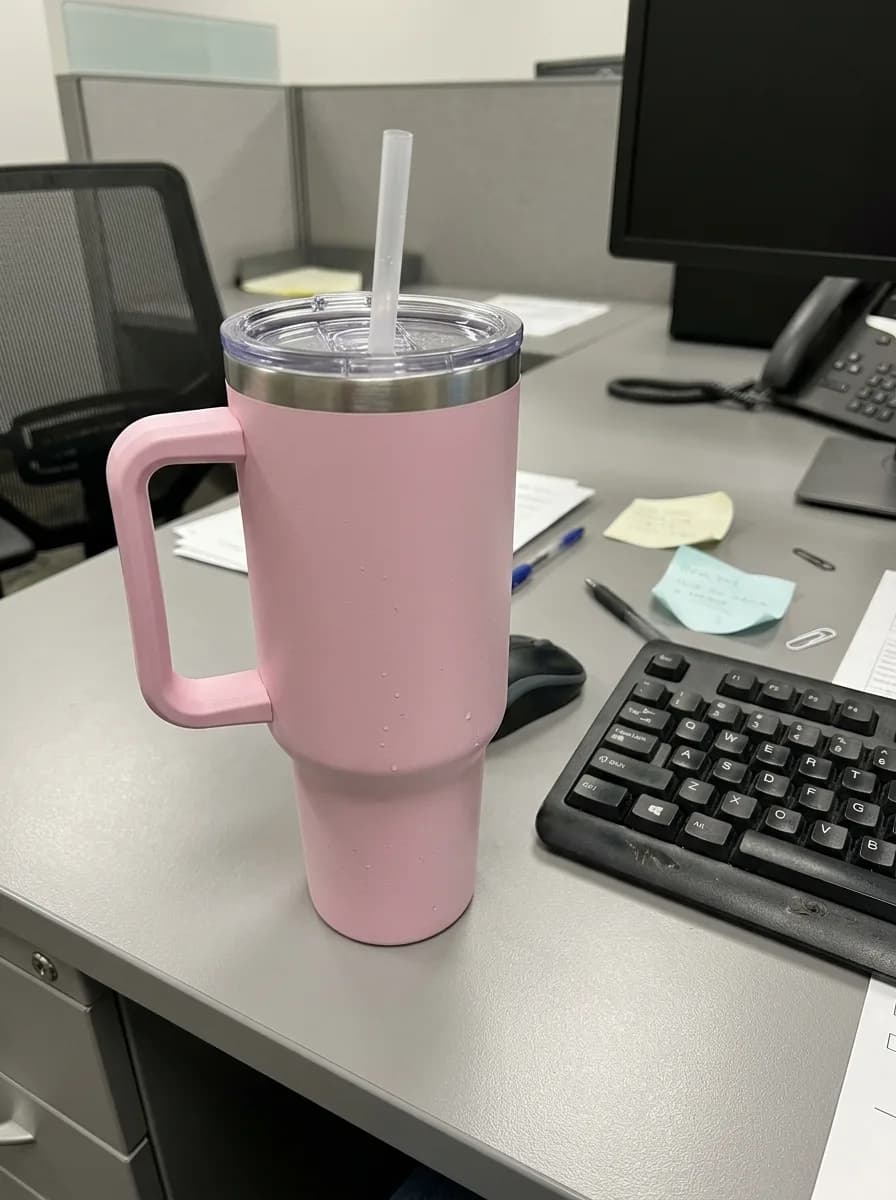
GPT Image 2.6 Sunny Picnic Blanket
Keep the product unchanged. Place it on a red and white checkered picnic blanket in a sunny park, with a wicker basket and fresh fruit nearby and trees softly blurred in the background. Bright natural daylight with soft shadows, shallow depth of field, cheerful summer lifestyle photo.
Before 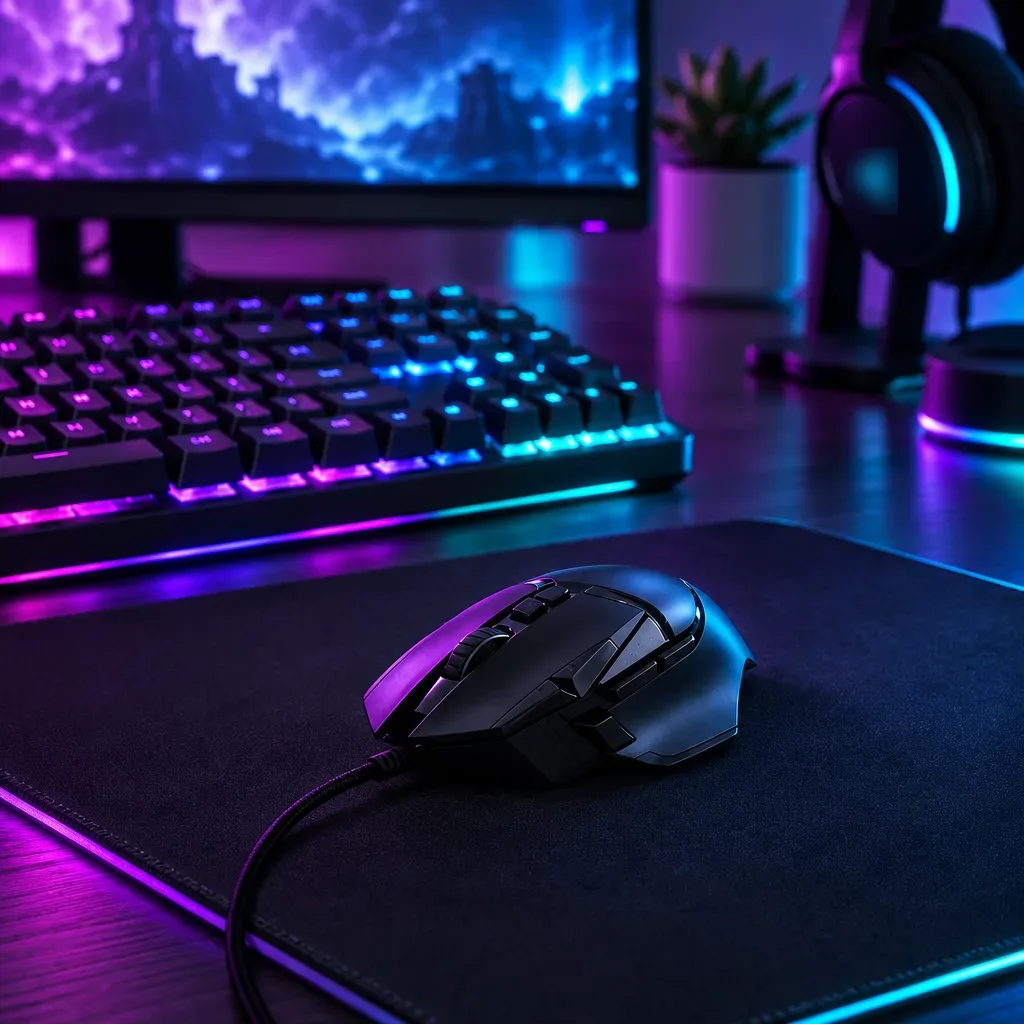
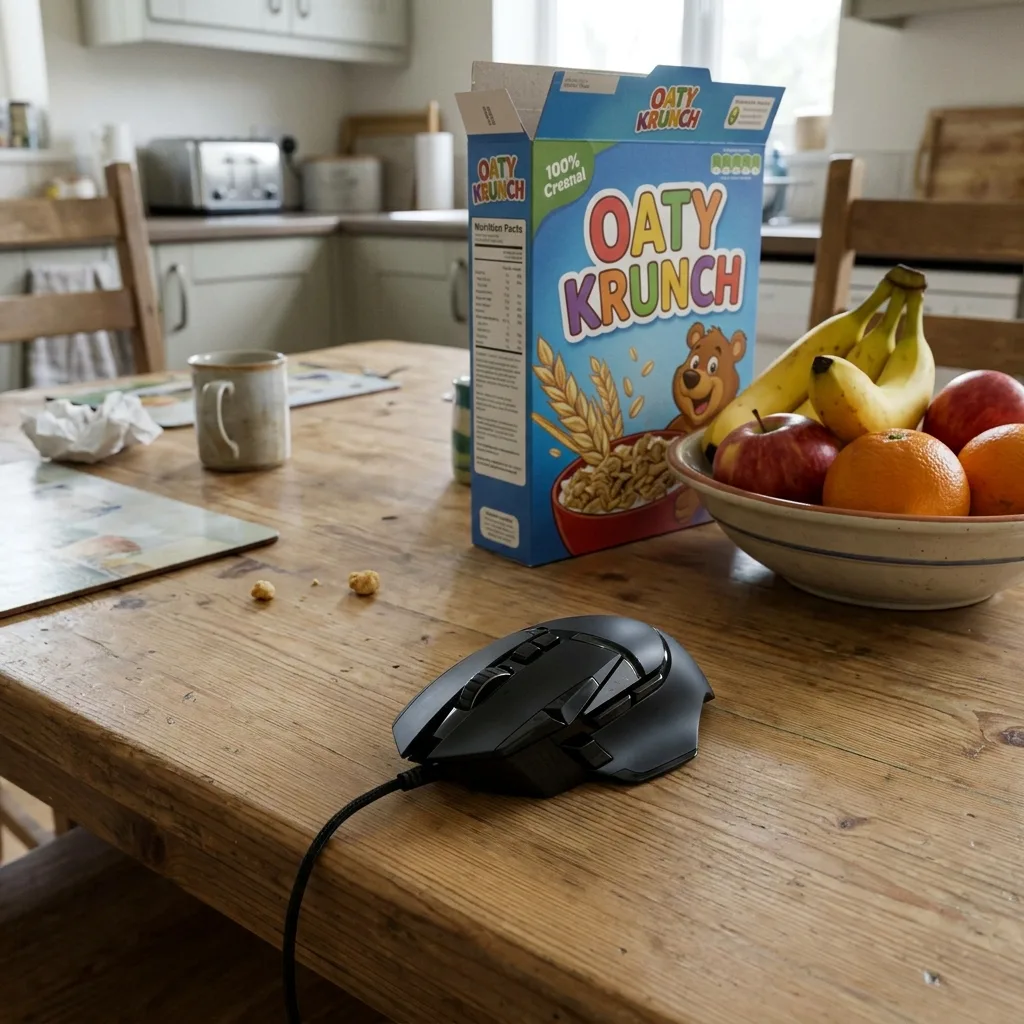
GPT Image 2.6 Neon Gaming Desk
Keep the product unchanged, including its shape, buttons and logo. Place it on a dark desk mat in a gaming setup, with a mechanical keyboard and the glow of a monitor softly blurred behind it. Purple and cyan neon light with subtle RGB reflections along the product's edges. Moody, high-contrast tech product photo.
Angles, colorways and label text
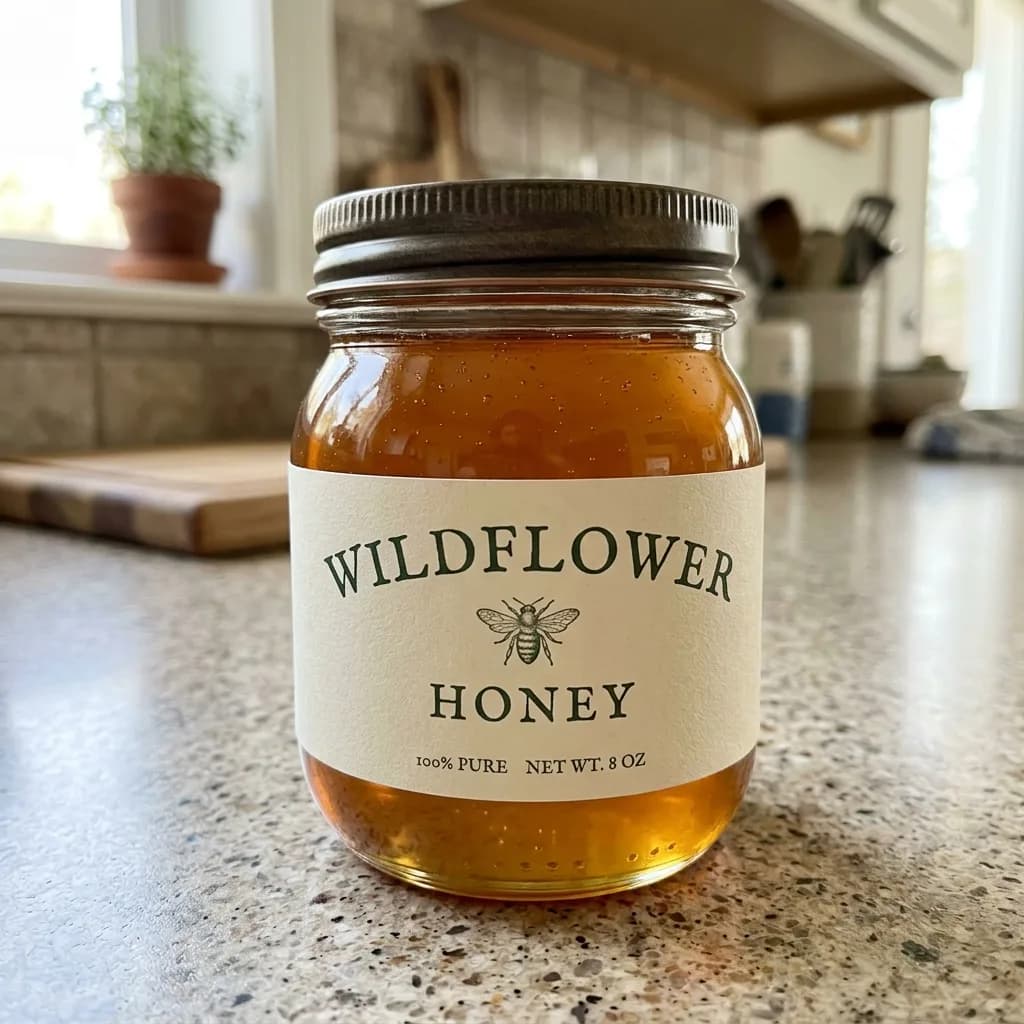
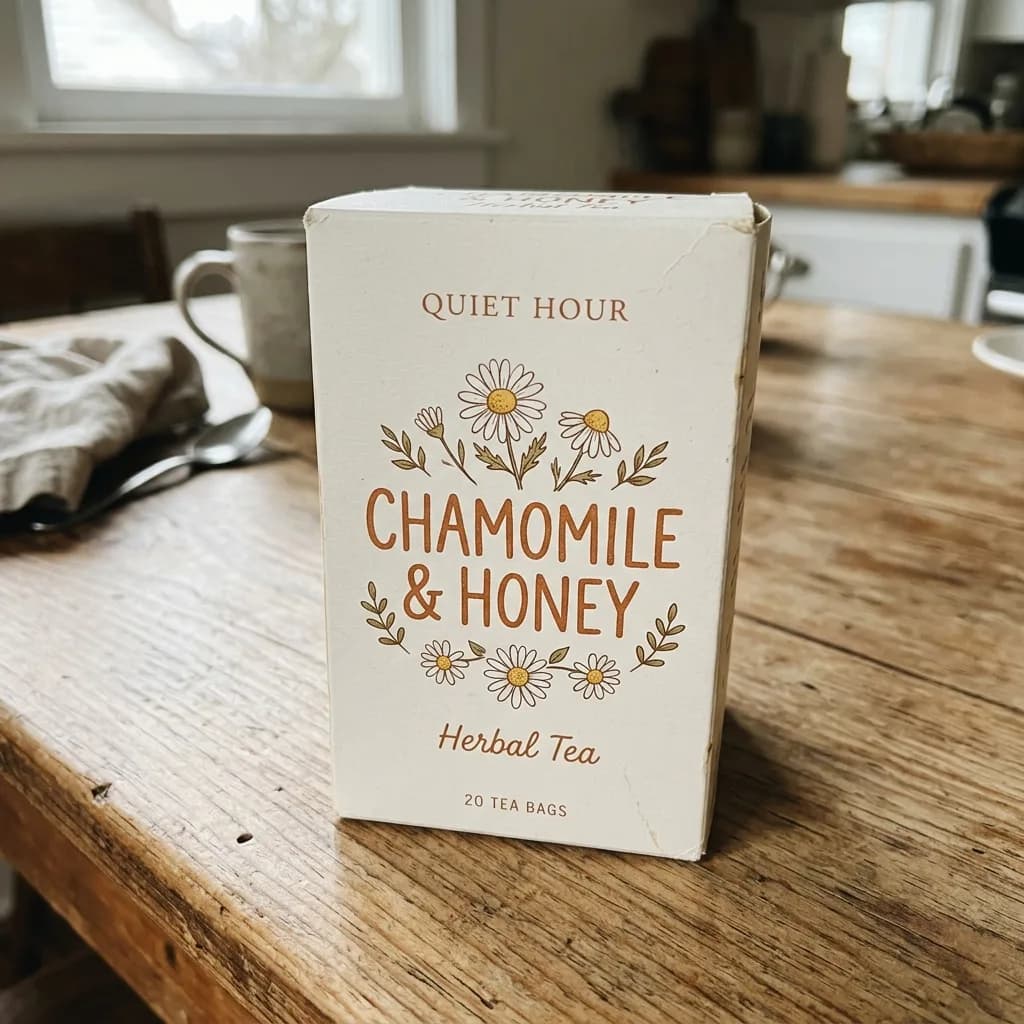
Say what changes and that the shape, label and colors stay. In the flat lay, GPT Image 2.6 laid out the TV remote that sat next to the wallet in the source photo, so name the product and say to leave everything else out. In the text edits, the jar label came back as LAVENDER and the tea box in Spanish, spelled as asked.
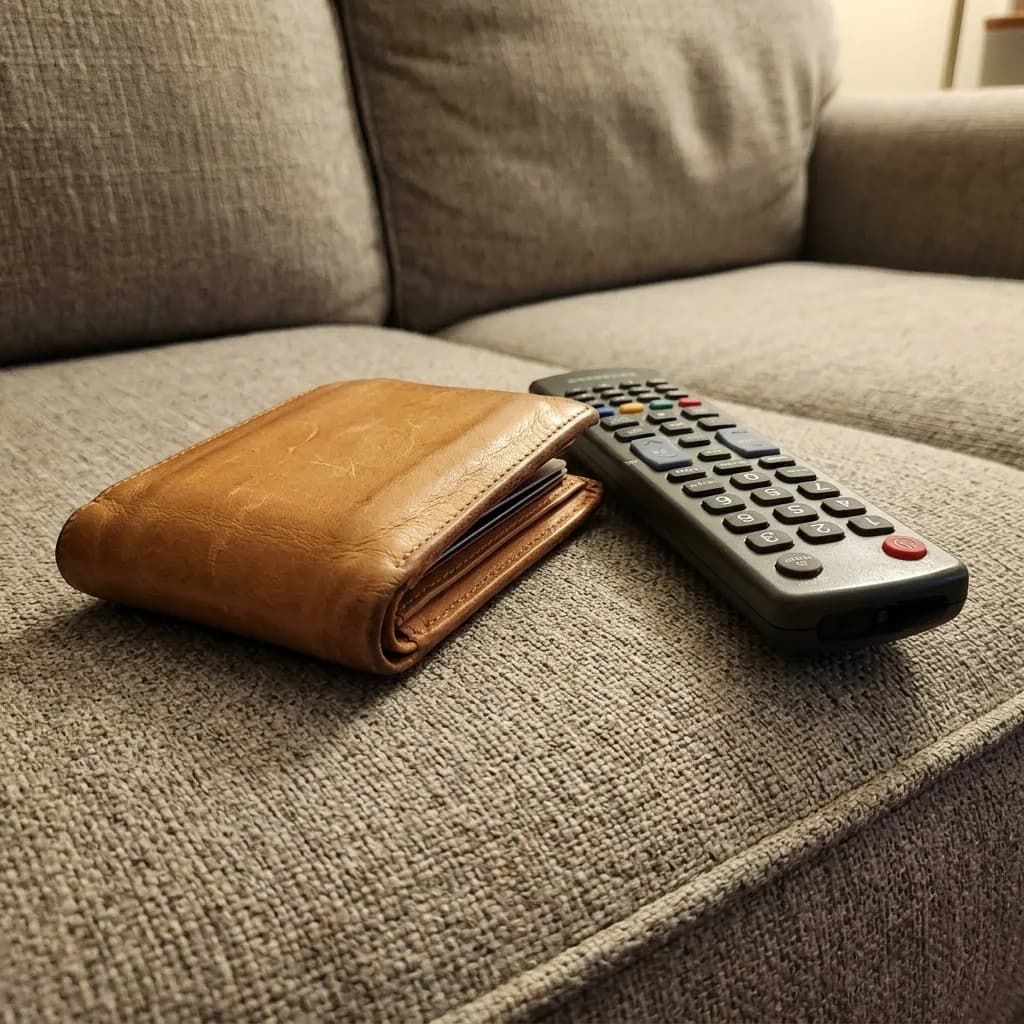
Before 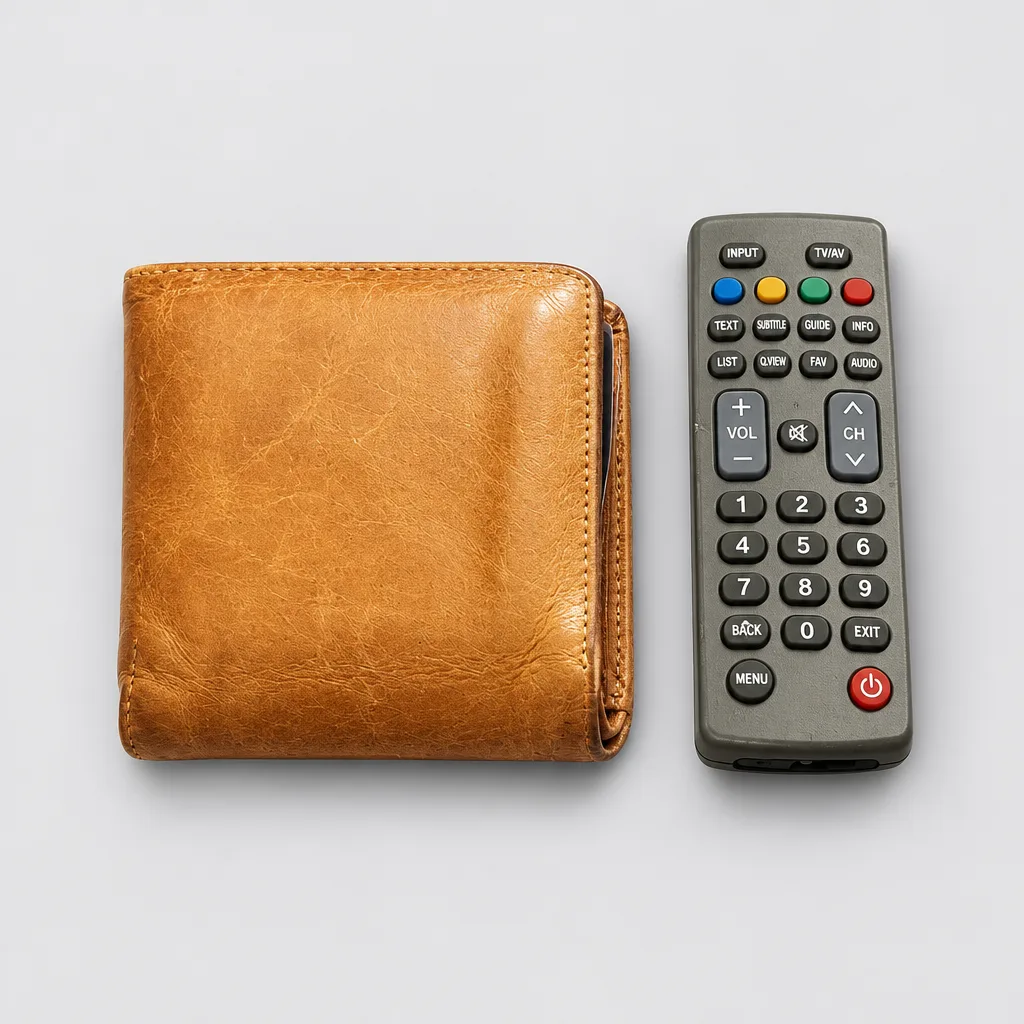
GPT Image 2.6 Overhead Flat Lay on Light Gray
Keep the product exactly as it is, including its shape, stitching, colors and any logo. Show it as an overhead flat lay, photographed straight down and centered on a light gray seamless background. Soft, even lighting with only a faint shadow. Clean, minimal marketplace listing photo.
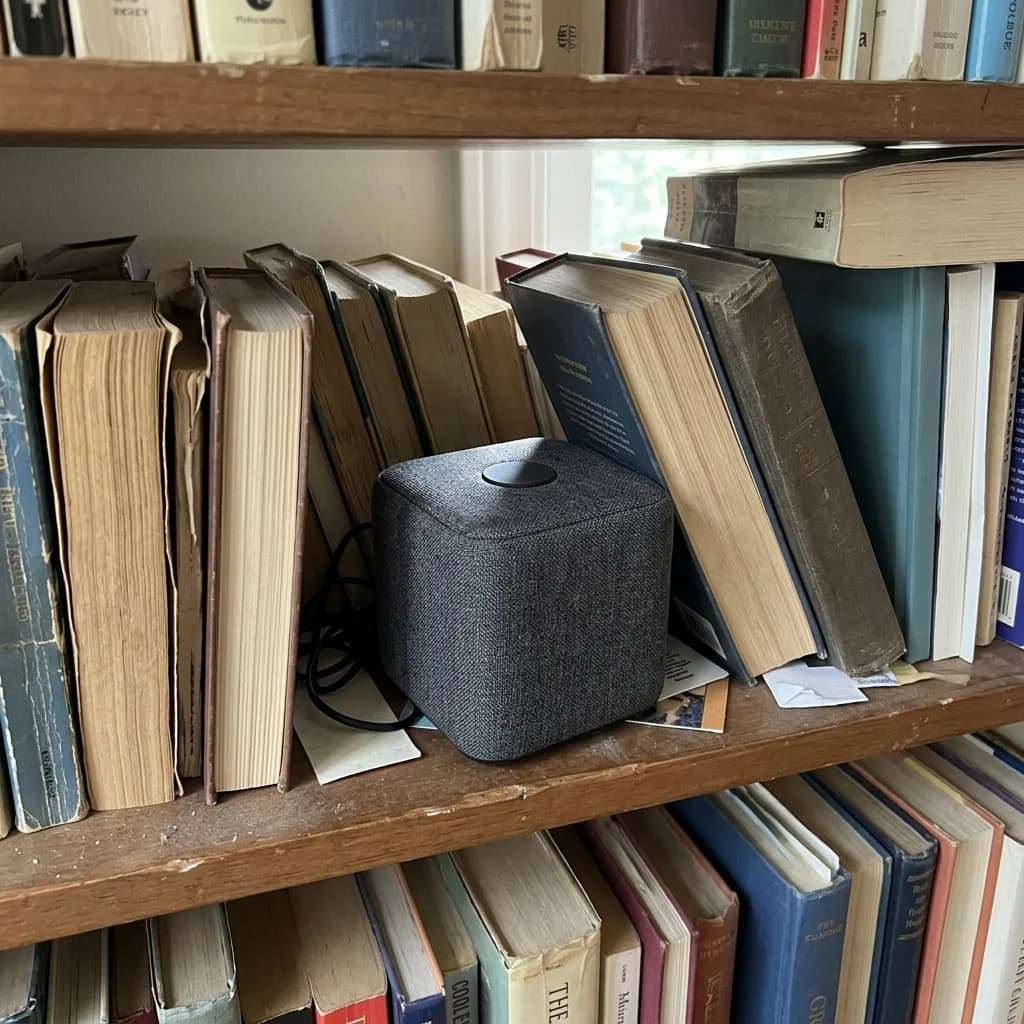
Before 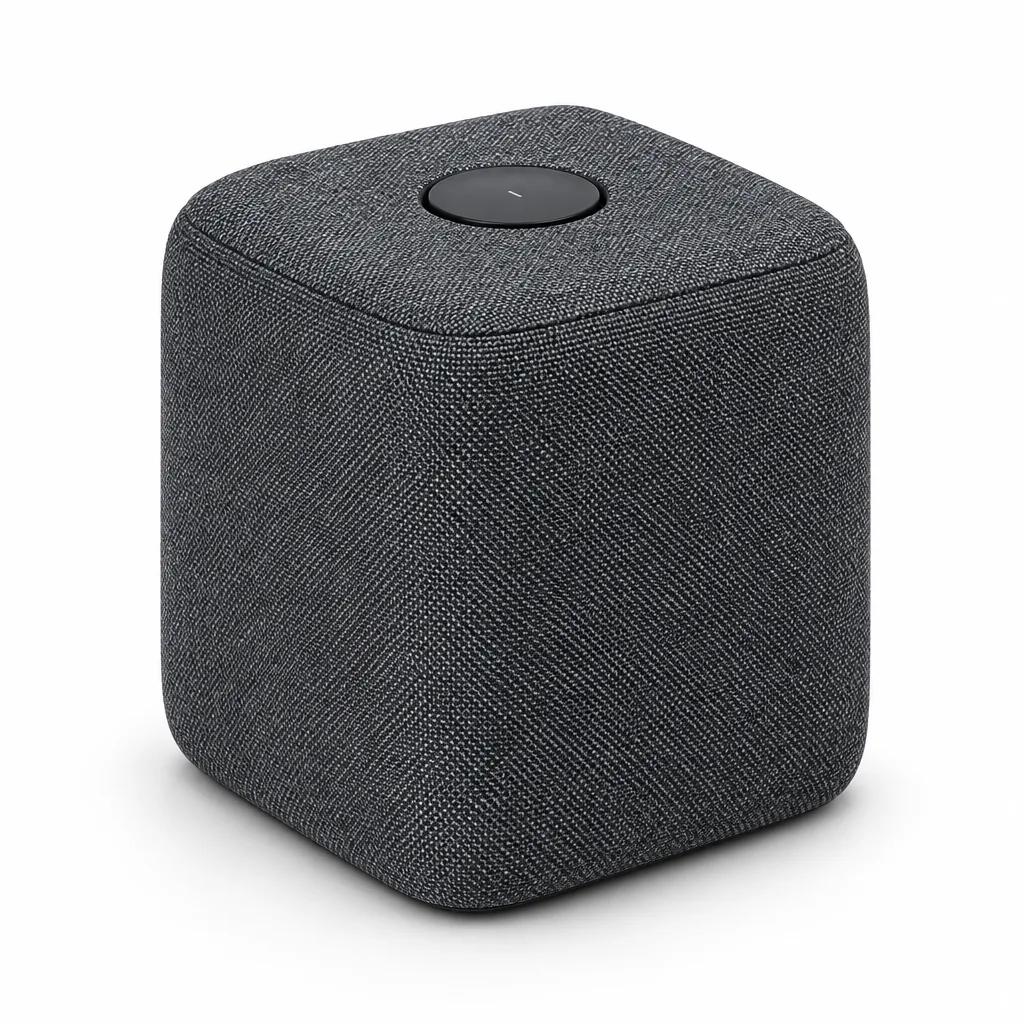
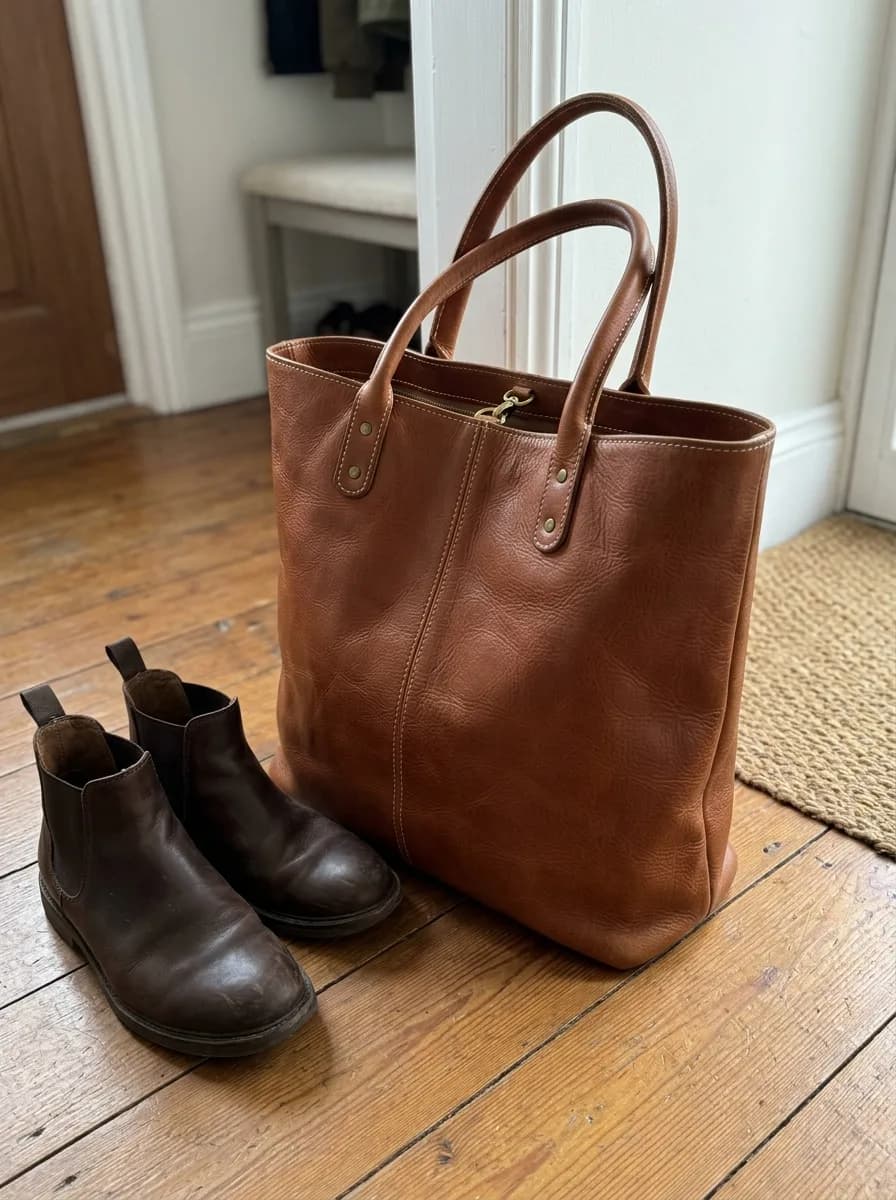
GPT Image 2.6 Three-Quarter Catalog Angle
Keep the product's design, colors, materials and logo exactly as they are. Show it at a three-quarter angle, turned about 45 degrees to the left, on a pure white background with a soft contact shadow. Even studio lighting, consistent e-commerce catalog style.
Before 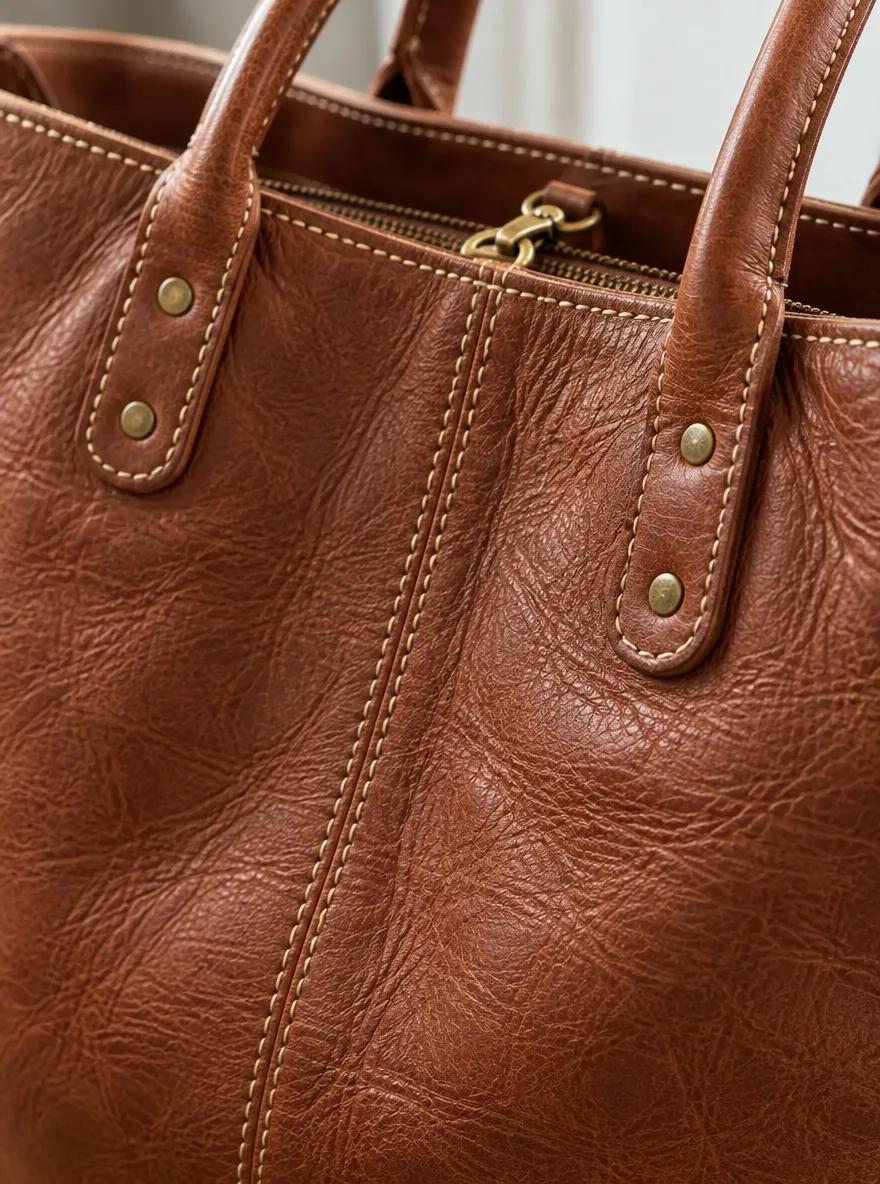
GPT Image 2.6 Material Close-Up for Detail Images
Turn this into a close-up detail shot of the product's material and craftsmanship. Fill the frame with its surface texture, stitching and hardware, using a shallow depth of field and soft side light that brings out the texture. Keep the colors, materials and hardware finish exactly as in the original photo.
Before 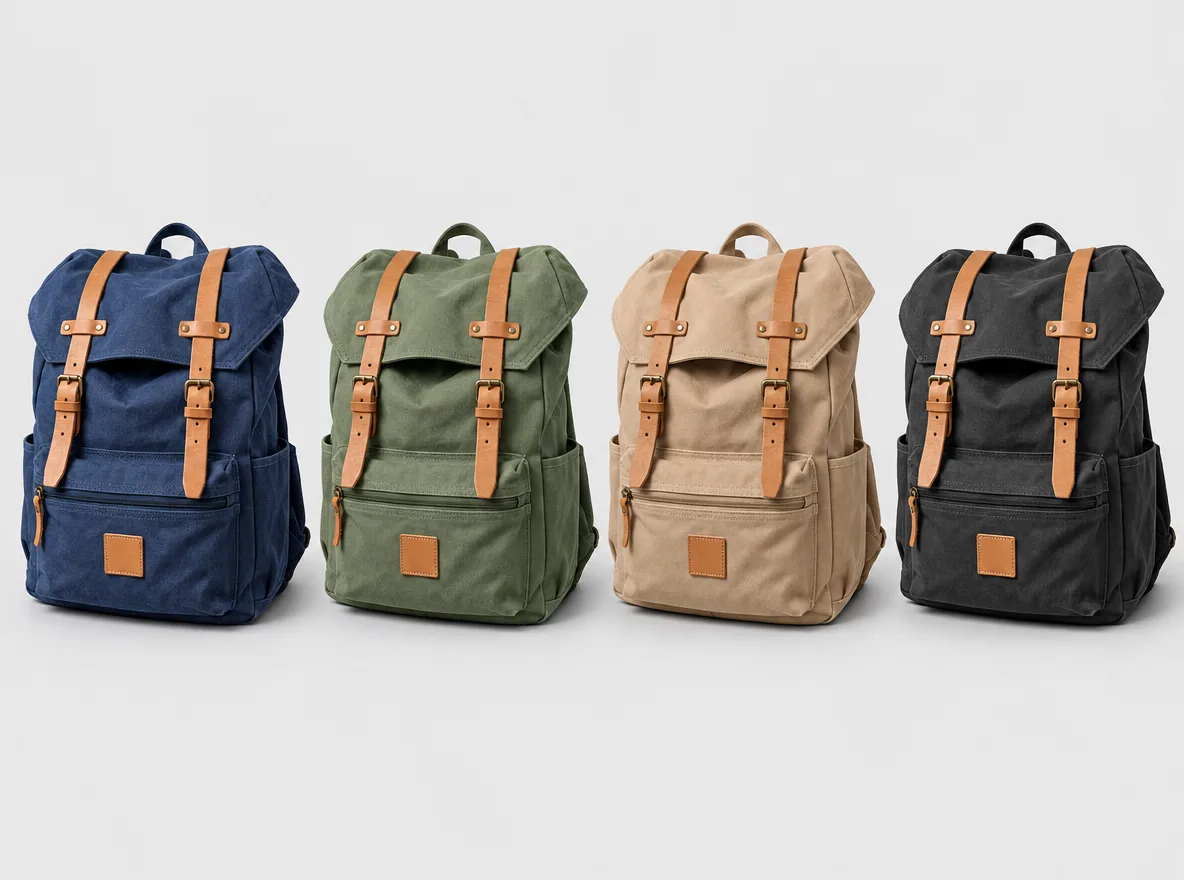
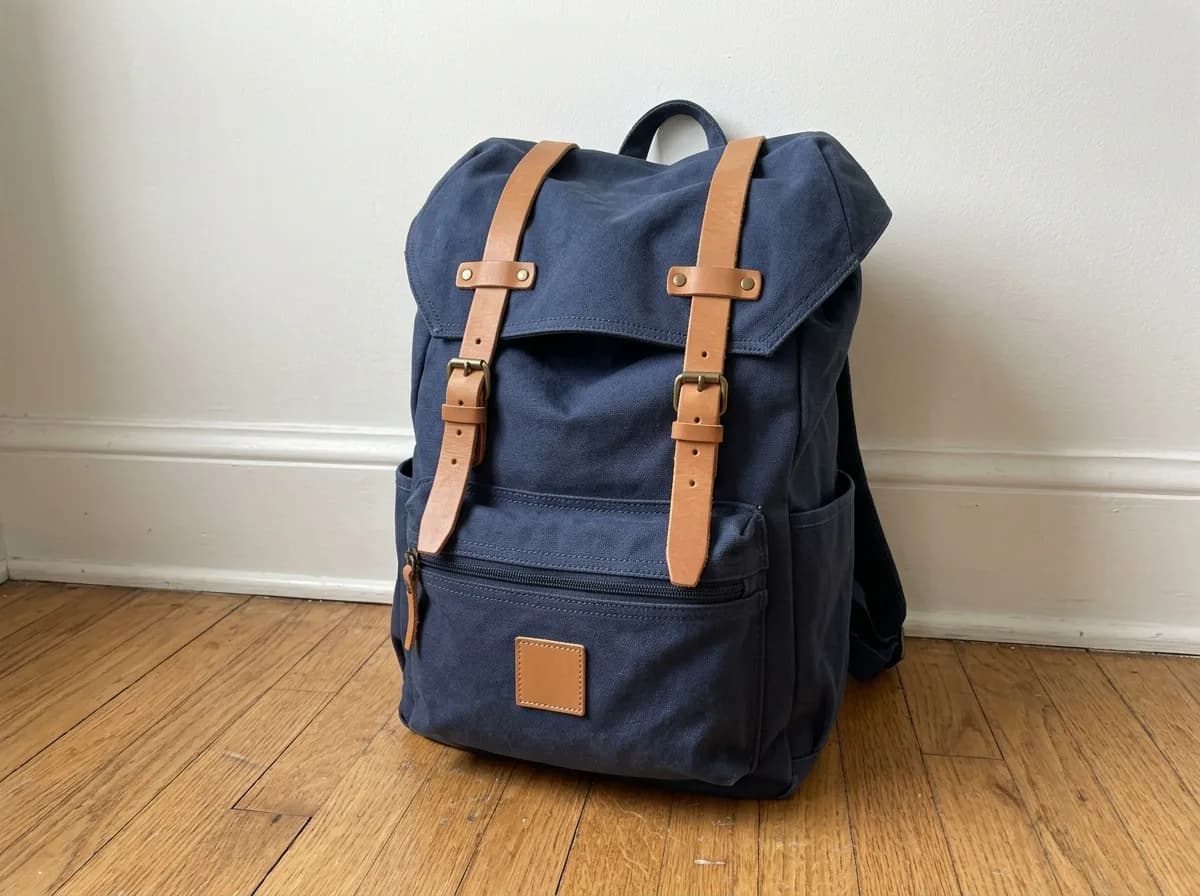
GPT Image 2.6 Preview Colorways Side by Side
Show this product in four colorways side by side: its original color, sage green, sand beige and charcoal black. Keep the shape, materials, details and logo identical across all four. Space them evenly on a light gray background with the same soft studio light and matching shadows.
Before 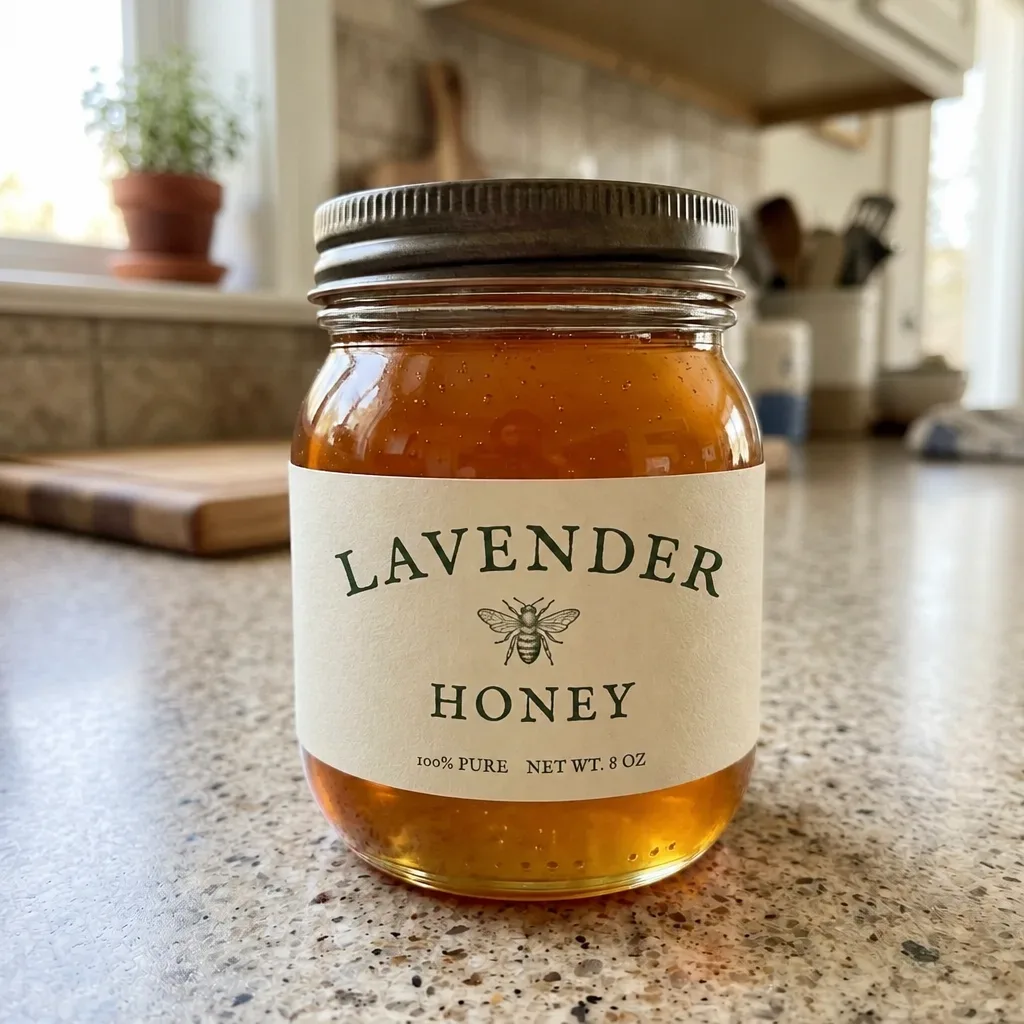
GPT Image 2.6 Change the Name on a Product Label
Brush the area to edit first
Replace the text in the marked area with "LAVENDER". Match the original lettering exactly: the same typeface, weight, color and letter spacing, following the curve of the label. Keep everything outside the marked area unchanged.
Before 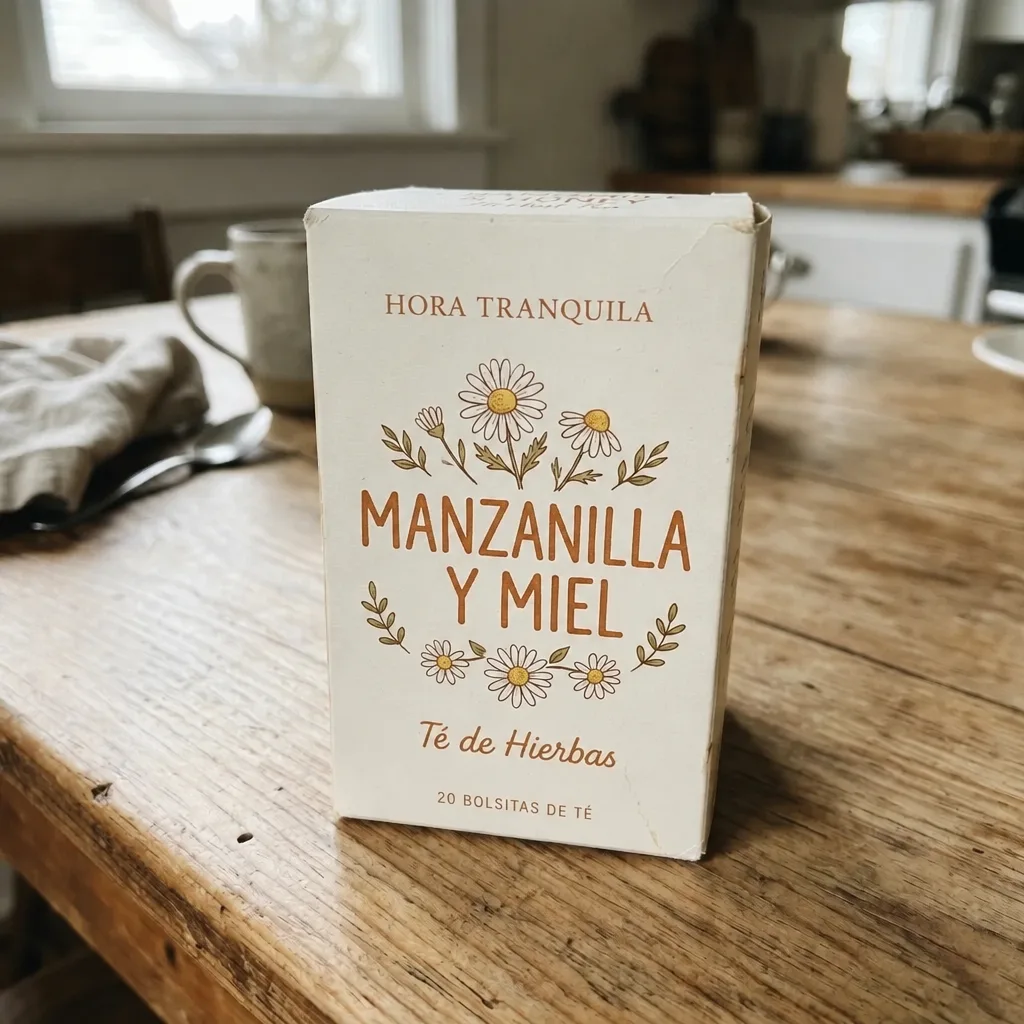
GPT Image 2.6 Translate the Text on Packaging
Translate the English text on the packaging into Spanish. Keep the brand name as it is, and give each translated line the same typeface, size, color and position as the original. Leave the product, the rest of the packaging and the background unchanged.
Cleanup before you publish
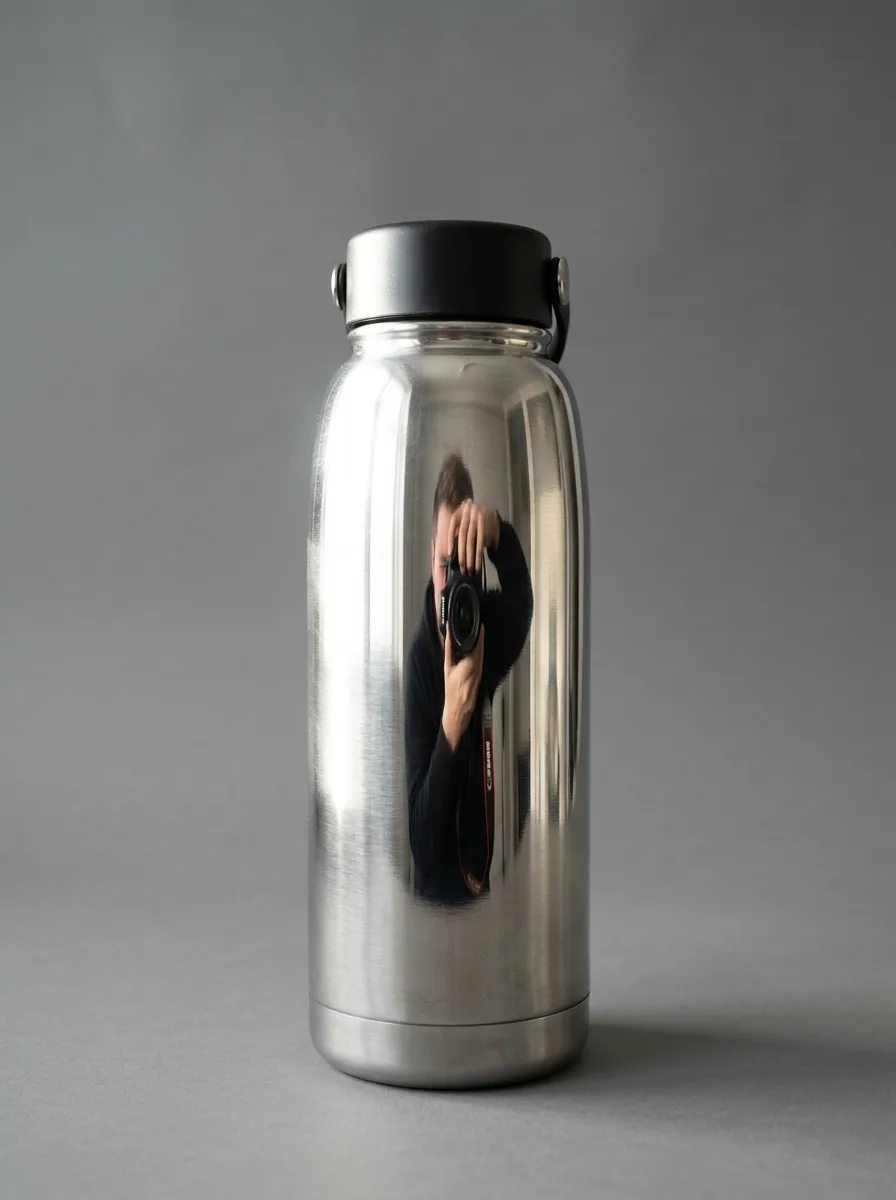
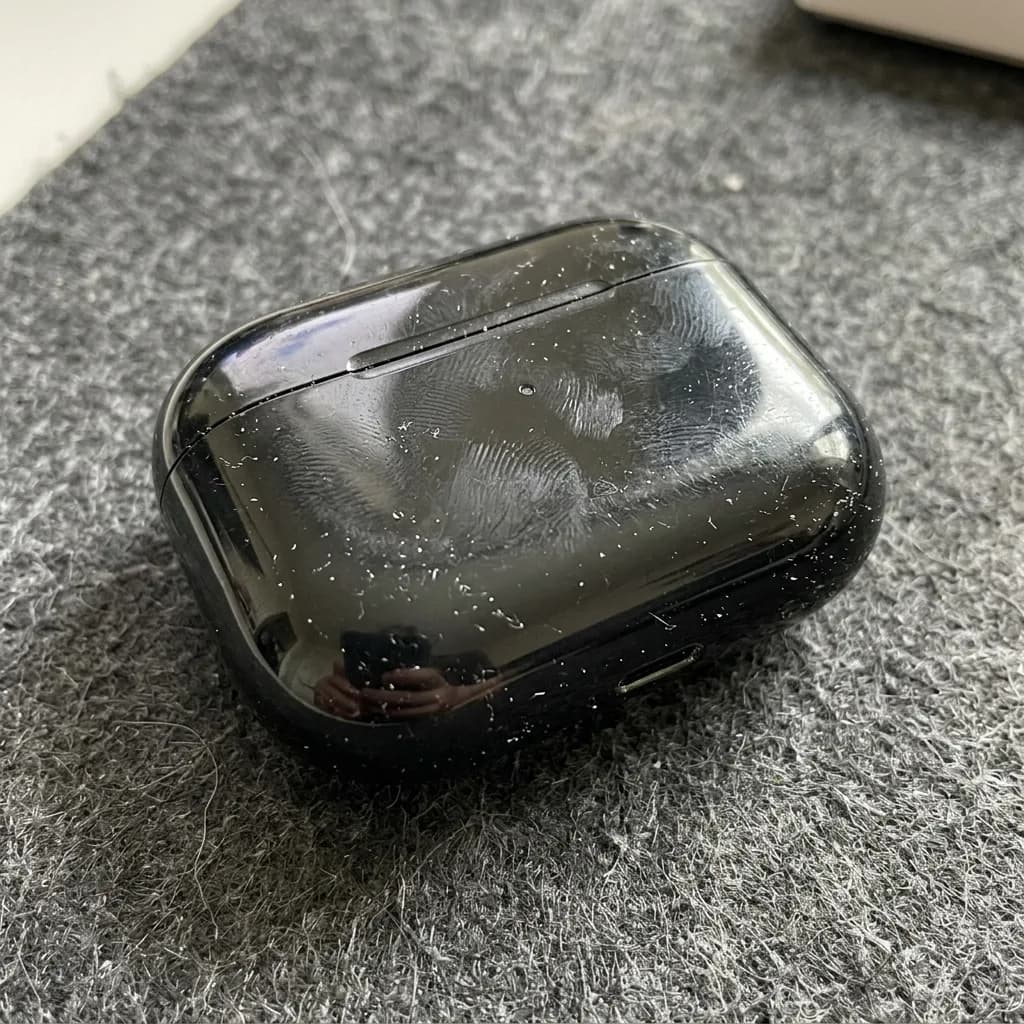
Brush over what should go, then say what to remove and that everything outside the marked area stays. Dust and fingerprints are the exception: that prompt works on the whole product, no brush needed.
Before 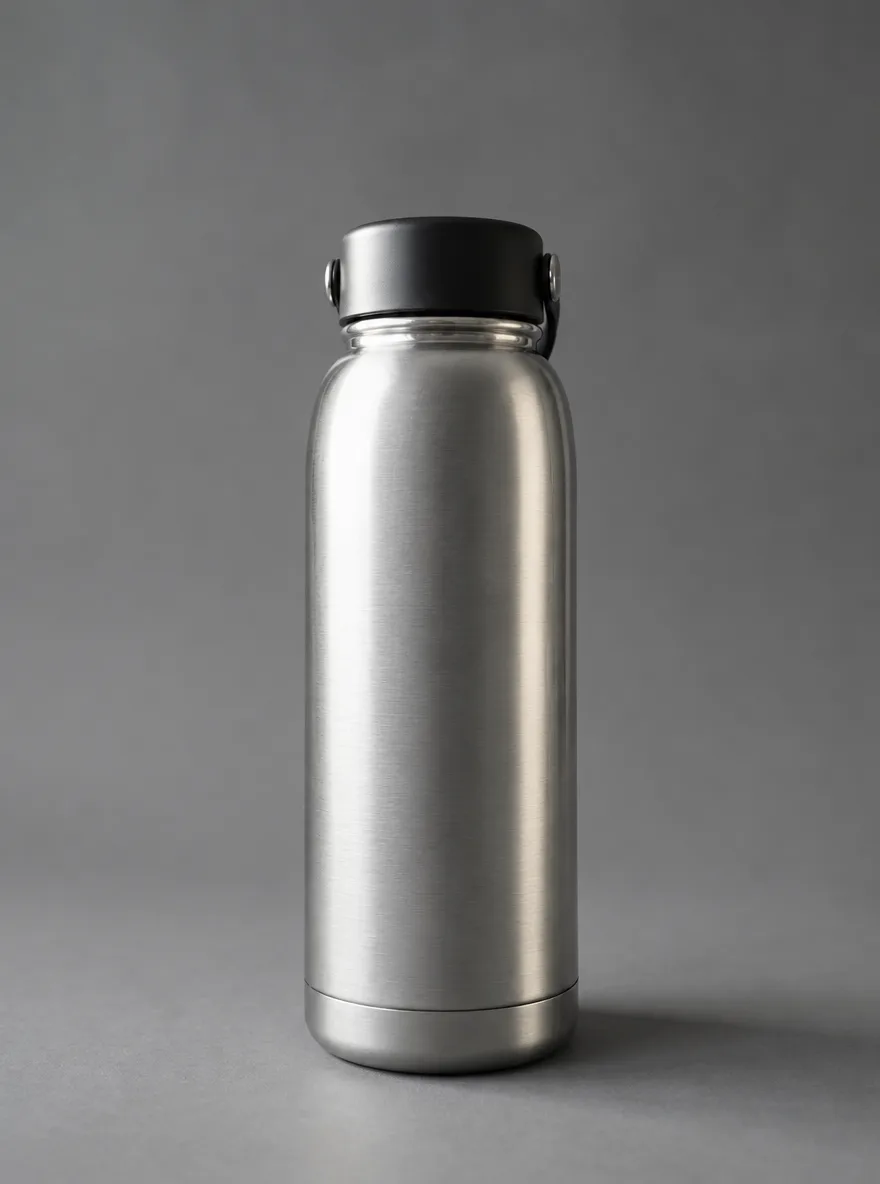
GPT Image 2.6 Remove Glare on Shiny Surfaces
Brush the area to edit first
Remove the glare, window reflections and camera reflection in the marked area of the shiny surface. Replace them with a smooth, even highlight that follows the surface's curvature, so it blends seamlessly with the rest of the product. Keep everything outside the marked area unchanged.
Before 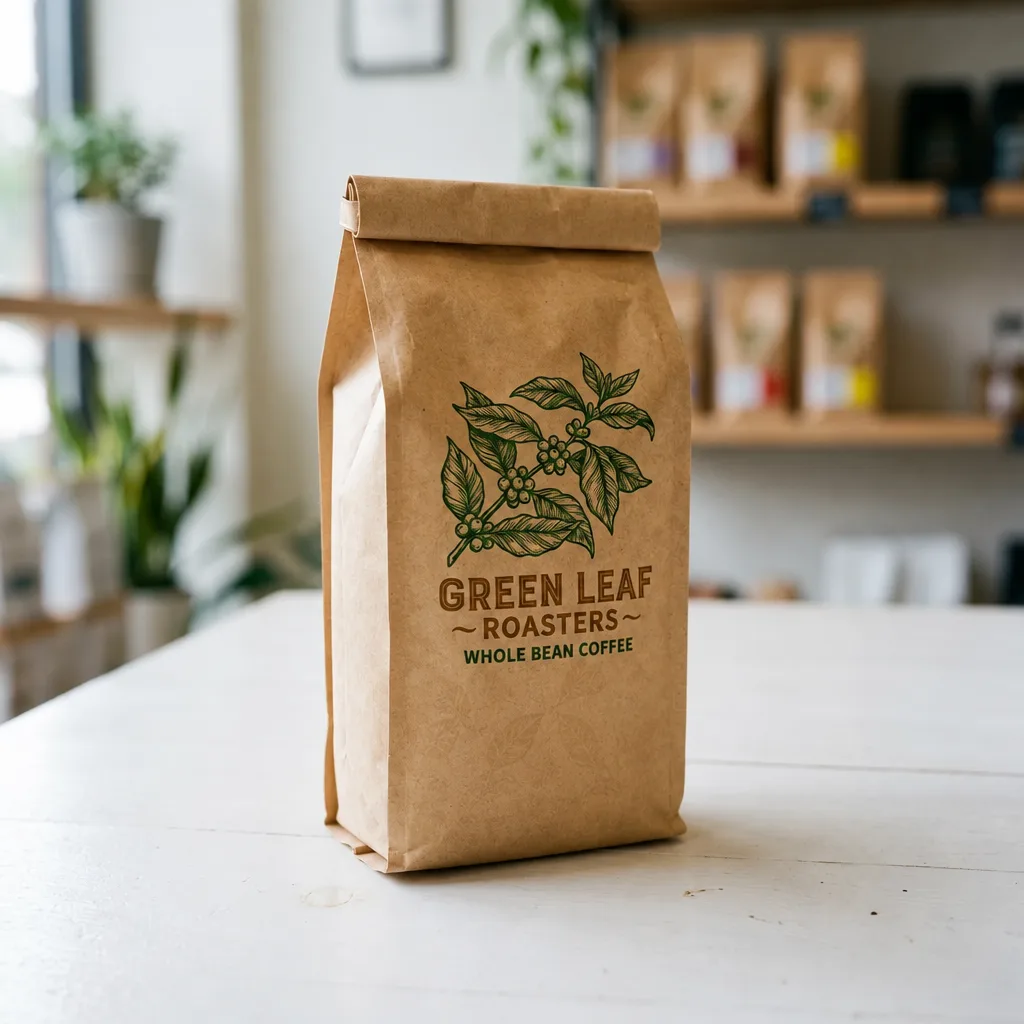
GPT Image 2.6 Erase Barcode and Price Sticker
Brush the area to edit first
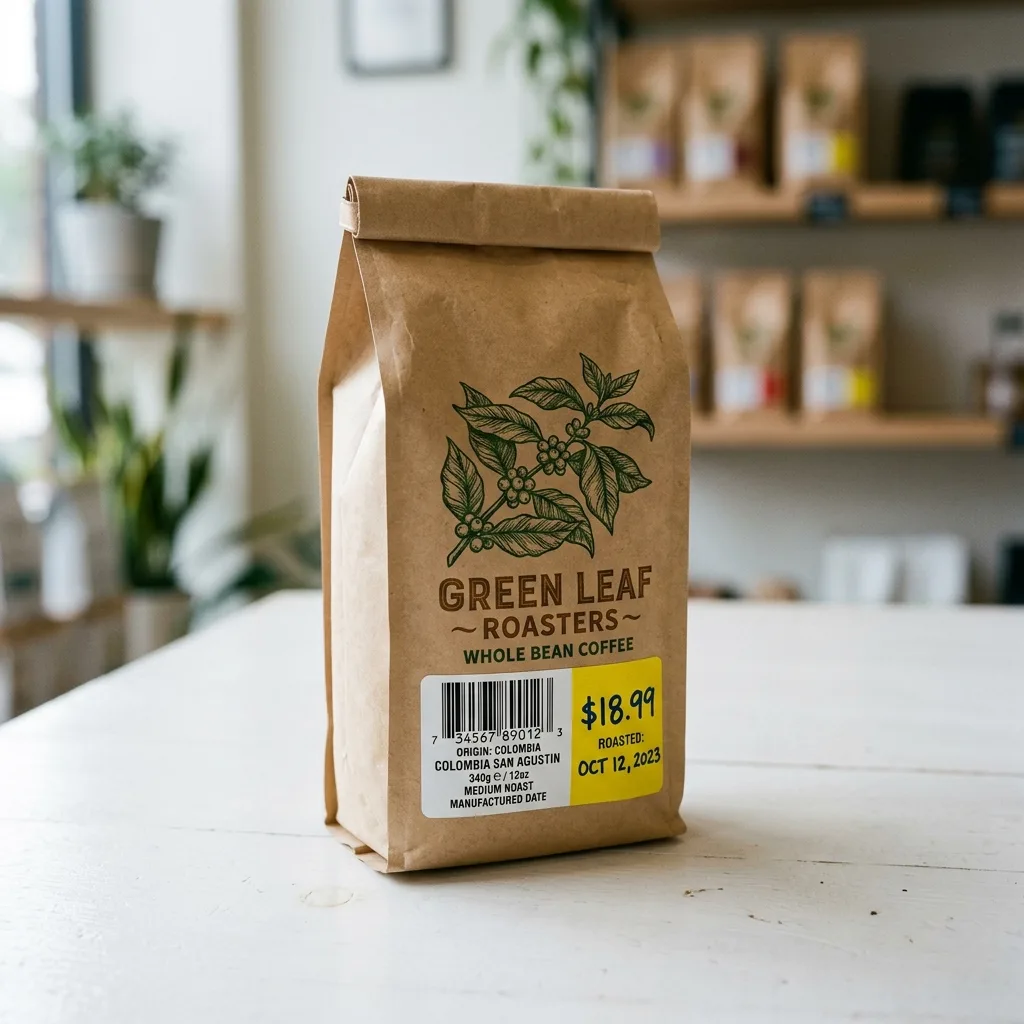
Erase the barcode, price sticker and any text label in the marked area. Rebuild the packaging underneath so its color, texture and printed pattern continue naturally, with no smudges or leftover edges. Keep everything outside the marked area unchanged.
Before 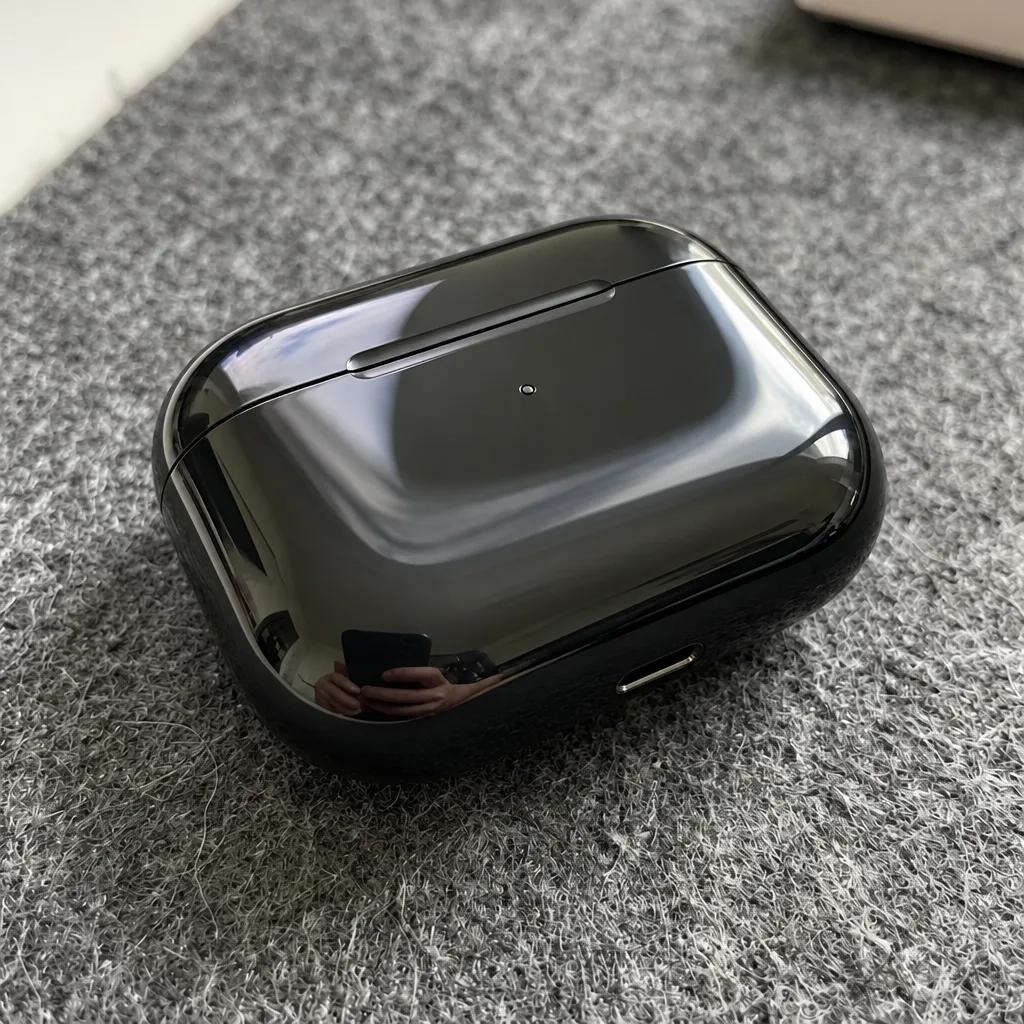
GPT Image 2.6 Remove Dust and Fingerprints
Remove all dust, lint, fingerprints and fine scratches from the product's surface. Keep its shape, color, glossy finish, logo and reflections exactly as they are, and leave the background unchanged. Clean, freshly unboxed look.
Two-photo composites
Upload the photos in order; the prompts call them IMG_1 and IMG_2. Say what to take from each image and what not to copy.

IMG_1 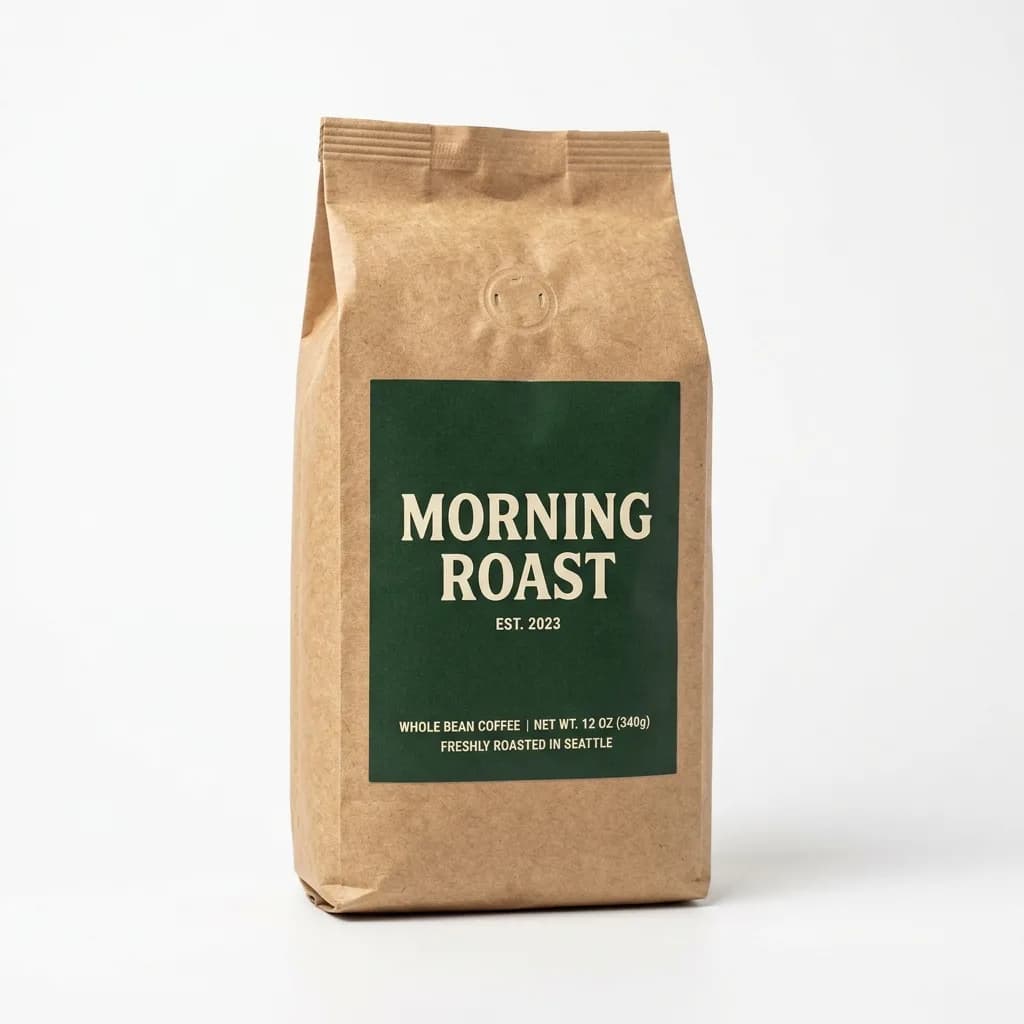
IMG_2 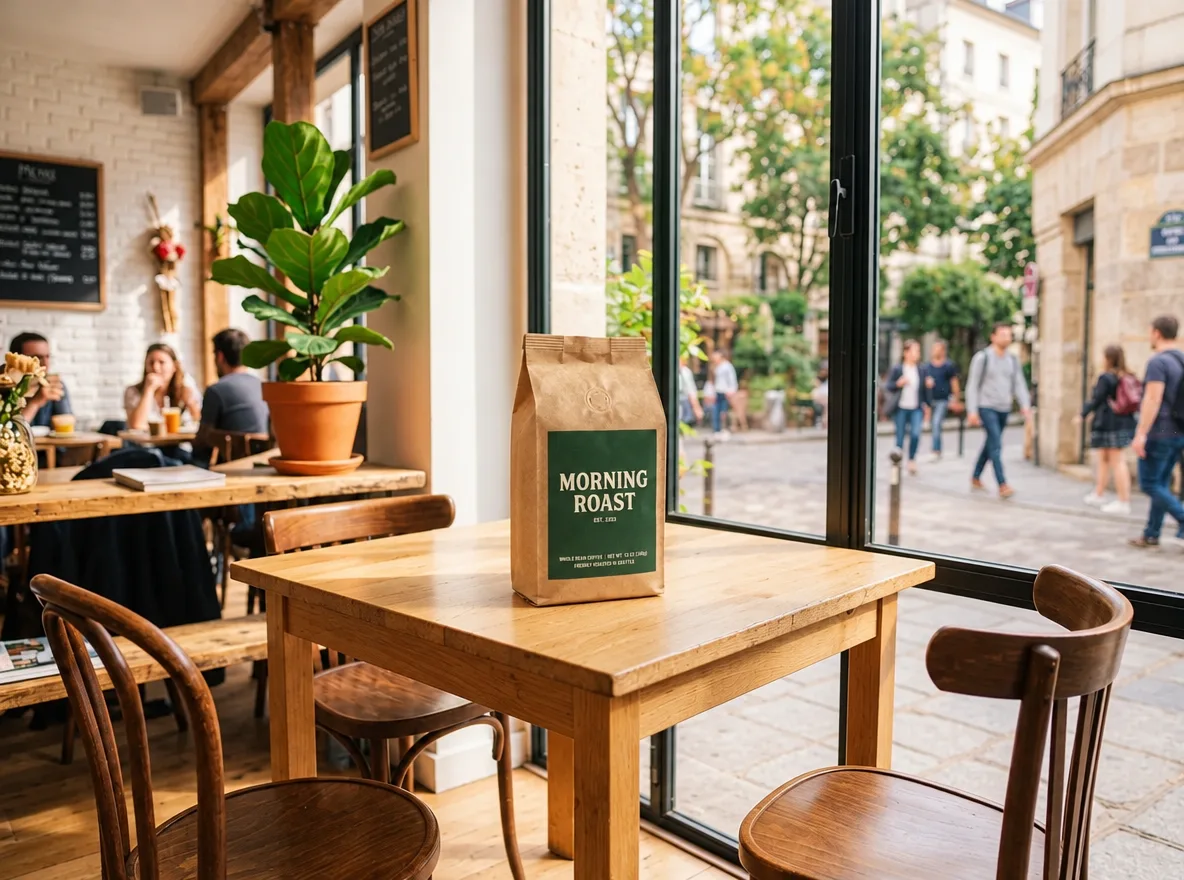
GPT Image 2.6 Place a Product into Your Scene
Needs two photos, uploaded in order
Place the product from IMG_2 on the table in IMG_1. Keep the product's shape, label and colors exactly as in IMG_2. Match IMG_1's perspective, lighting direction and color temperature, and add a natural contact shadow so the product looks photographed in place. Keep the rest of IMG_1 unchanged.
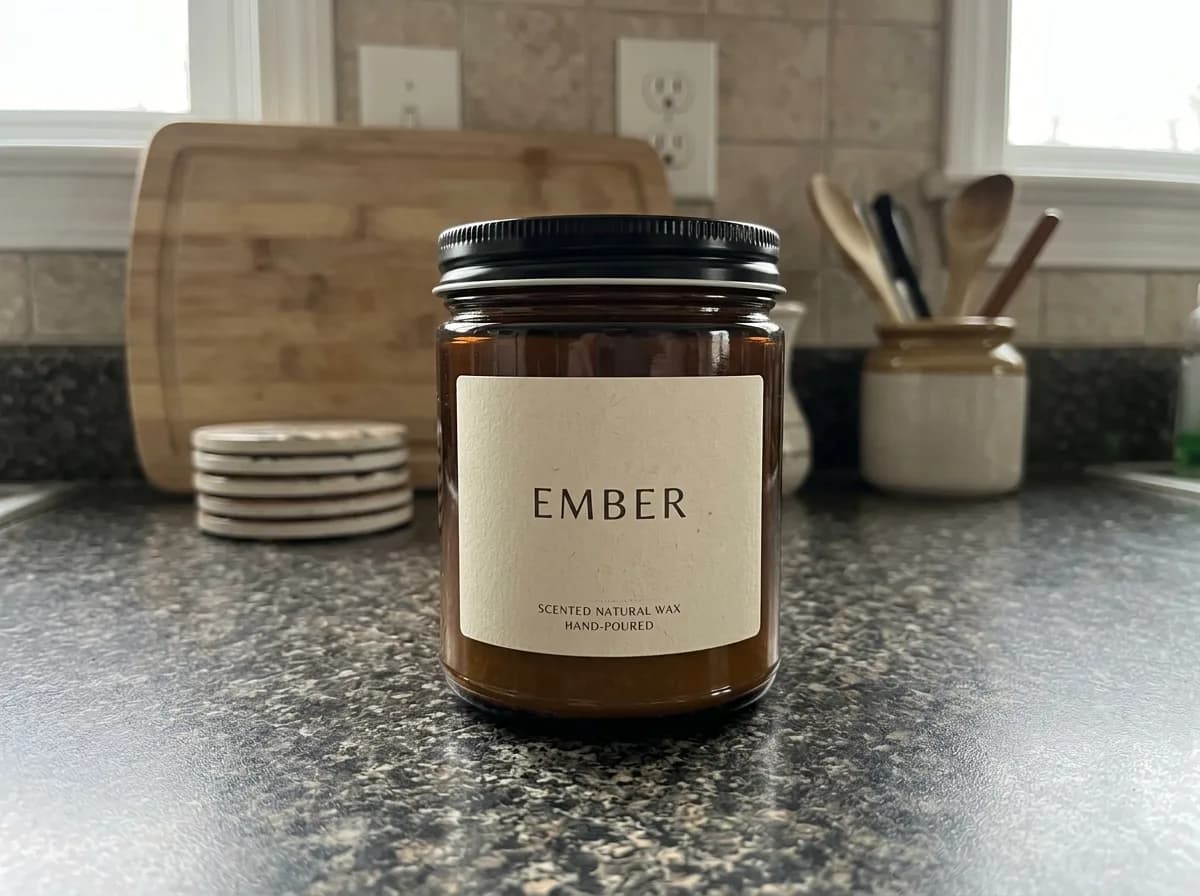
IMG_1 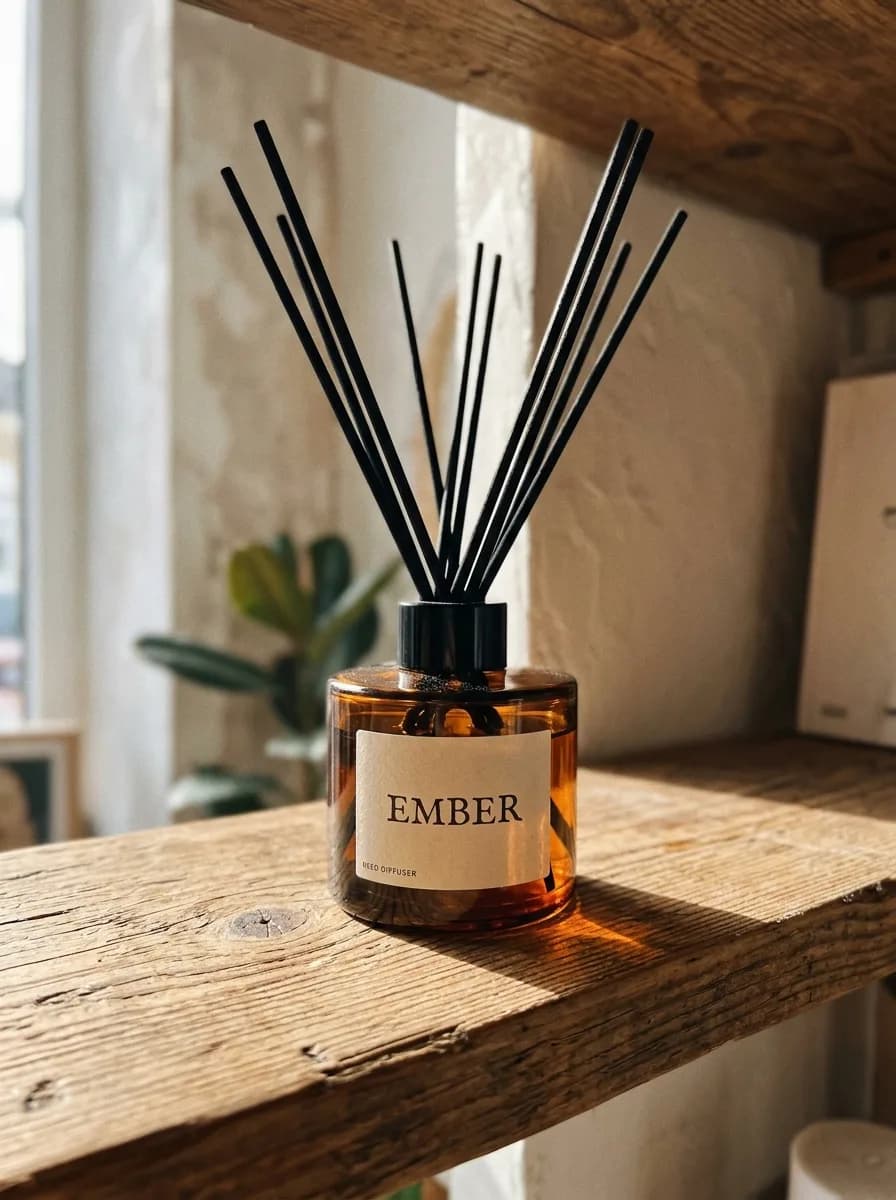
IMG_2 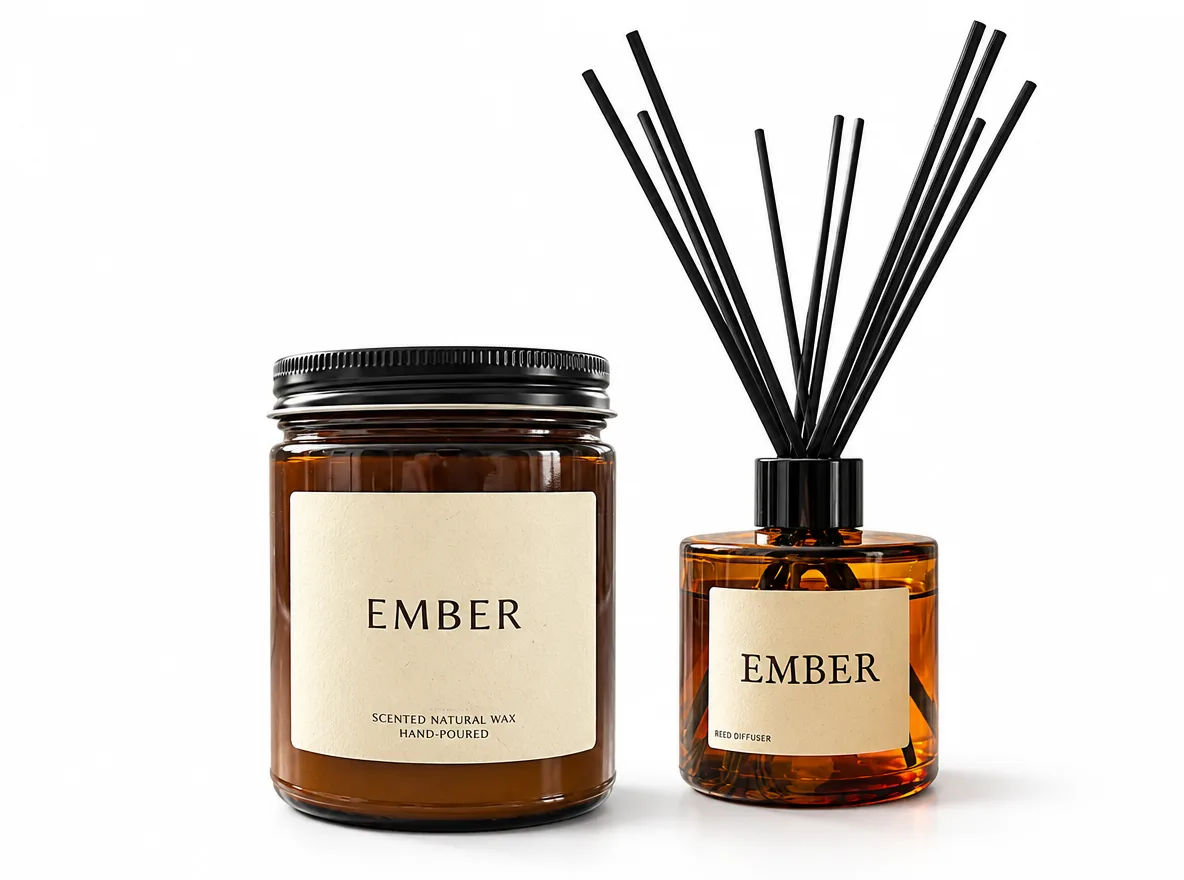
GPT Image 2.6 Bundle Two Products into One Shot
Needs two photos, uploaded in order
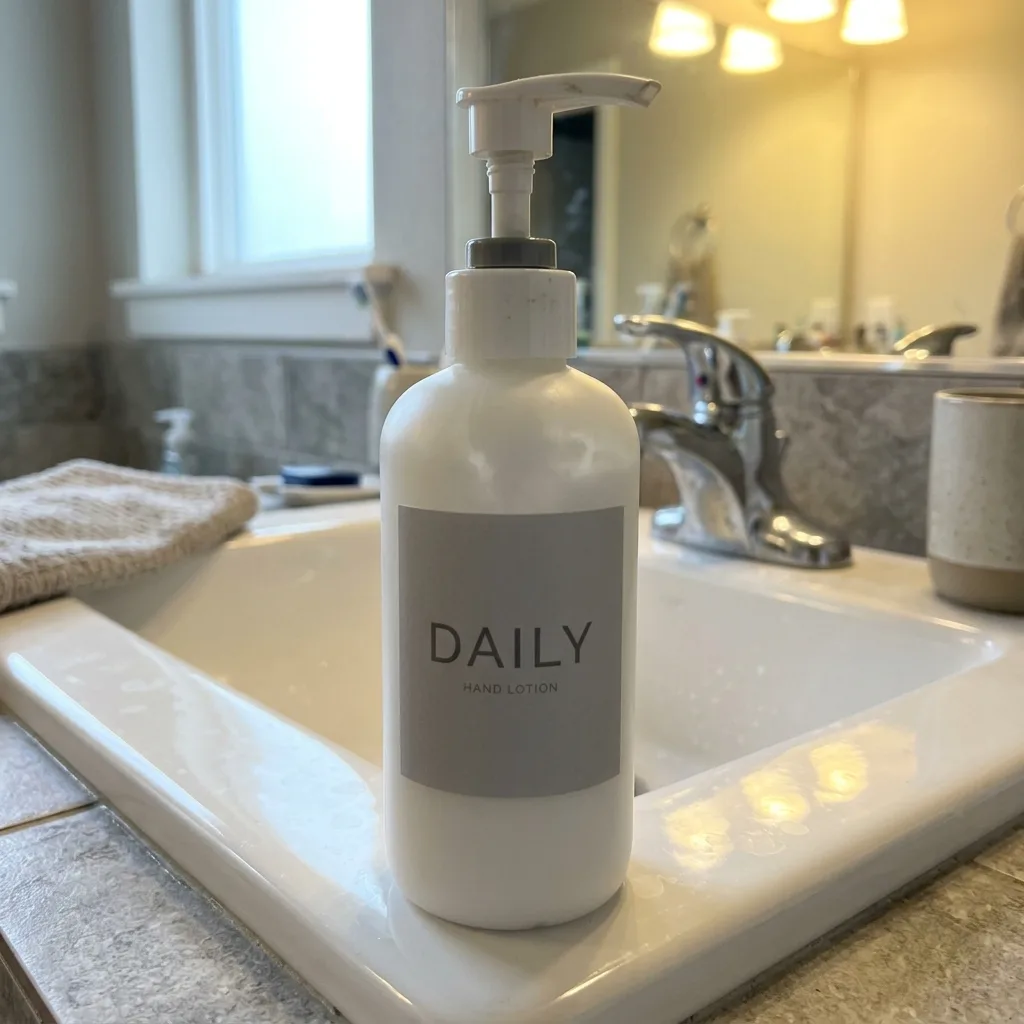
Combine the product in IMG_1 and the product in IMG_2 into one bundle photo. Keep both products exactly as they are, including their shapes, labels and colors. Arrange them side by side on a pure white background with the same soft studio light and natural contact shadows. Clean gift-set listing image.
IMG_1 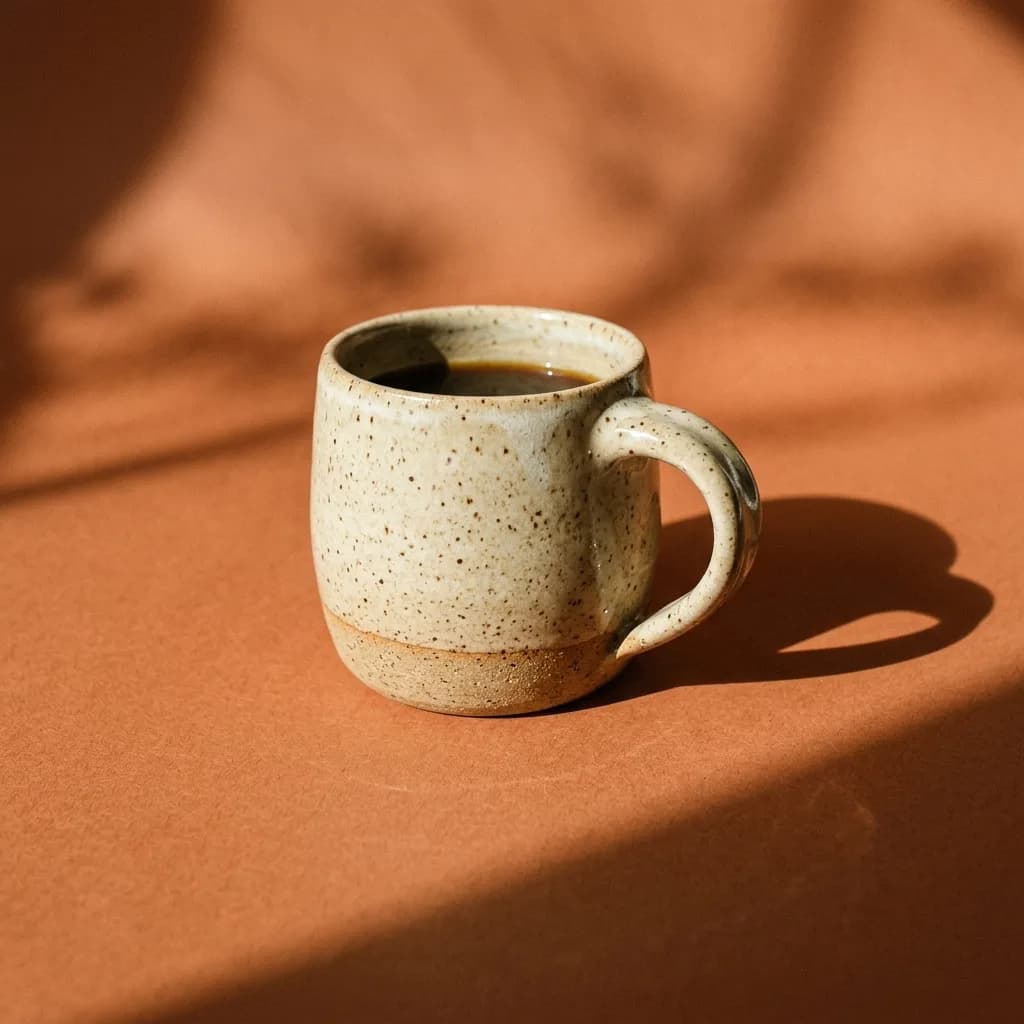
IMG_2 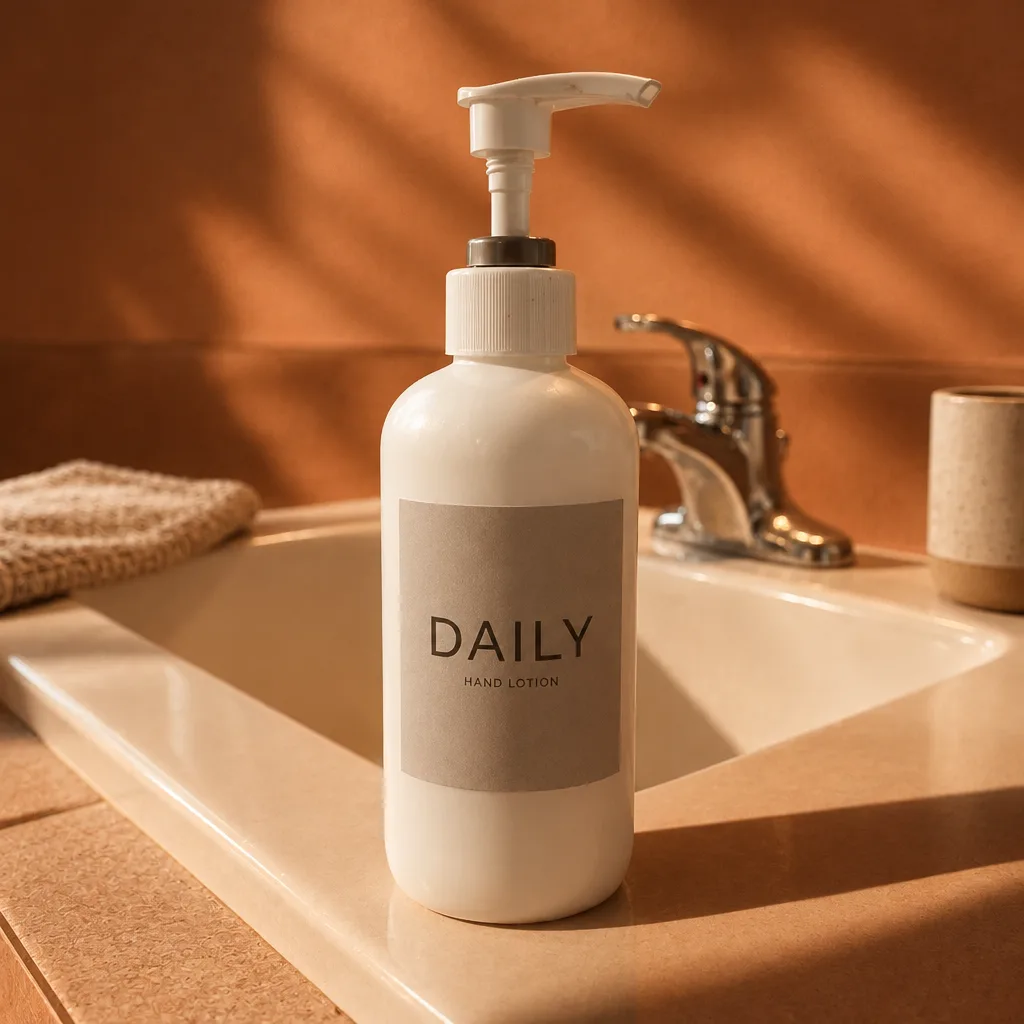
GPT Image 2.6 Match Your Existing Catalog Look
Needs two photos, uploaded in order
Restyle IMG_1 to match the look of IMG_2: use the same background color, lighting direction, shadow style and color grade. Keep the product in IMG_1 exactly as it is, including its shape, label and colors. Do not copy the product or props from IMG_2.
Apparel
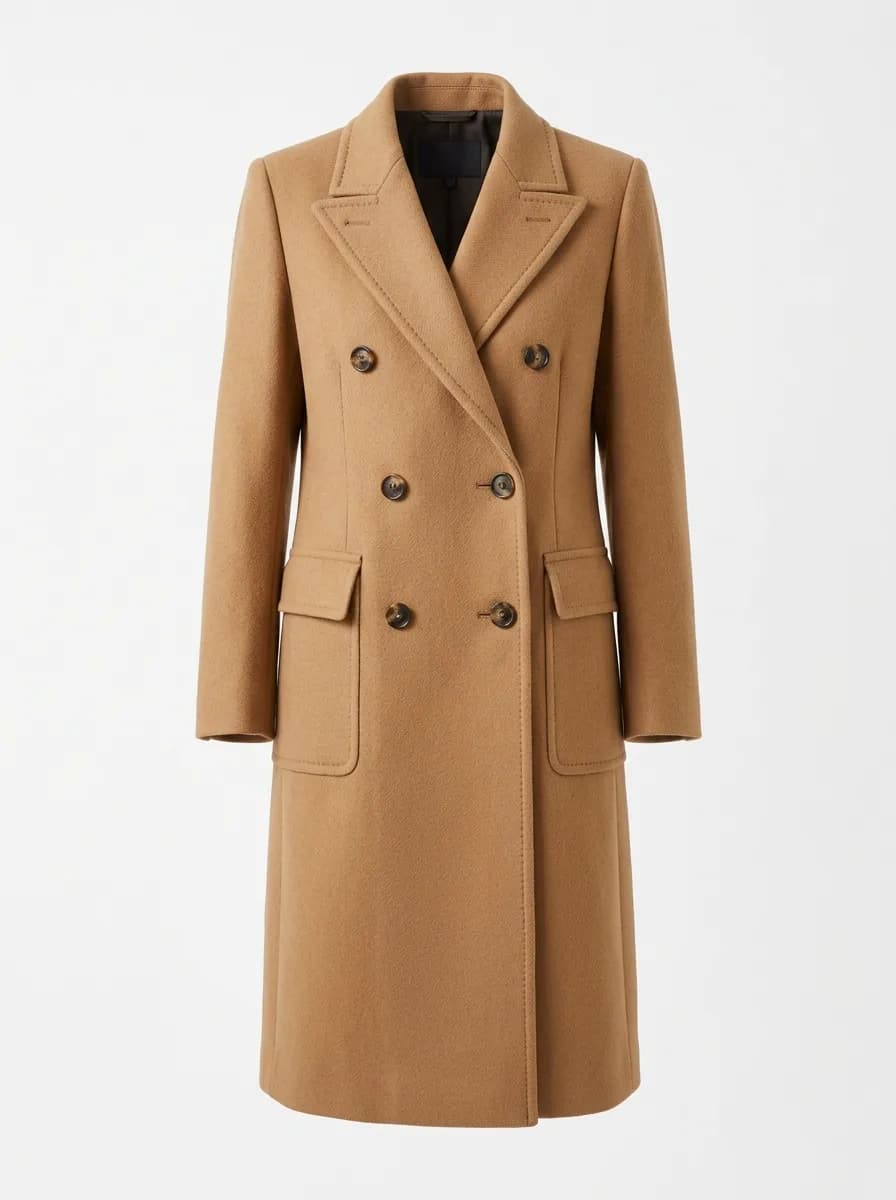
Say what changes (the model, the scene, the fabric or the backdrop) and list what must stay: cut, color, seams, buttons and fit. On the wrinkle prompt GPT Image 2.6 removed nearly every crease, but the linen weave came out smoother and the blue a little more saturated than the original. If the fabric's texture matters, compare the result with your photo.
Before 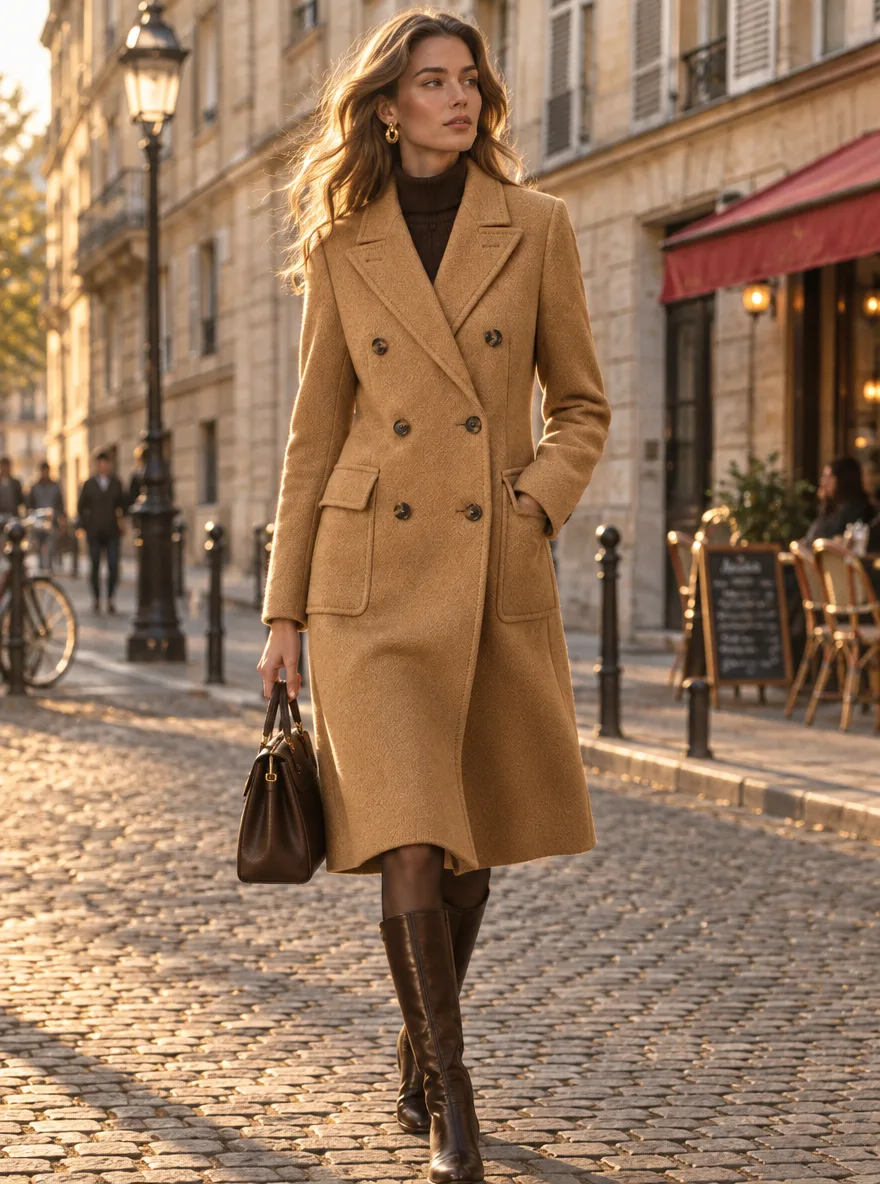
GPT Image 2.6 Ghost Mannequin to Street Model
Show the garment in this photo worn by a tall female model walking on a European cobblestone street. Keep the garment exactly as it is: cut, color, pattern, buttons and seams. Natural fabric folds and movement, golden-hour side light, 35mm street fashion photo.
IMG_1 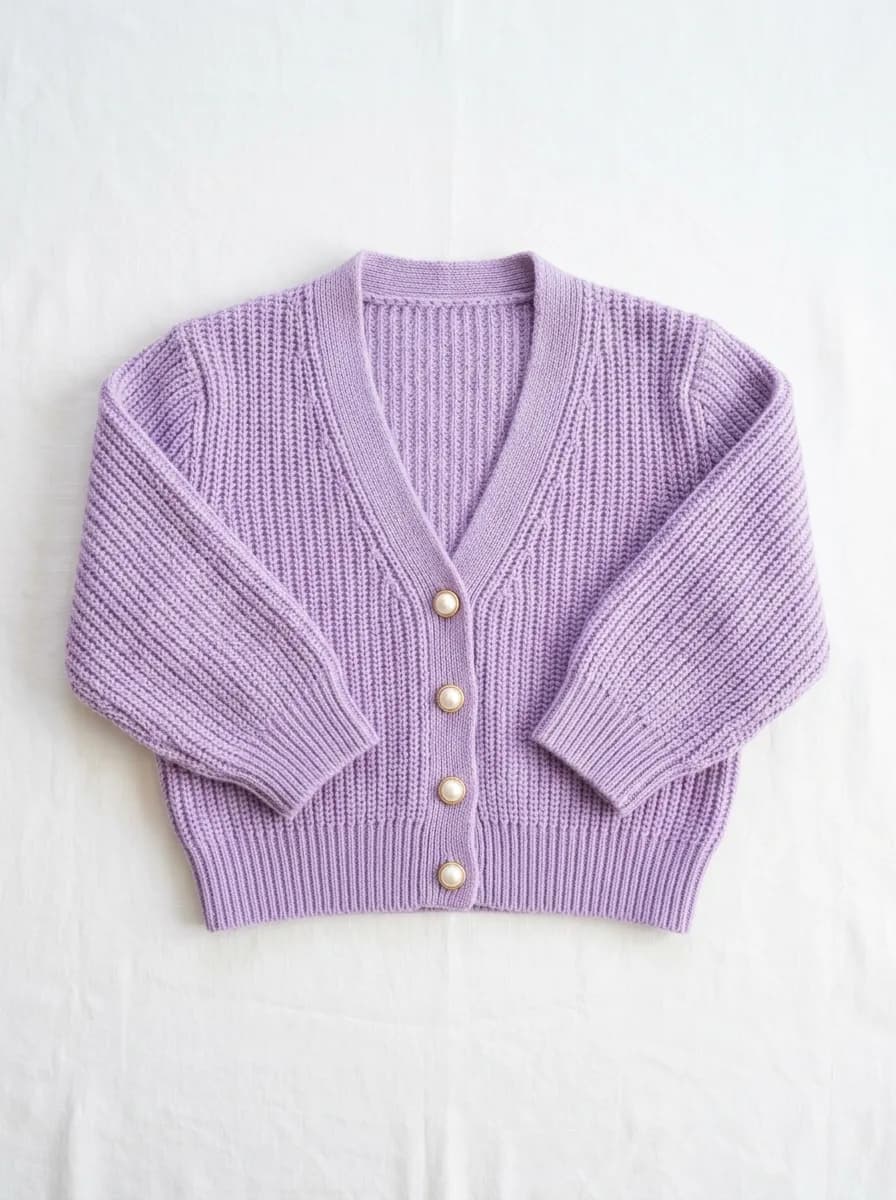
IMG_2 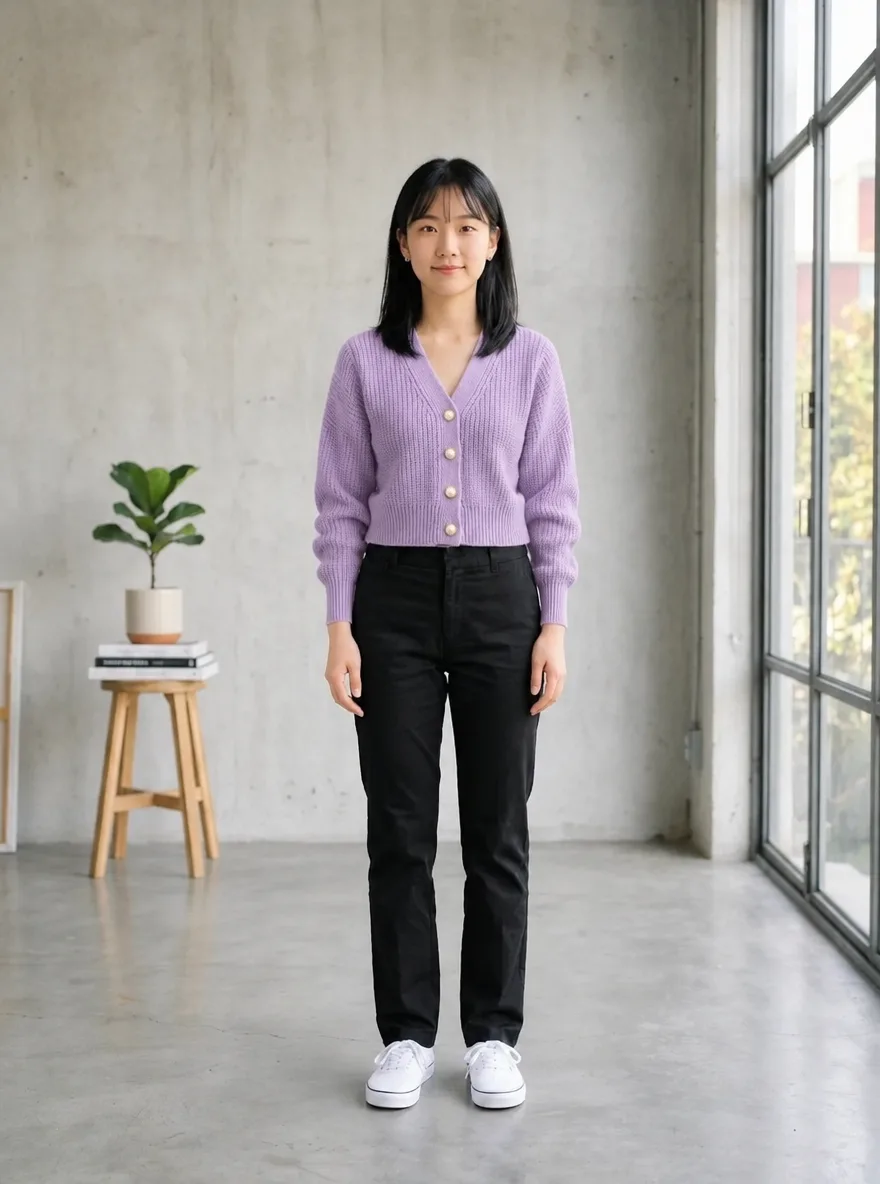
GPT Image 2.6 Virtual Try-On
Needs two photos, uploaded in order
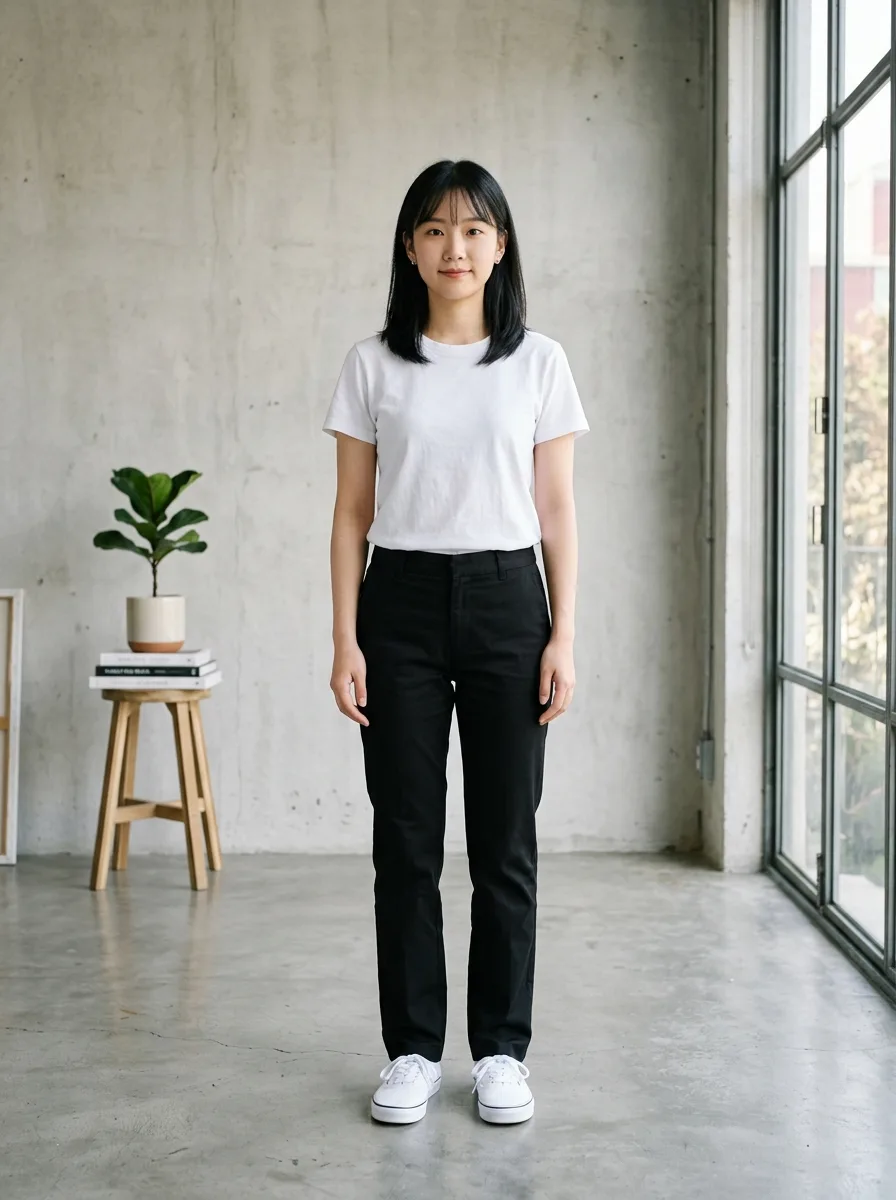
Dress the person in IMG_1 in the garment from IMG_2. Keep the person's face, hairstyle, body shape and pose unchanged. Keep the garment's cut, color, fabric texture and seams exactly as in IMG_2, with natural folds that fit the pose. Keep IMG_1's background and lighting.
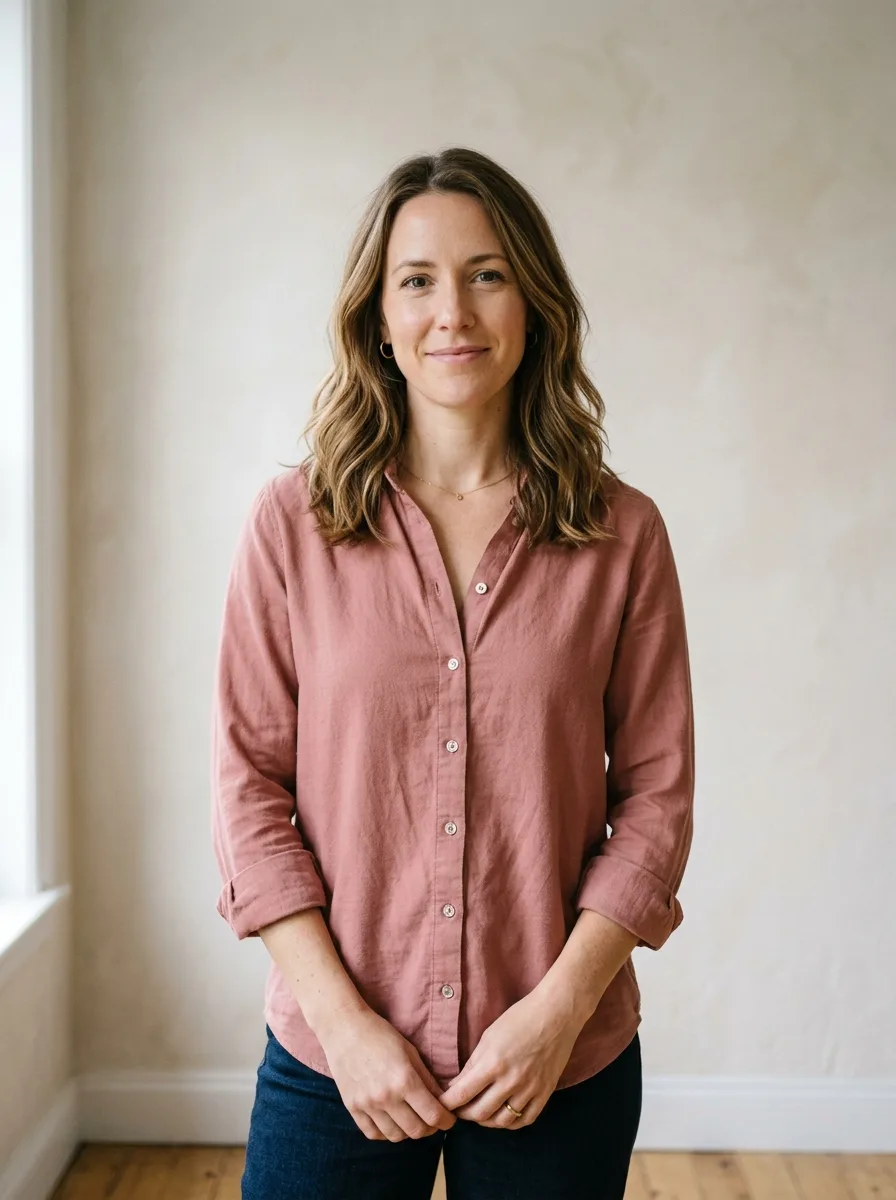
Before 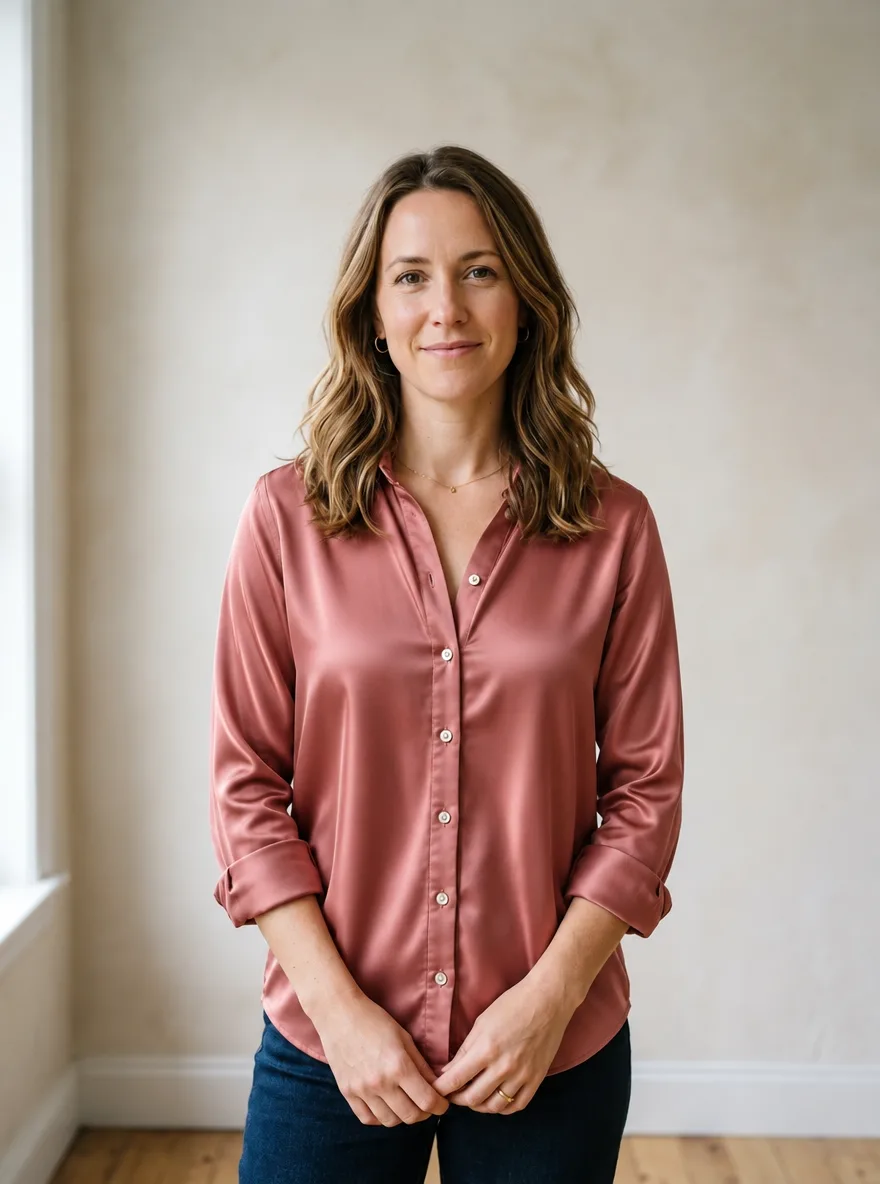
GPT Image 2.6 Upgrade Fabric to Silk
Brush the area to edit first
Change the fabric of the garment in the marked area to heavy, lustrous mulberry silk with a fluid drape and soft highlights along the folds. Keep the garment's cut, seams, color and fit unchanged, and keep everything outside the marked area as it is.
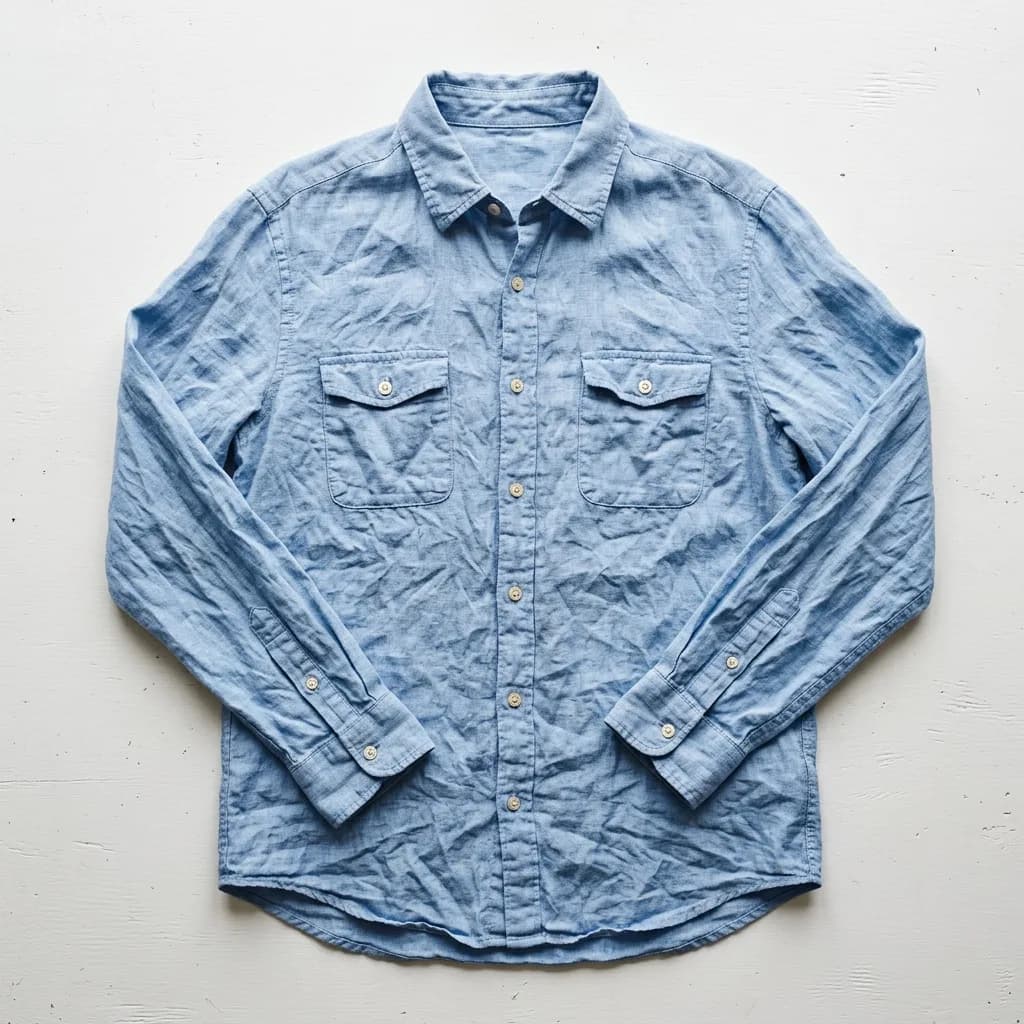
Before 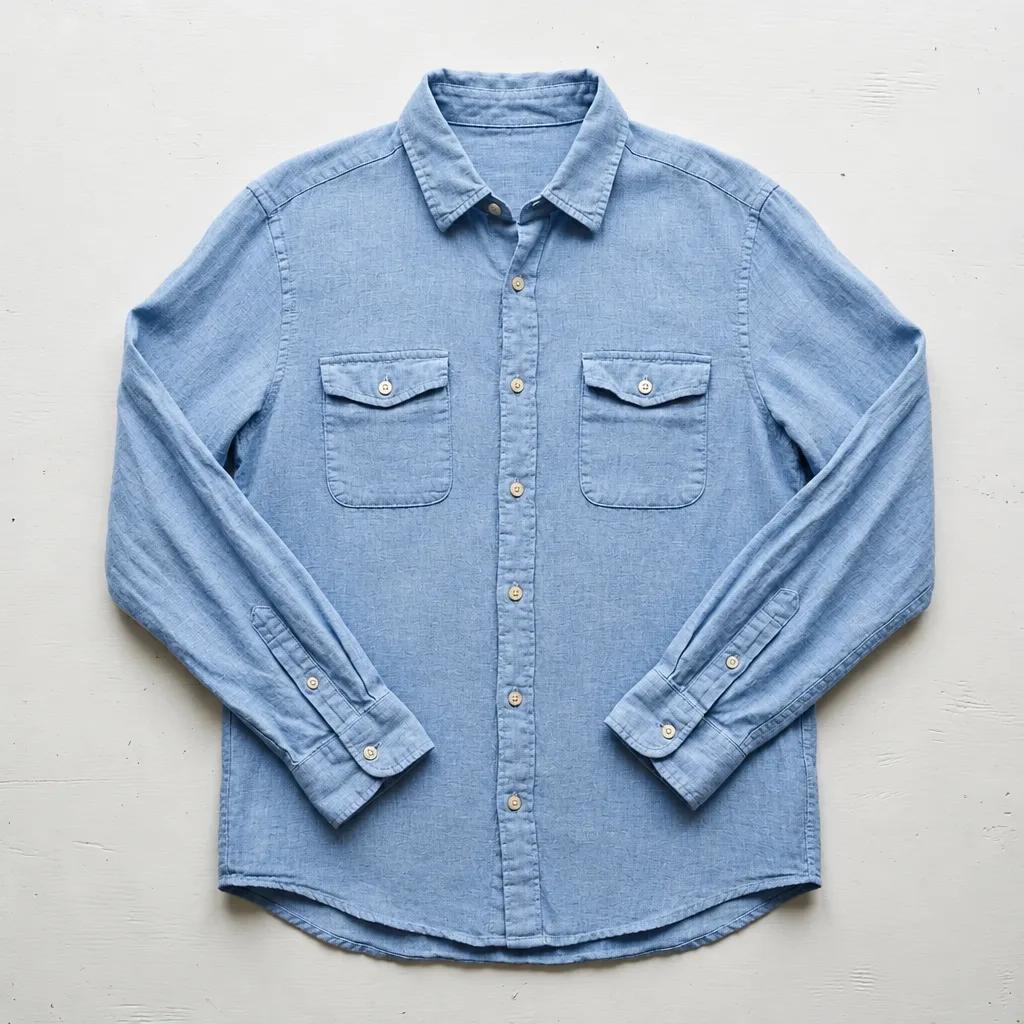
GPT Image 2.6 Smooth Out Fabric Wrinkles
Brush the area to edit first
Smooth out the creases and wrinkles in the marked area as if the garment had been professionally steamed. Keep the woven fabric texture, color, seams and the garment's natural shading. Keep everything outside the marked area unchanged.
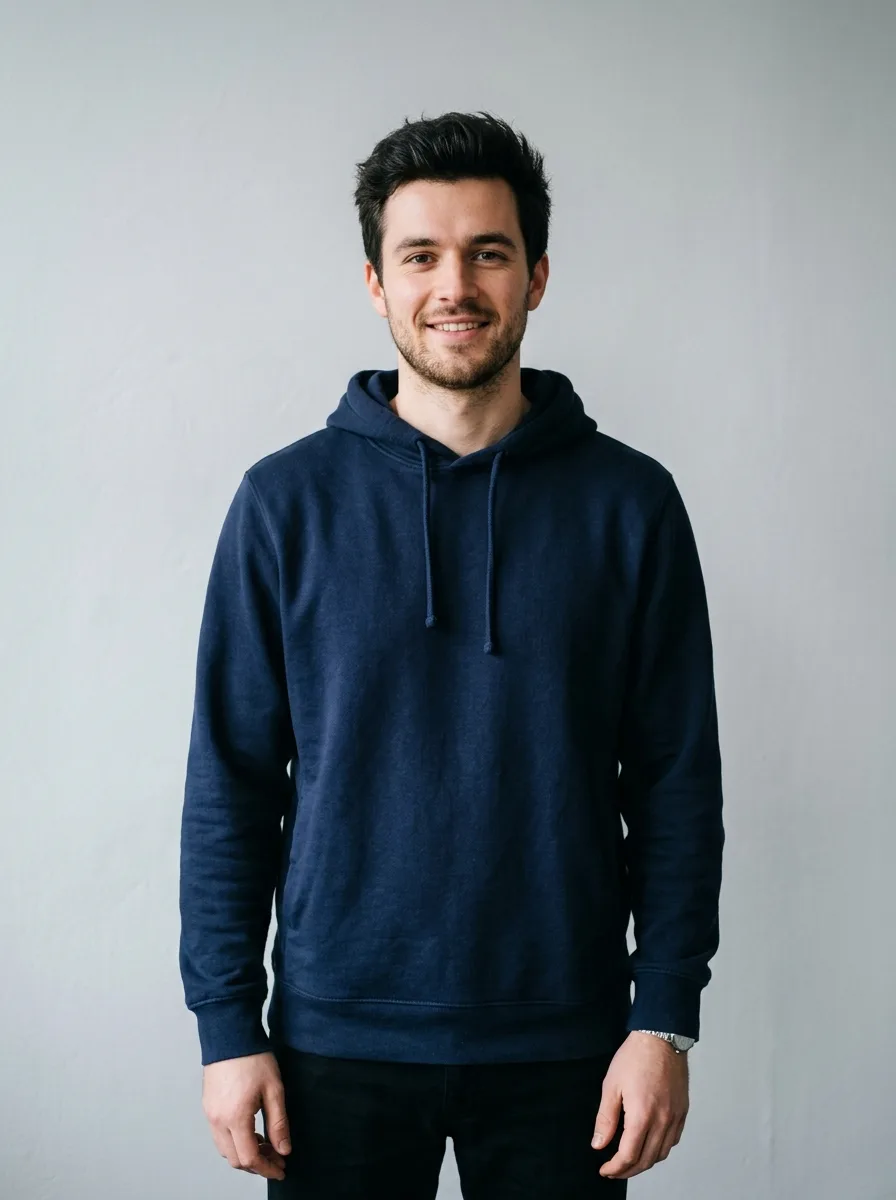
Before 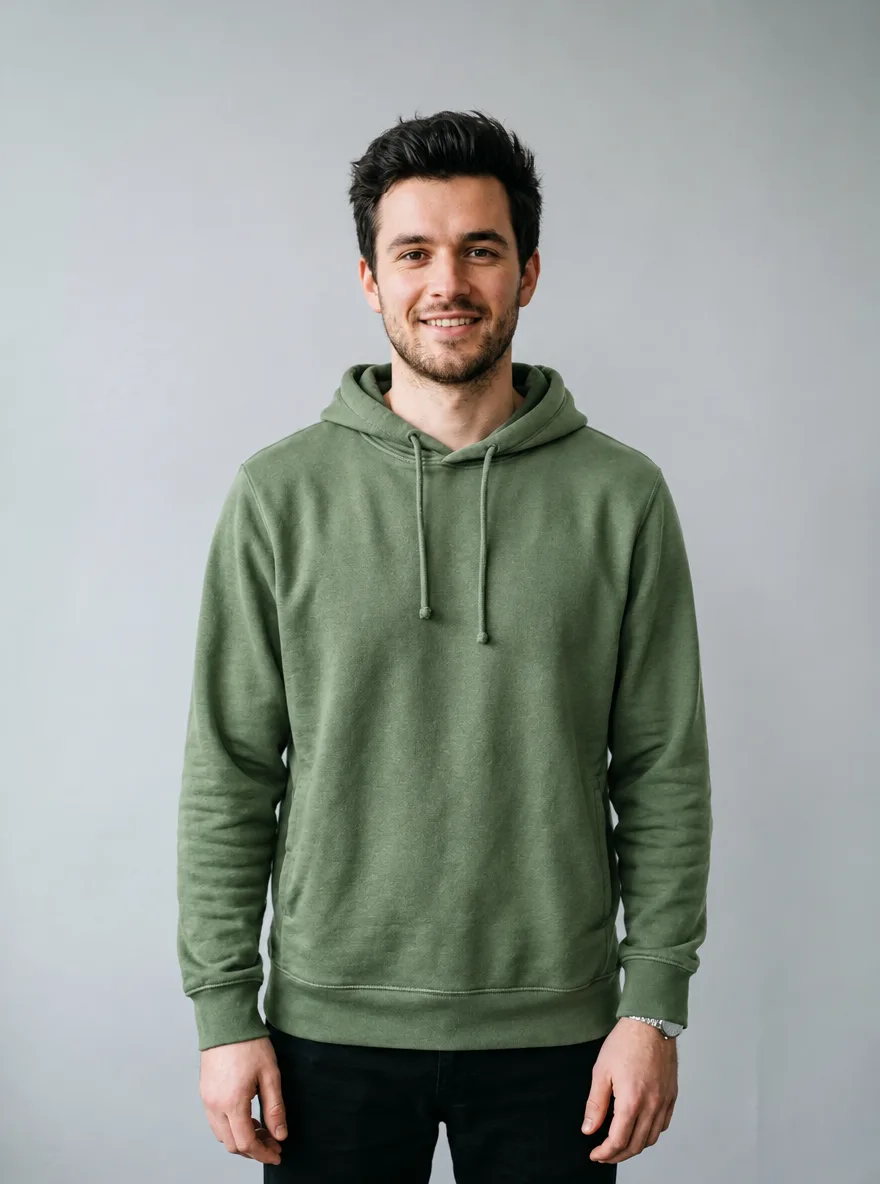
GPT Image 2.6 Recolor a Garment
Brush the area to edit first
Change the color of the garment in the marked area to sage green. Keep the fabric texture, stitching, folds, shadows and highlights exactly as they are, so it looks like the same garment dyed in a new color. Keep everything outside the marked area unchanged.
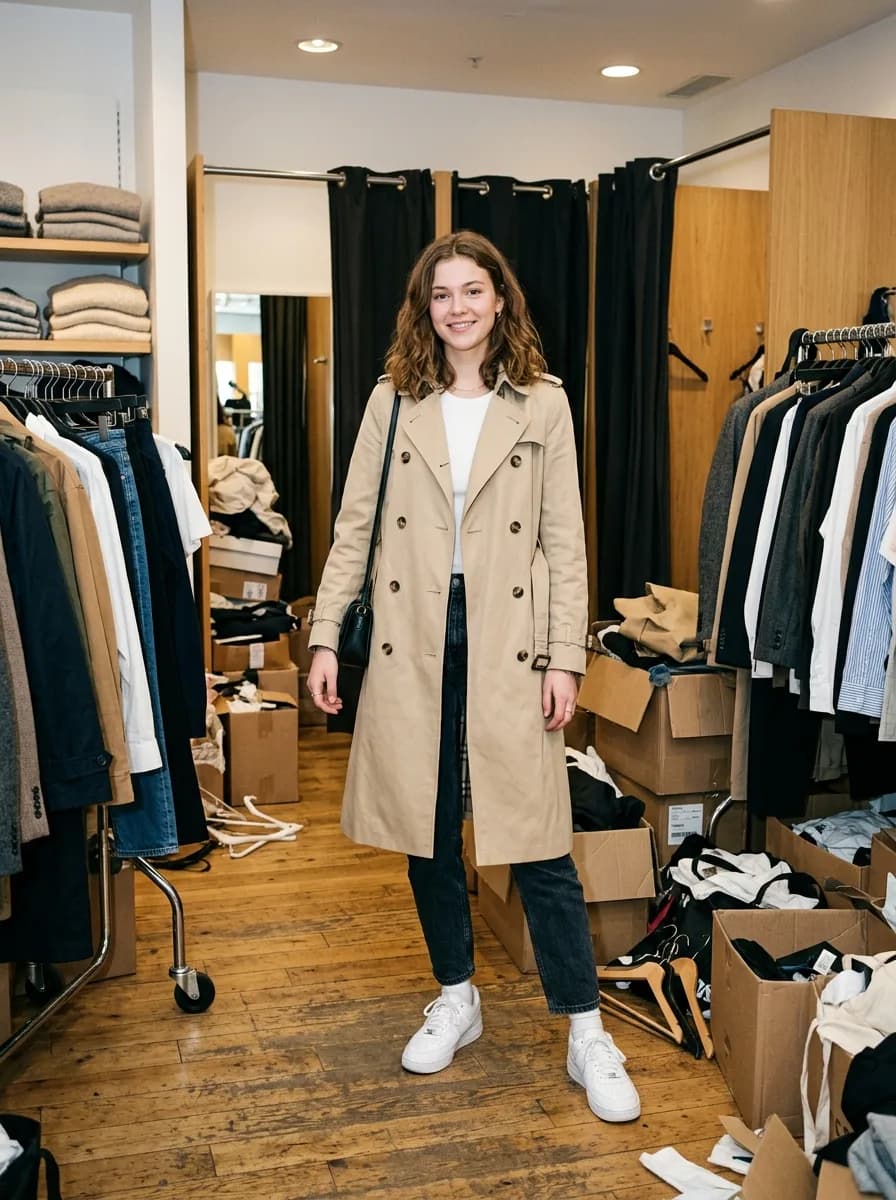
Before 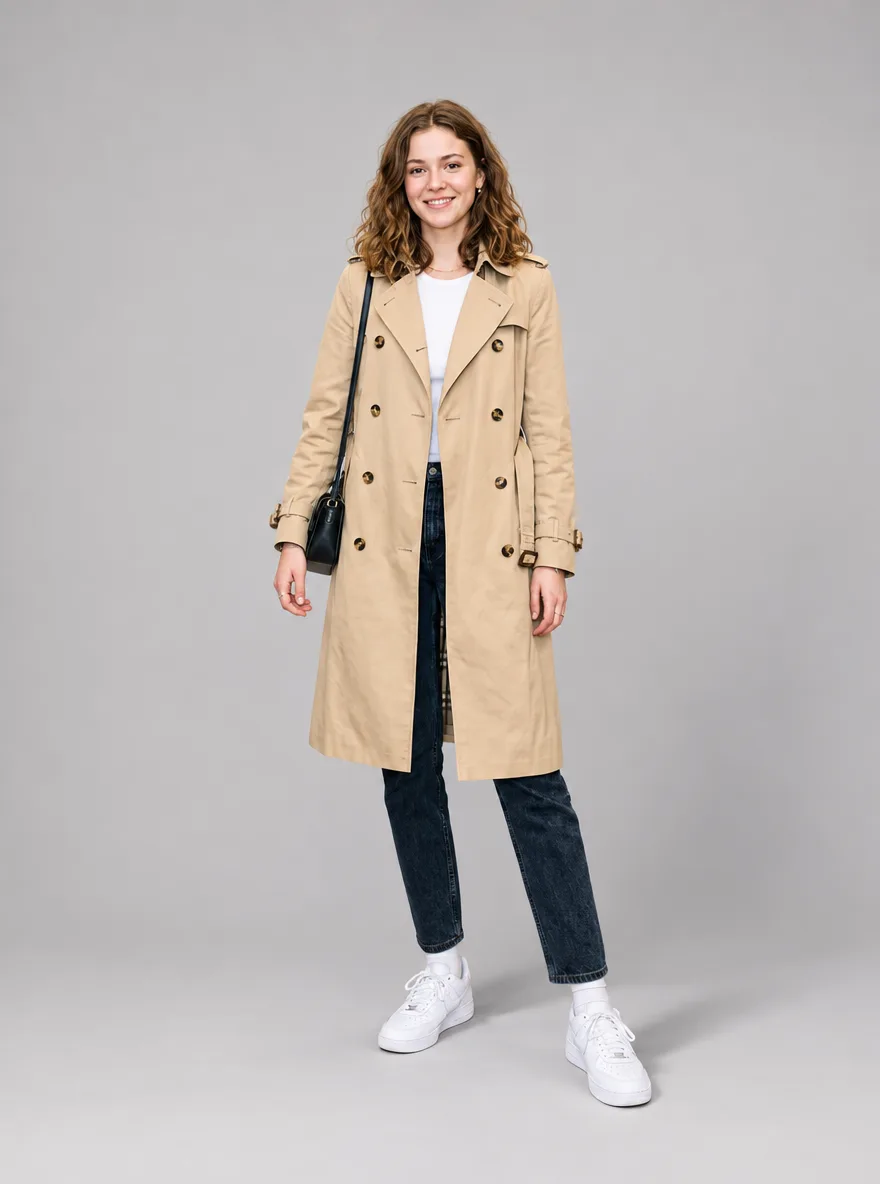
GPT Image 2.6 Clean Studio Backdrop for Model Shots
Keep the model, pose, outfit and the lighting on the model exactly as they are. Replace the cluttered background with a seamless light gray studio backdrop and add a soft, natural shadow on the floor behind the feet. Clean fashion e-commerce look.
Portraits
Change one thing and list what stays: face, expression, hairstyle, clothing. For the hair color and for removing people in the background, brush the area first.
Before 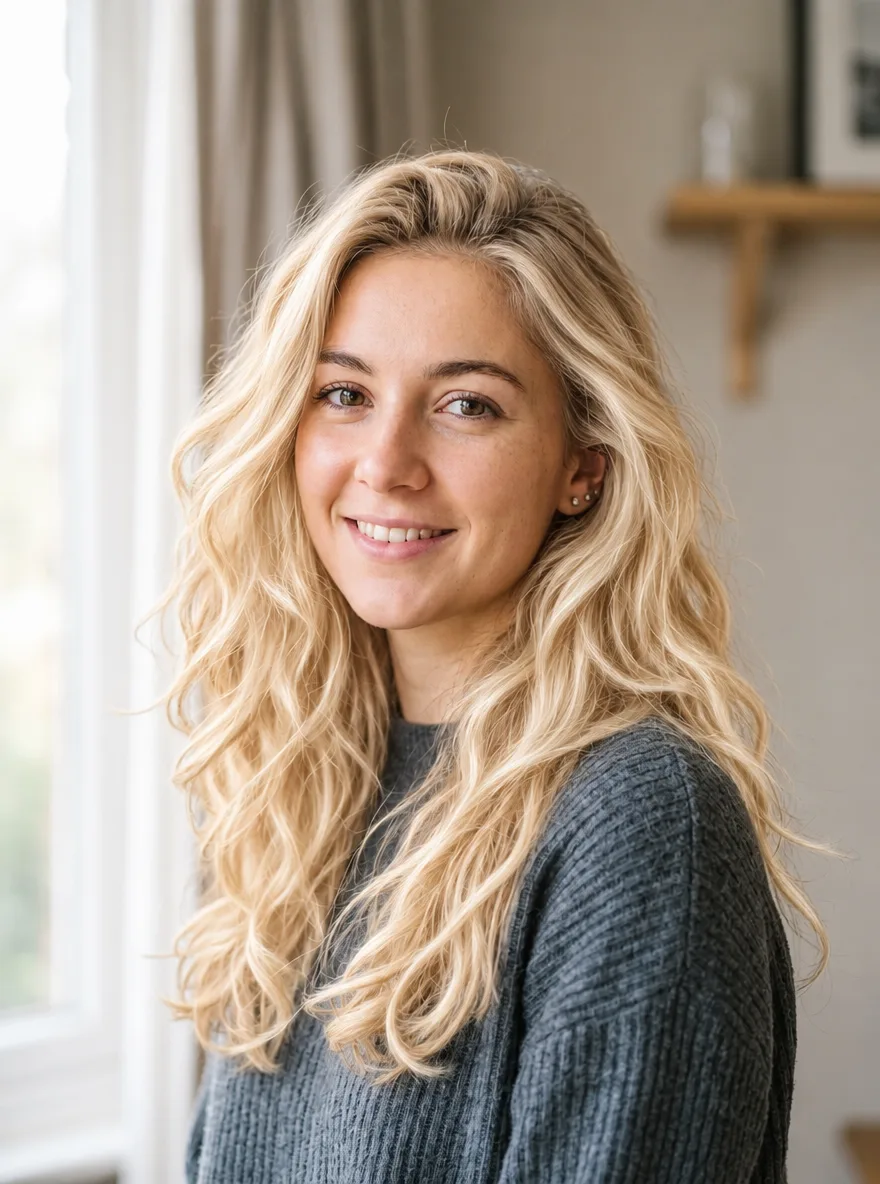
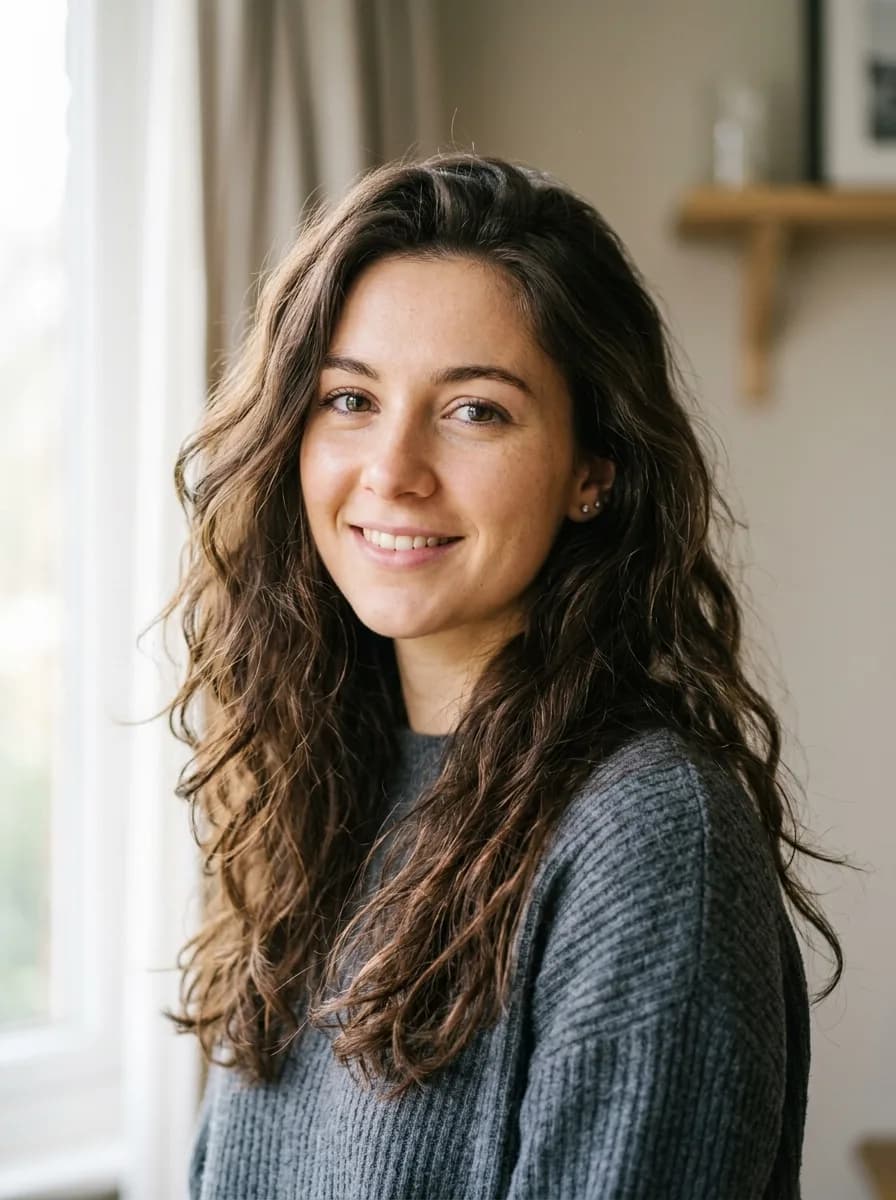
GPT Image 2.6 Change Hair to Platinum Blonde
Brush the area to edit first
Recolor the hair in the marked area to a bright platinum blonde with soft golden undertones. Keep the hairstyle, individual strands, shine and natural hairline transitions. Keep the face and everything outside the marked area unchanged.
Before 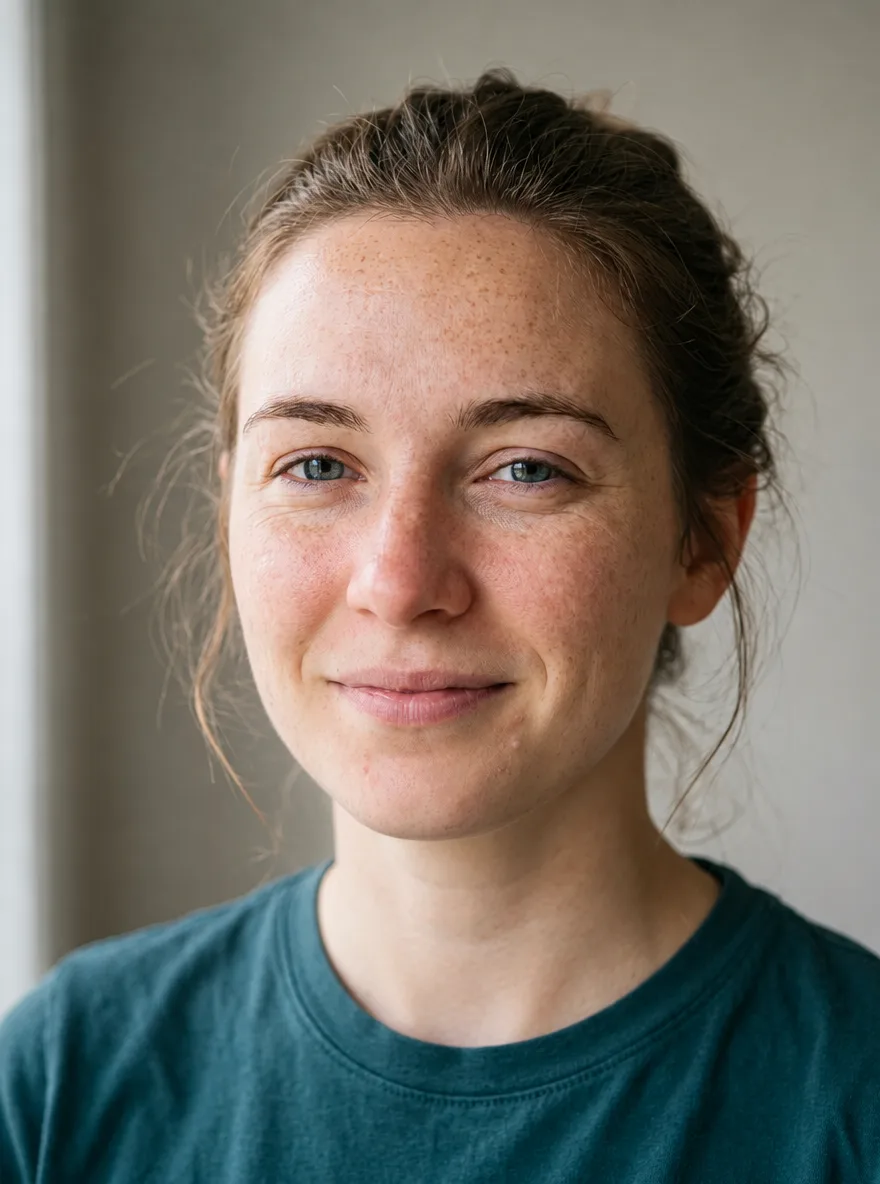
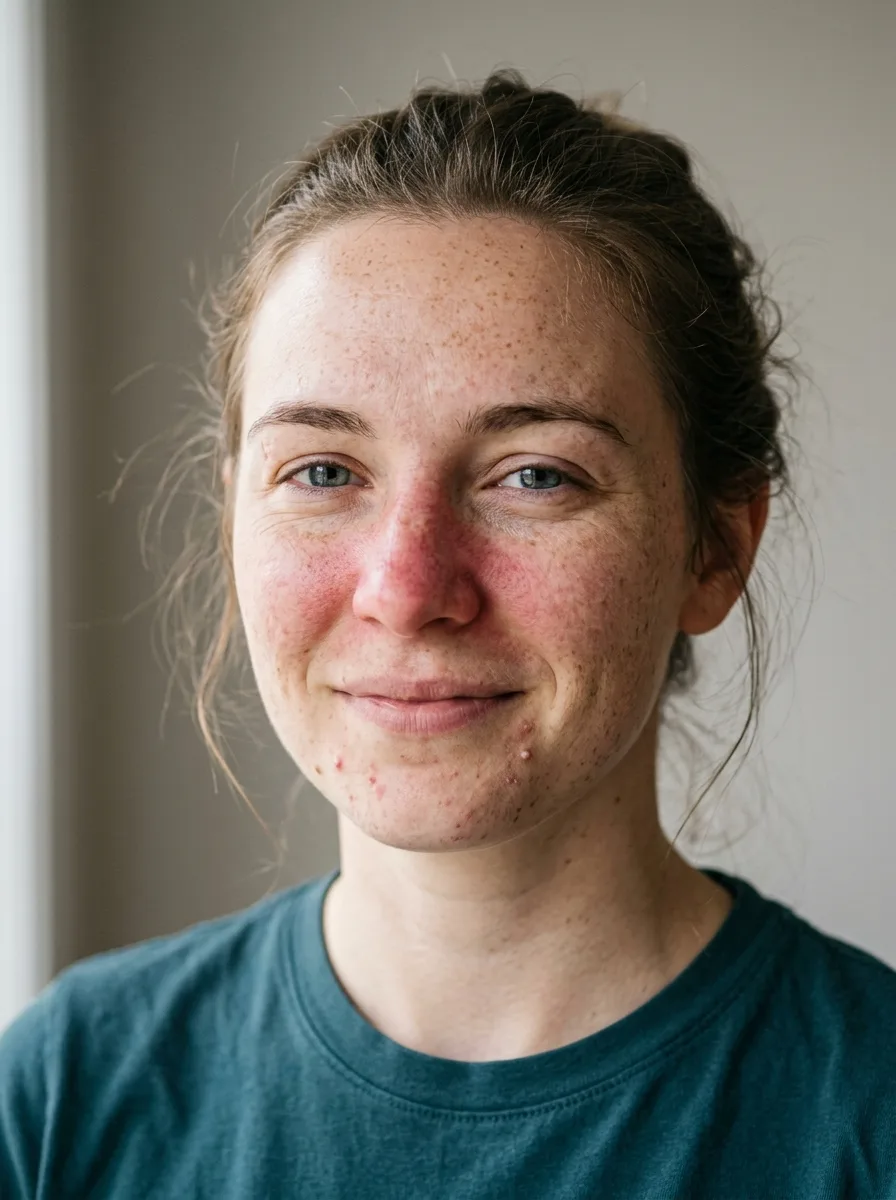
GPT Image 2.6 Natural Skin Retouch
Retouch the skin on the face: reduce temporary redness and small blemishes while keeping the real pore texture, freckles and natural skin tone variation. No plastic smoothing. Keep the face shape, features, expression and lighting exactly as they are.
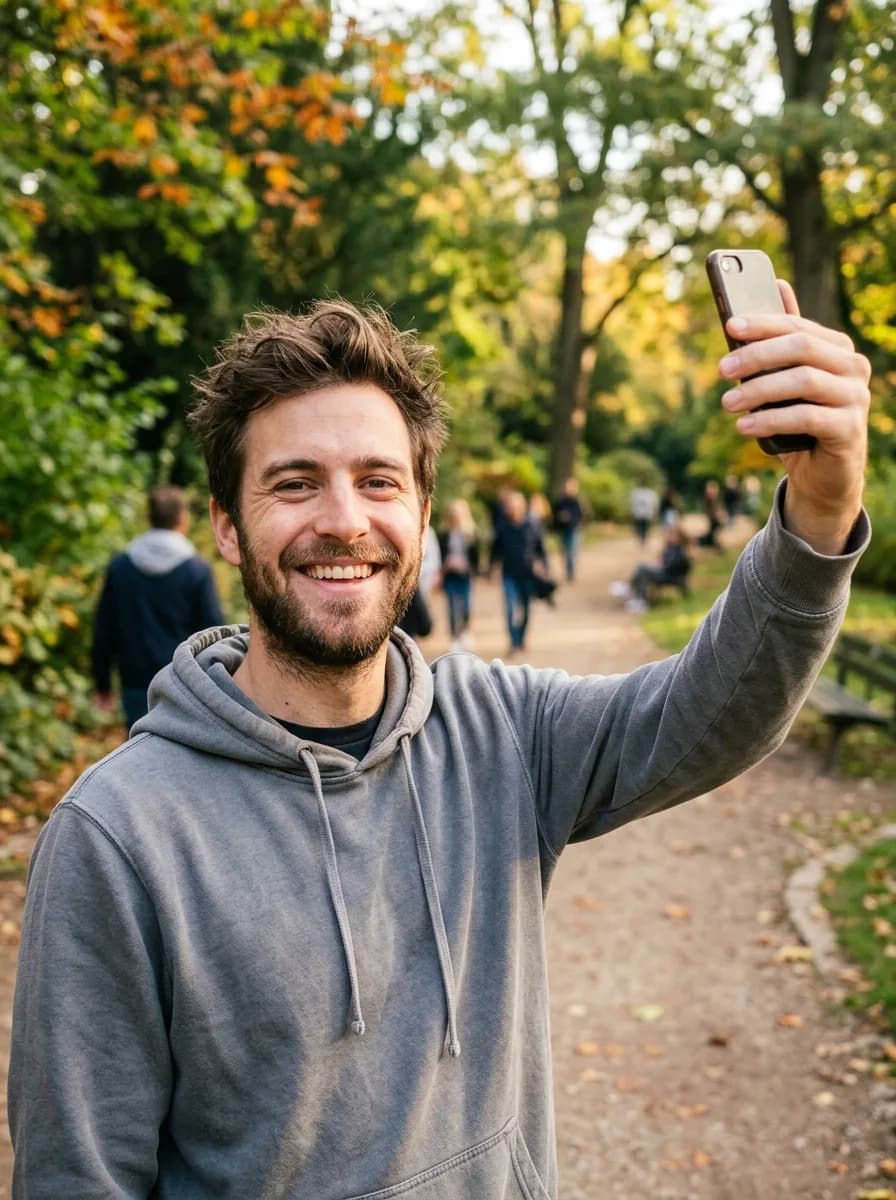
Before 
GPT Image 2.6 Casual Photo to Business Headshot
Turn this into a professional business headshot. Keep the person's face, features, hairstyle and expression exactly the same. Replace the background with a smooth mid-gray studio backdrop, dress the person in a navy blazer over a white shirt, and use soft key light from the front left. Sharp focus on the eyes.
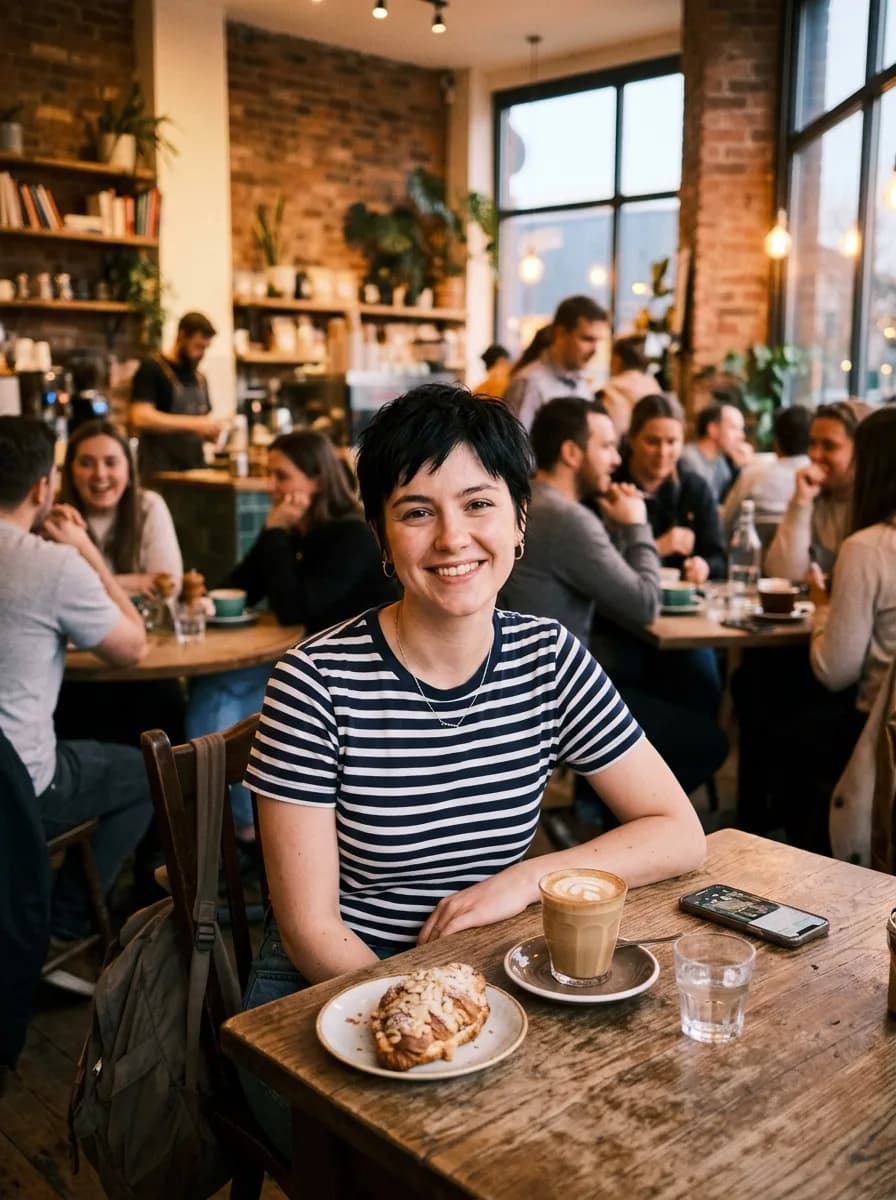
Before 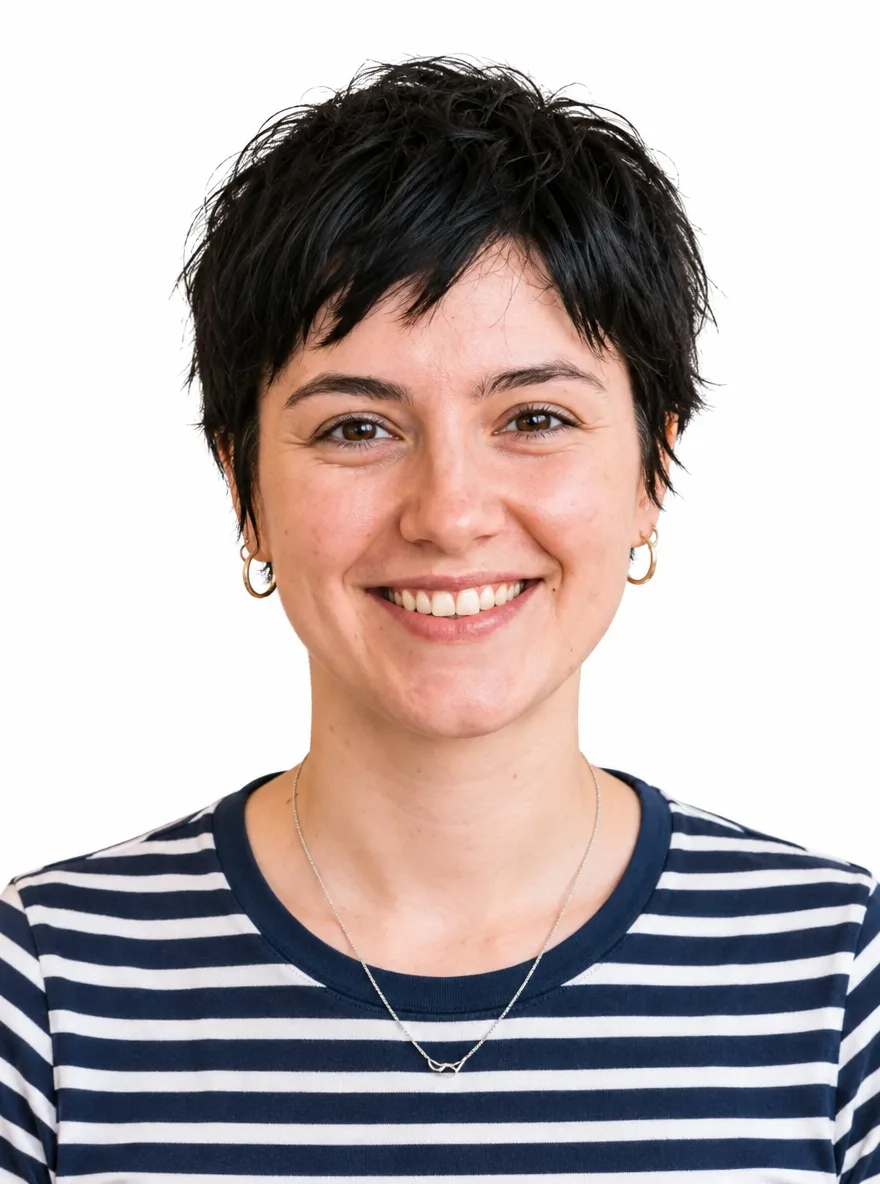
GPT Image 2.6 ID Photo with White Background
Turn this into a passport-style ID photo: a front-facing head-and-shoulders crop on a plain white background, with even lighting and no shadows on the face or background. Keep the person's face, features, hairstyle and skin tone exactly the same.
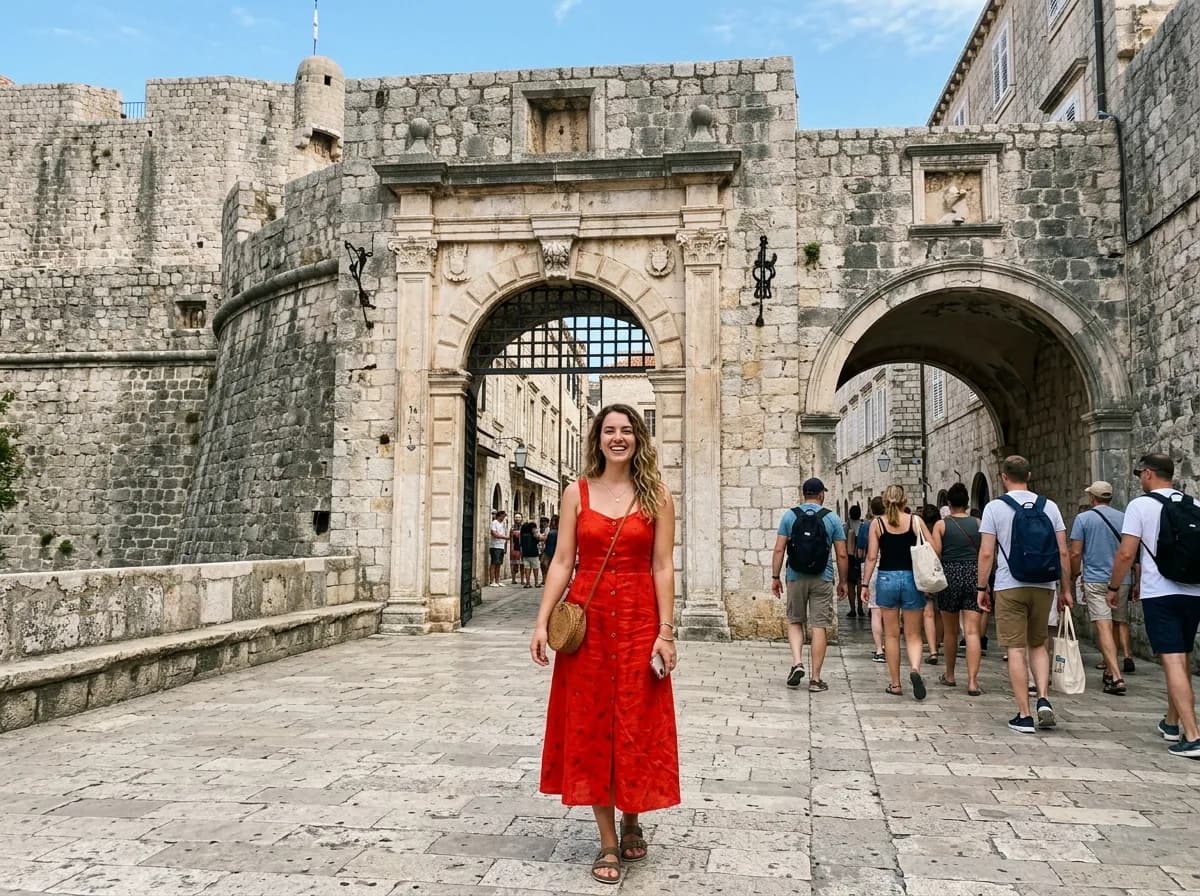
Before 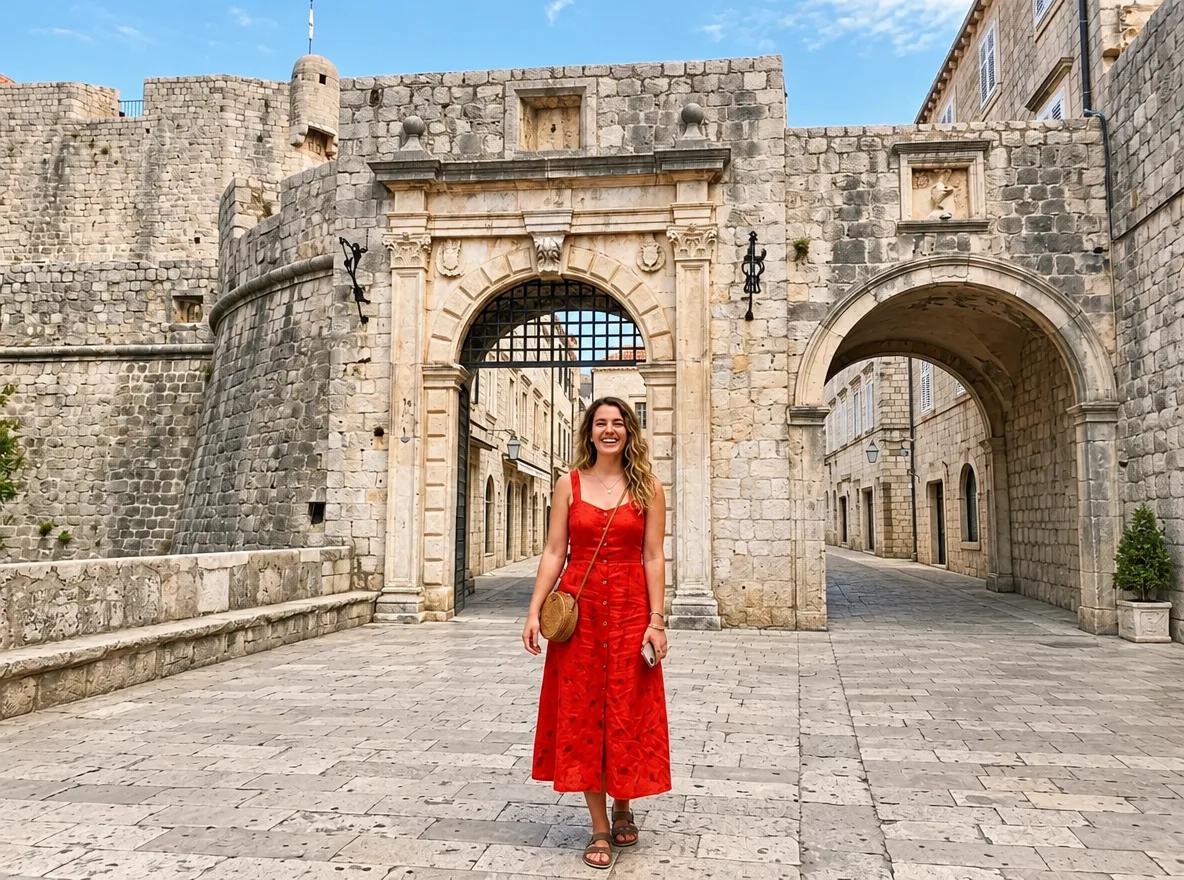
GPT Image 2.6 Remove People from the Background
Brush the area to edit first
Remove the people in the marked area and rebuild the background behind them so the scenery, lighting and perspective continue naturally, with no blur, smears or leftover shadows. Keep the main subject and everything outside the marked area unchanged.
Sales and seasonal campaigns
The seasonal prompts change only the set, props and light. When you want text on the image, keep it short, put it in quotes and ask for exact spelling. The discount update came back reading 35% OFF, as asked.
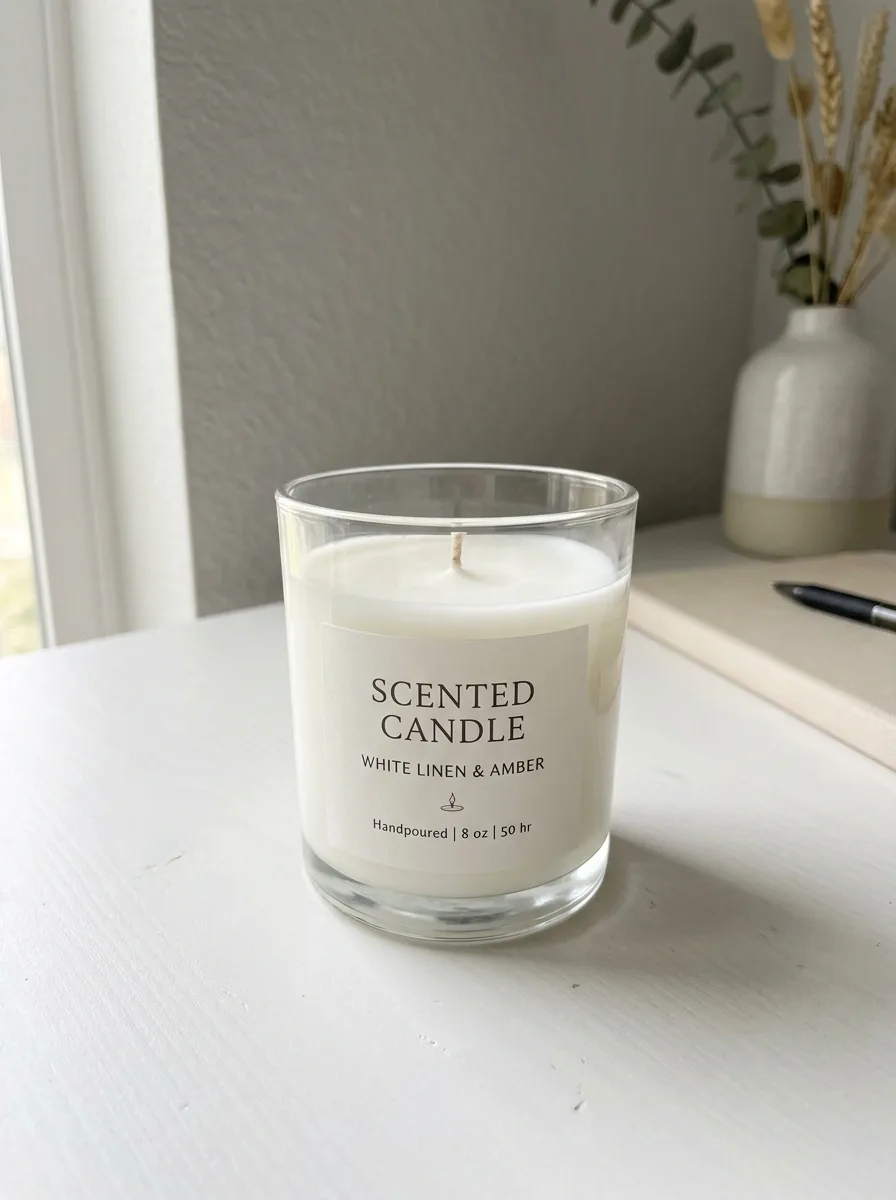
Before 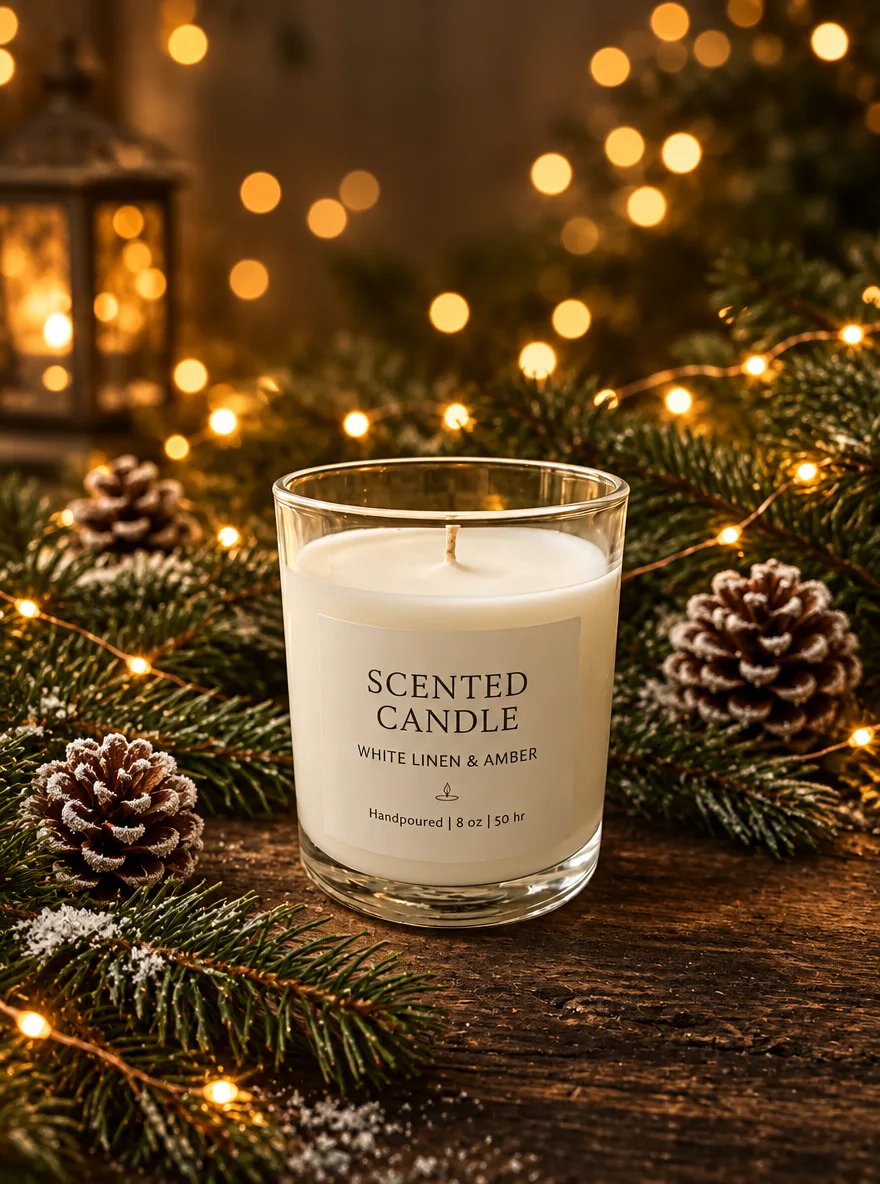
GPT Image 2.6 Christmas Pine and Warm Bokeh
Keep the product unchanged. Place it on dark rustic wood surrounded by fresh pine branches and a few frosted pinecones, with golden fairy lights forming warm, round bokeh in the background. Cozy, premium Christmas campaign look.
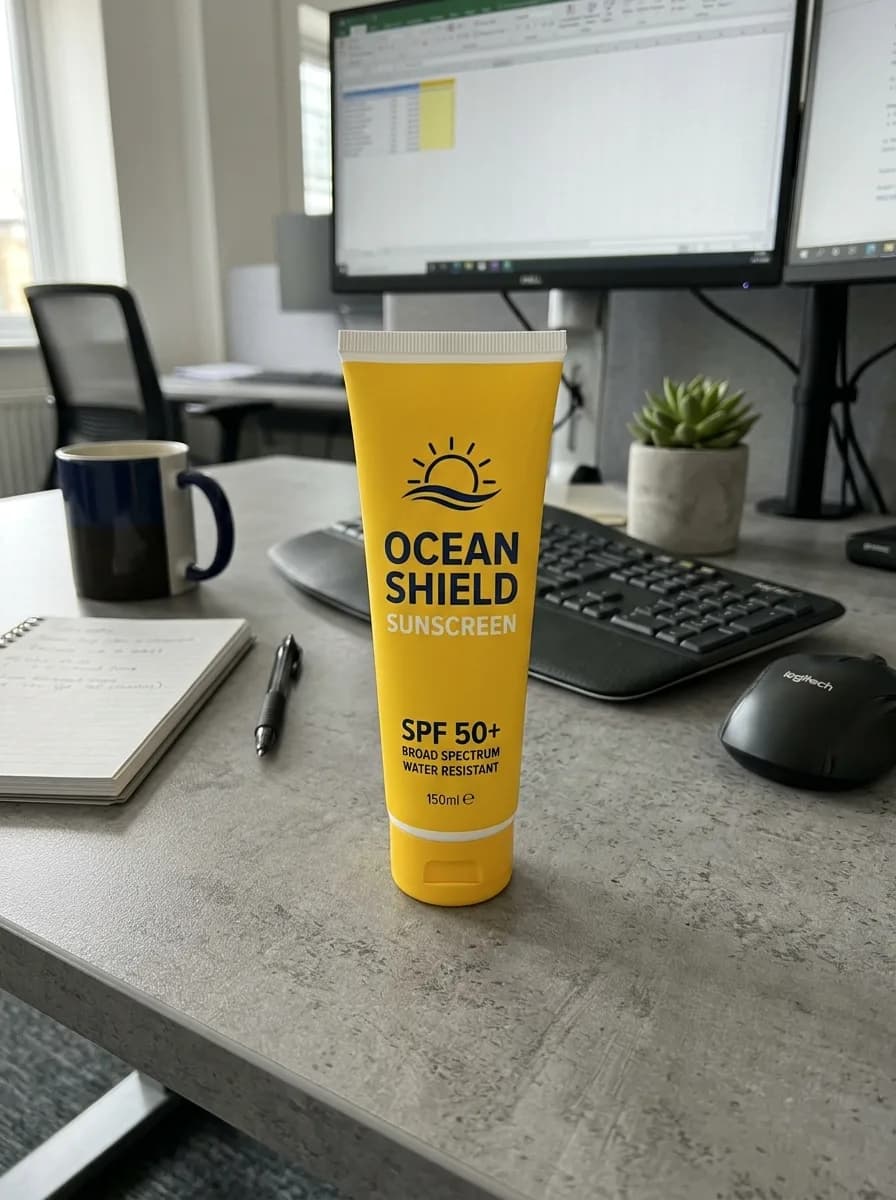
Before 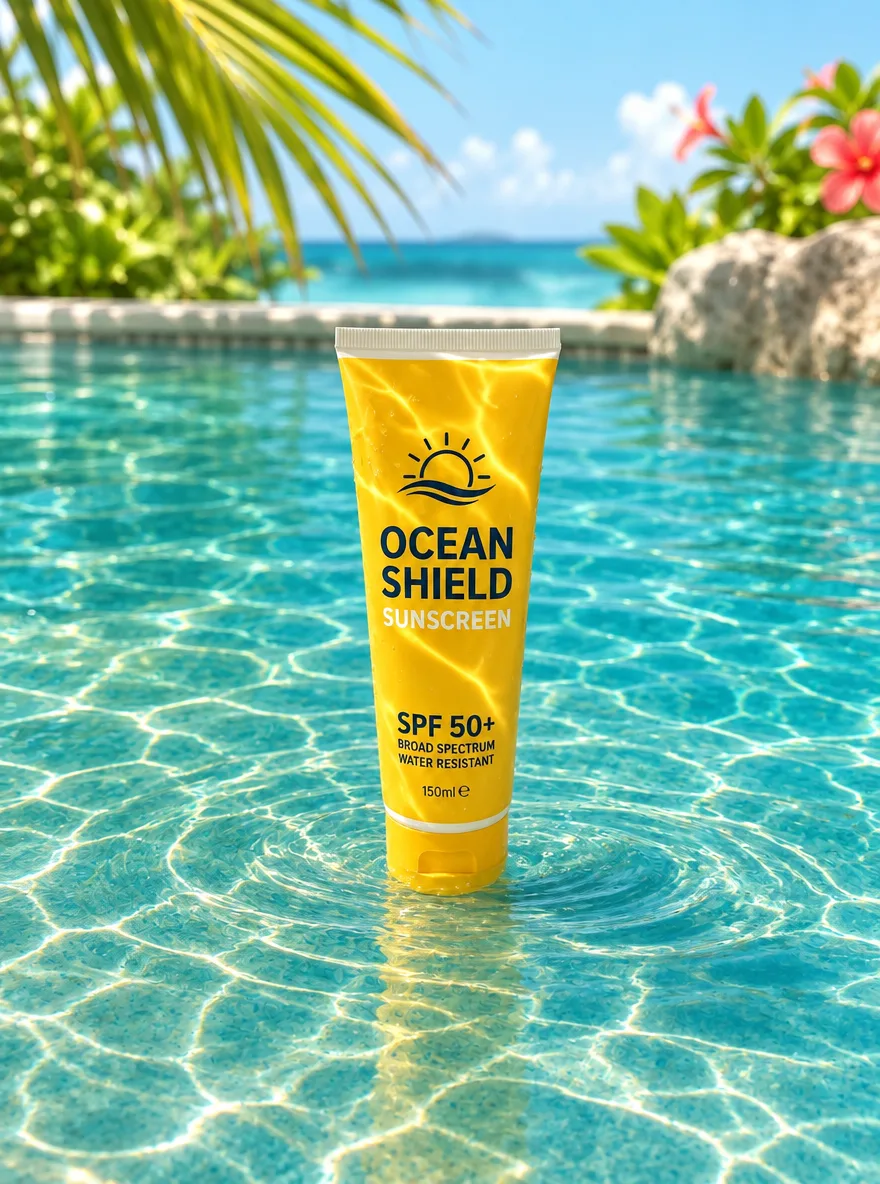
GPT Image 2.6 Summer Pool Water and Caustics
Keep the product unchanged. Place it standing in shallow, crystal-clear turquoise pool water, with dancing sunlight caustics across the product and gentle ripples around its base. Bright tropical sunlight, refreshing summer campaign look.
Before 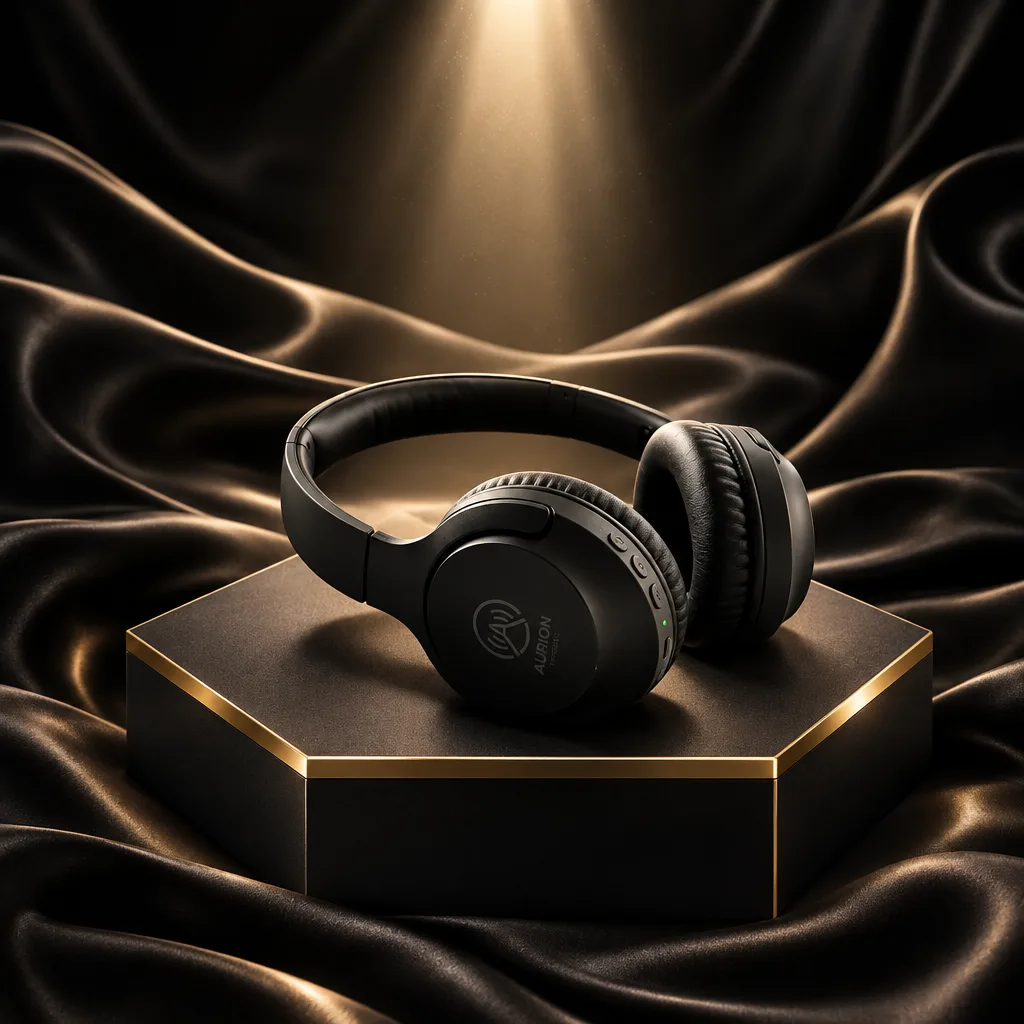
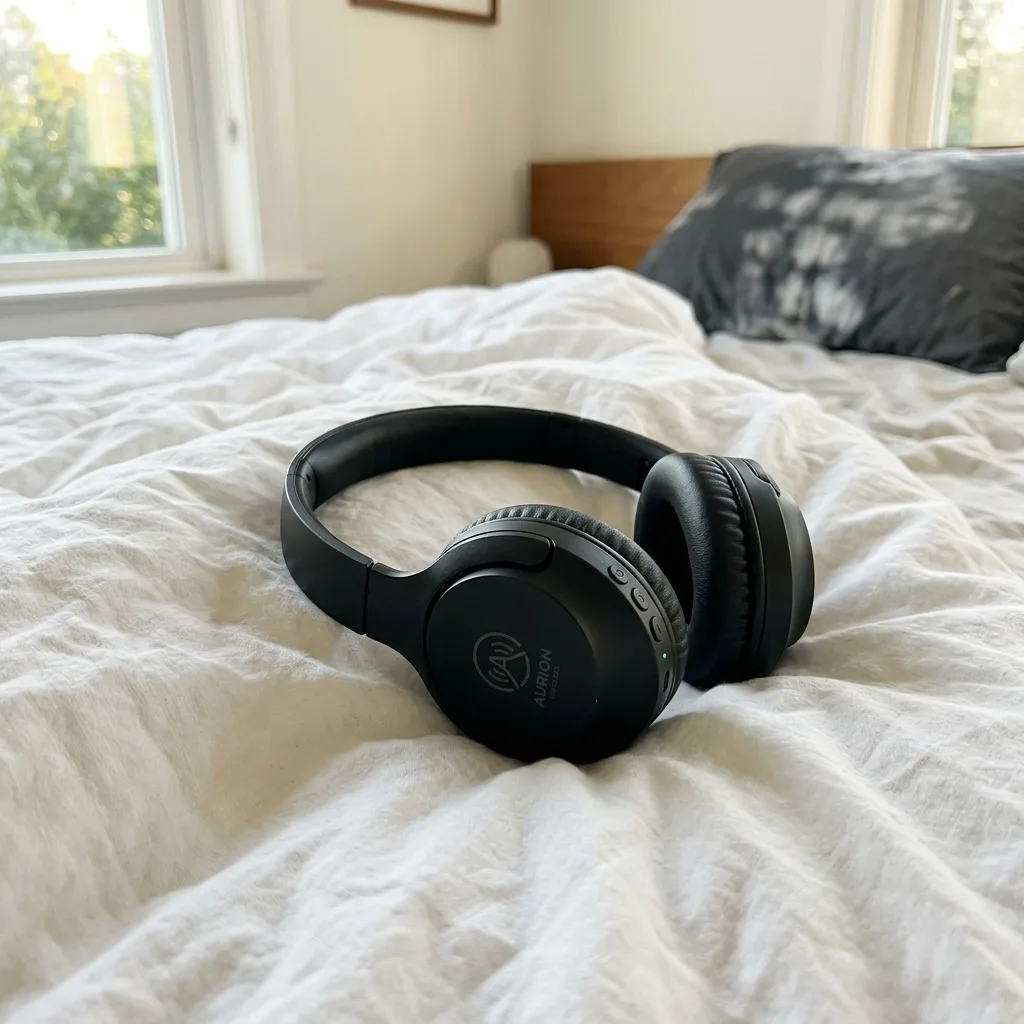
GPT Image 2.6 Black Friday Black-and-Gold Pedestal
Keep the product unchanged. Place it on a matte black hexagonal pedestal with polished brass edges, with flowing dark satin fabric in the background and a dramatic spotlight from above. Luxurious Black Friday campaign look, premium commercial photography. Do not add any text.
Before 
GPT Image 2.6 Turn a Product Photo into a Sale Poster
Turn this product photo into a sale poster. Keep the product unchanged and centered. Add the headline "SUMMER SALE" at the top and "50% OFF" below the product in a bold, clean sans-serif, on a bright coral background with simple geometric shapes. Spell the text exactly as given.

Before 
GPT Image 2.6 Update the Discount on a Promo Graphic
Change the discount to "35% OFF" wherever it appears. Keep the typeface, colors, layout, product photo and every other word exactly as they are.
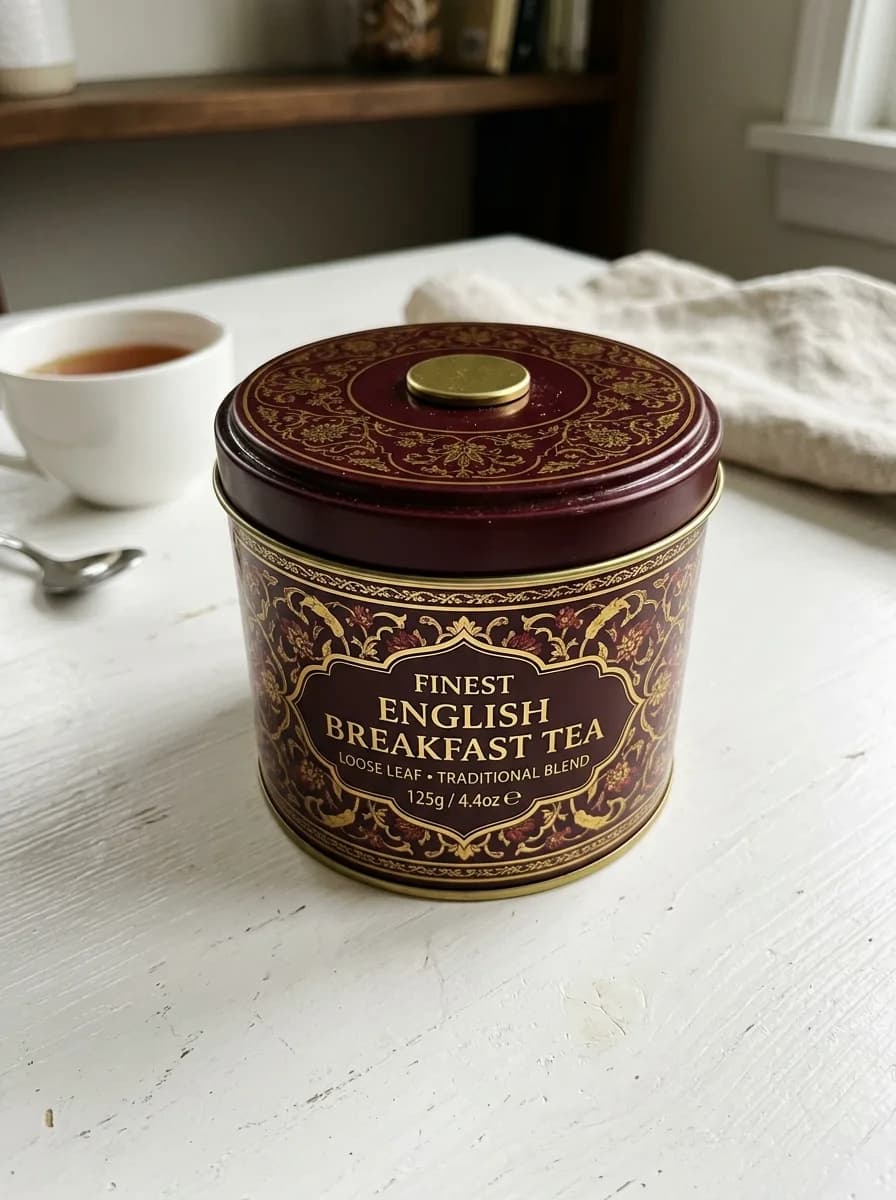
Before 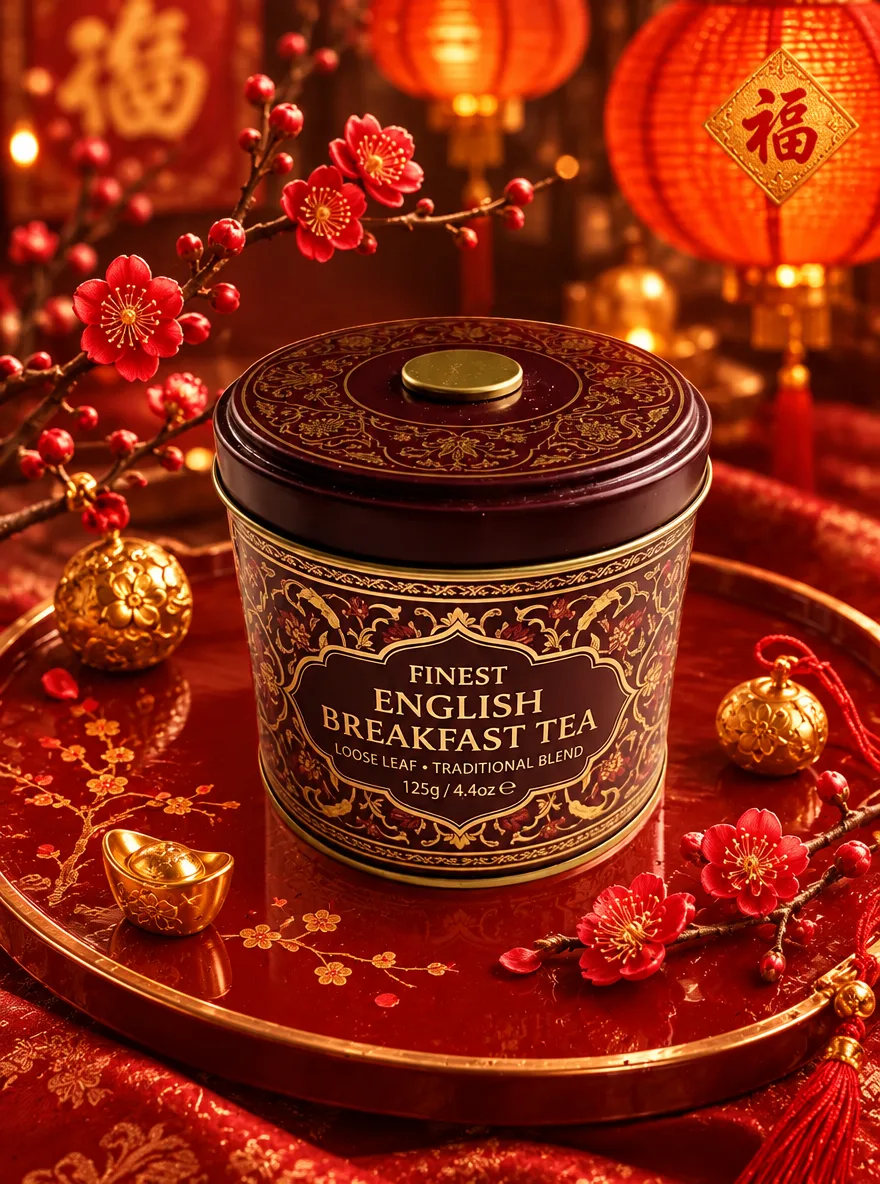
GPT Image 2.6 Lunar New Year Red and Gold
Keep the product unchanged. Place it on a red lacquer tray with plum blossom branches and small gold ornaments around it, and blurred red paper lanterns glowing in the background. Warm, festive Lunar New Year campaign look with rich red and gold tones.
Photo restoration
Ask it to fix the damage, fading, blur or darkness and to leave faces and composition alone. On the old print, the prompt says to keep the original composition, but GPT Image 2.6 cut off the white border and came back zoomed in. If you need the whole frame, check the edges.
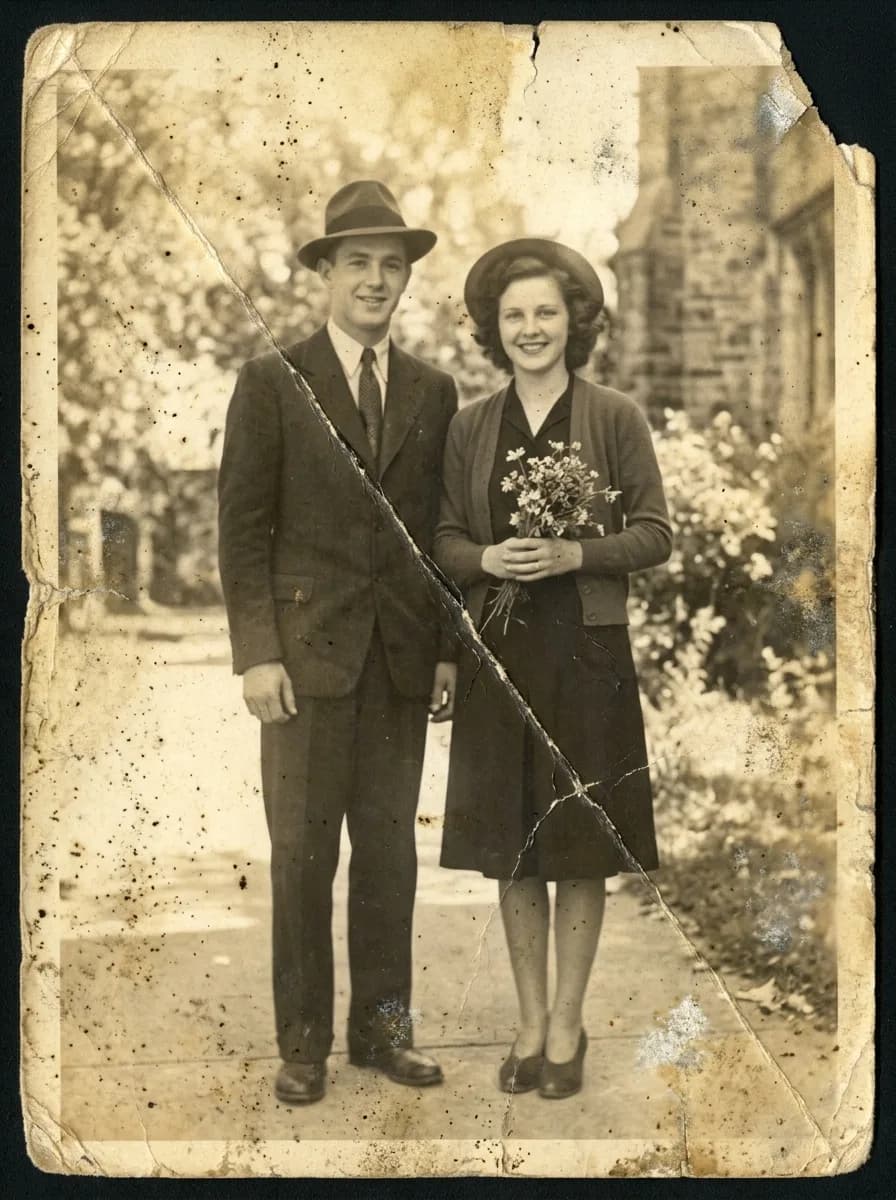
Before 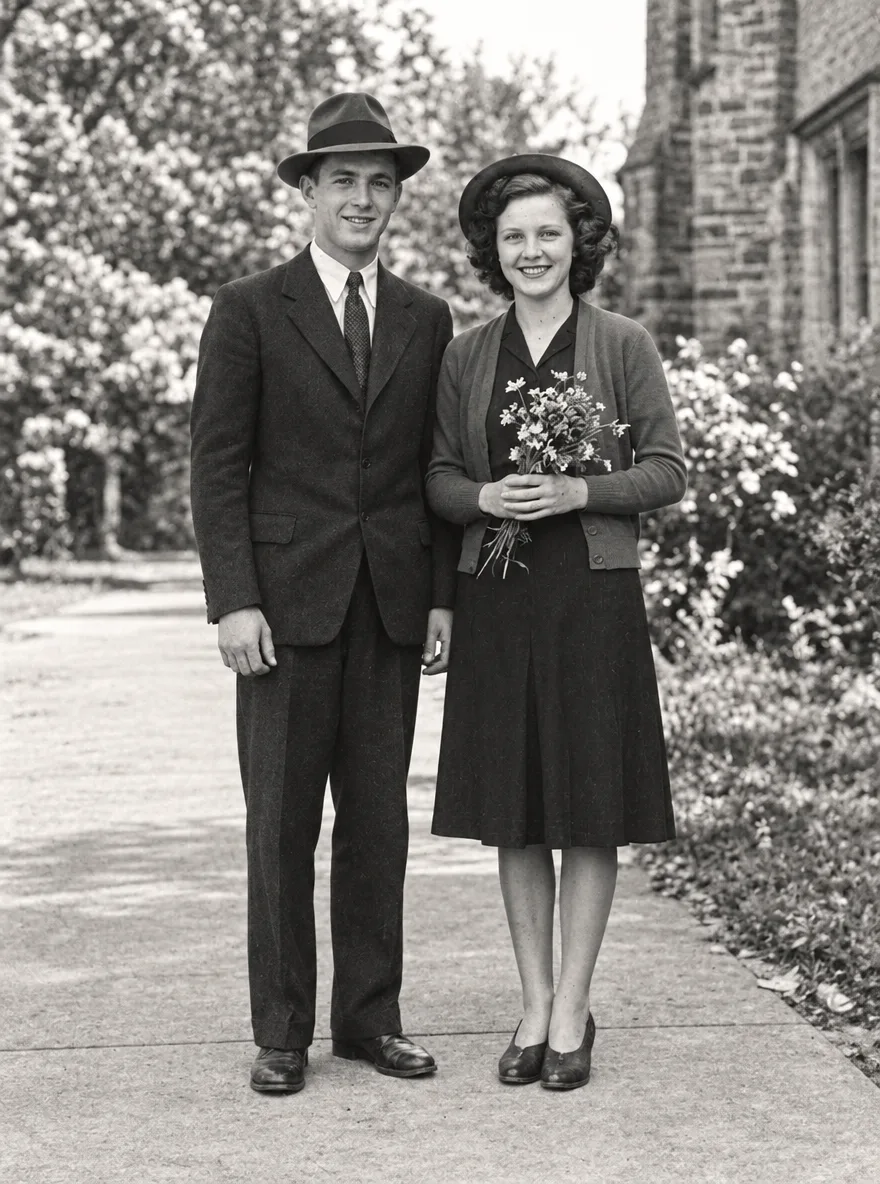
GPT Image 2.6 Restore a Faded Old Photo
Restore this old photograph: remove the yellow age cast, dust spots, scratches and fold creases, and bring back clear, natural detail in the faces and eyes. Keep the people's features, expressions, clothing and the original composition unchanged. Clean archival quality with natural contrast.
Before 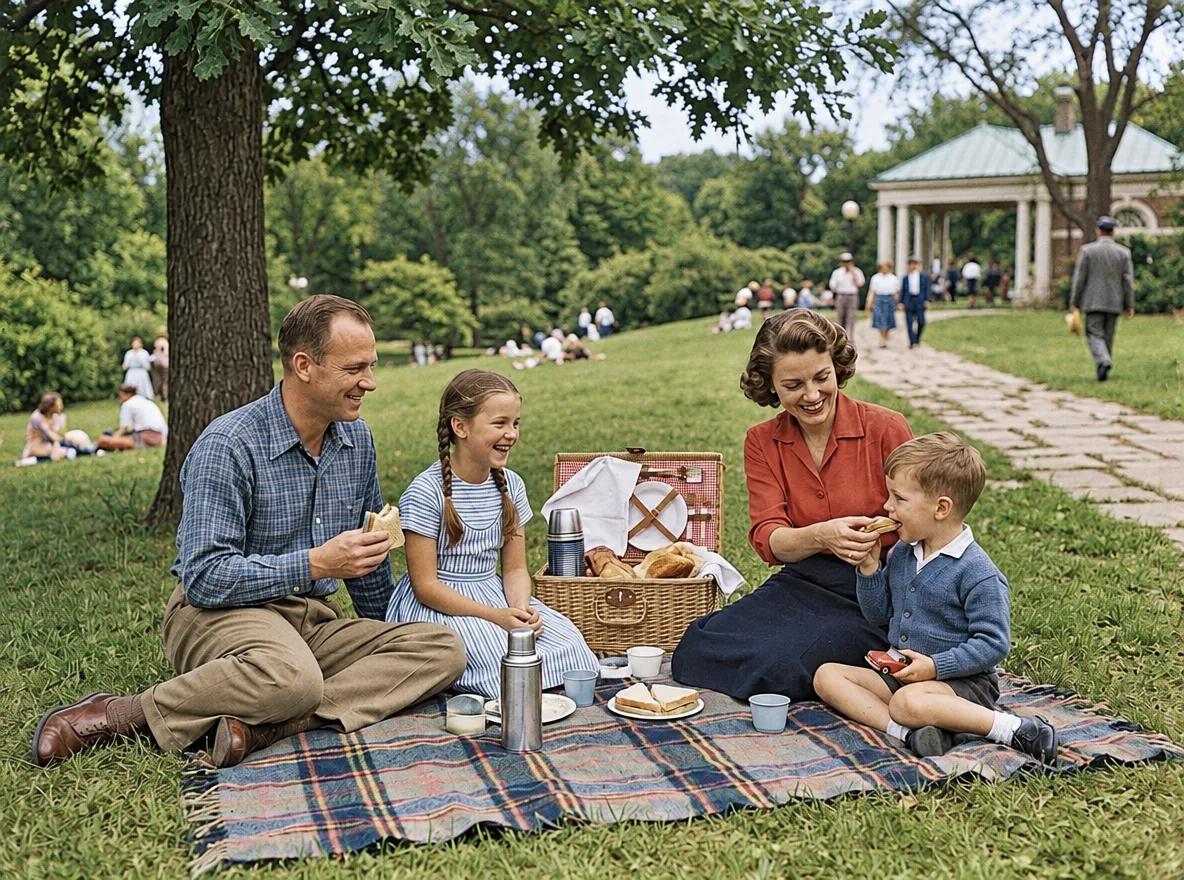
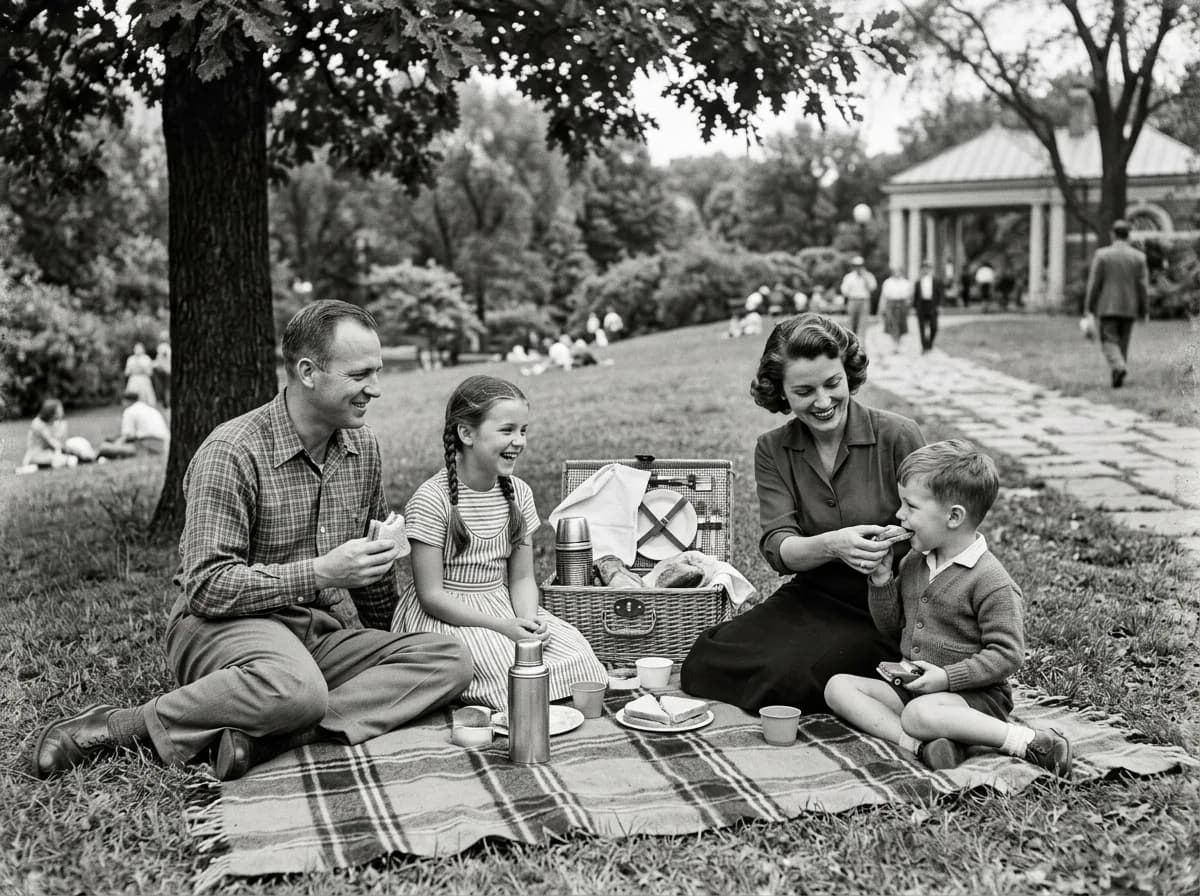
GPT Image 2.6 Colorize a Black-and-White Photo
Colorize this black-and-white photo with natural, period-accurate colors: realistic skin tones, clothing and surroundings. Keep every detail, the grain structure and the composition exactly as they are; only add color. Avoid oversaturated or uniform tints.
Before 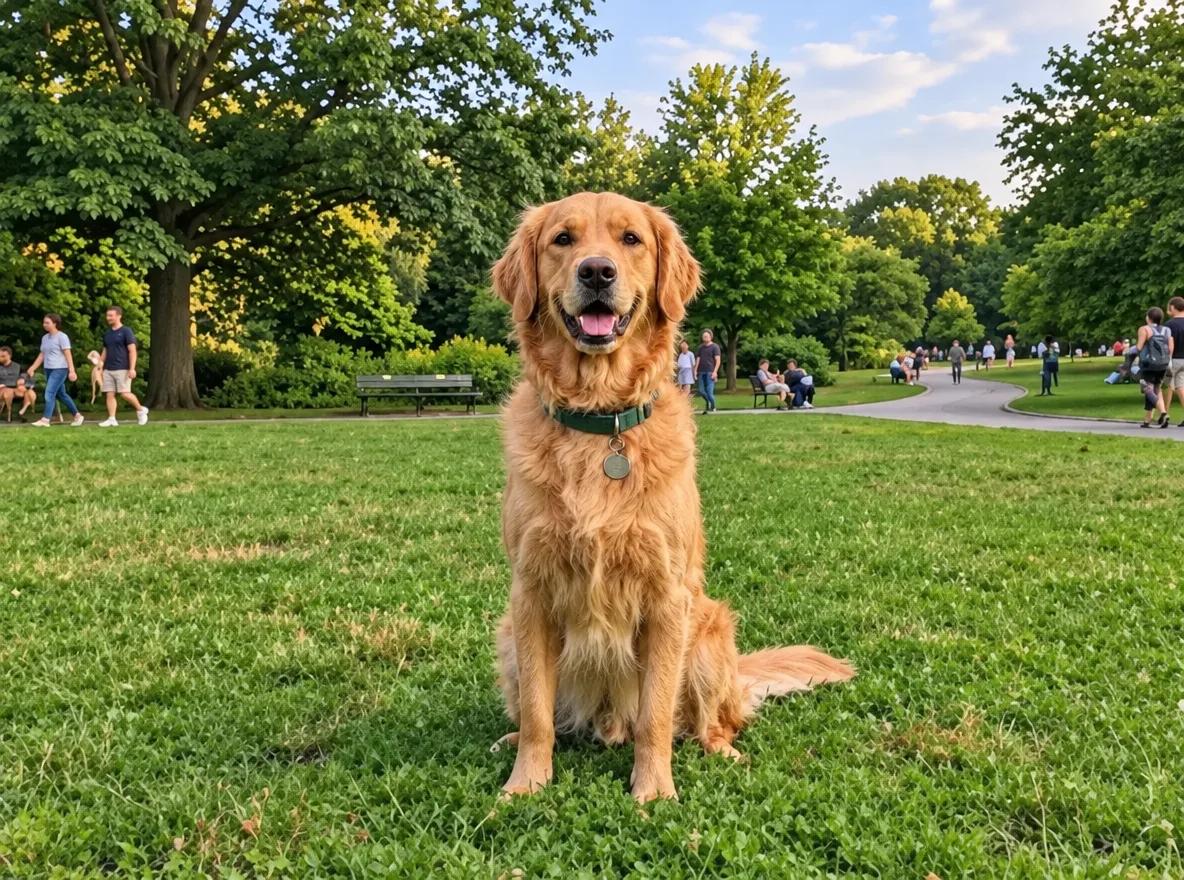
GPT Image 2.6 Fix Blur and Noise
Sharpen this blurry, noisy photo: remove motion blur and grain, and recover crisp edges and fine texture. Keep the subject, colors, lighting and composition exactly the same. Do not add new details or change any shapes.
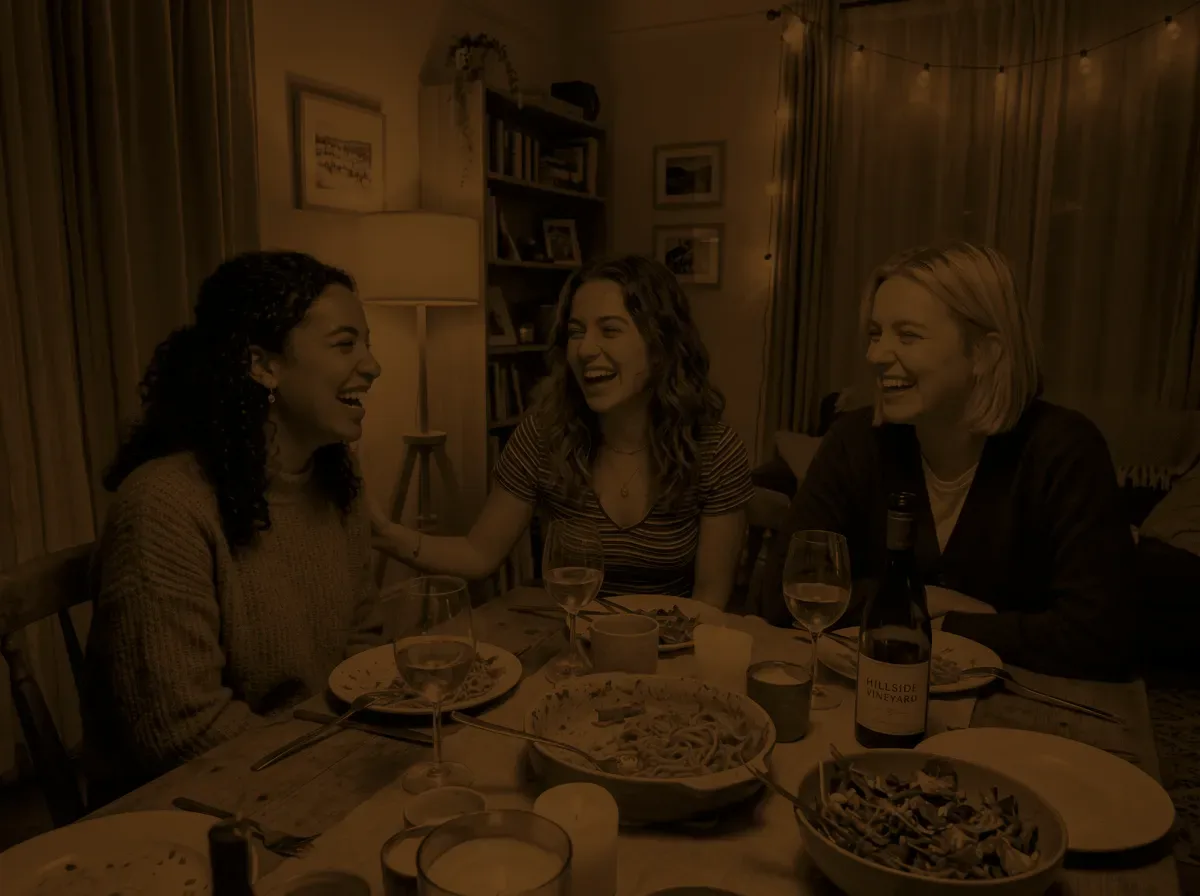
Before 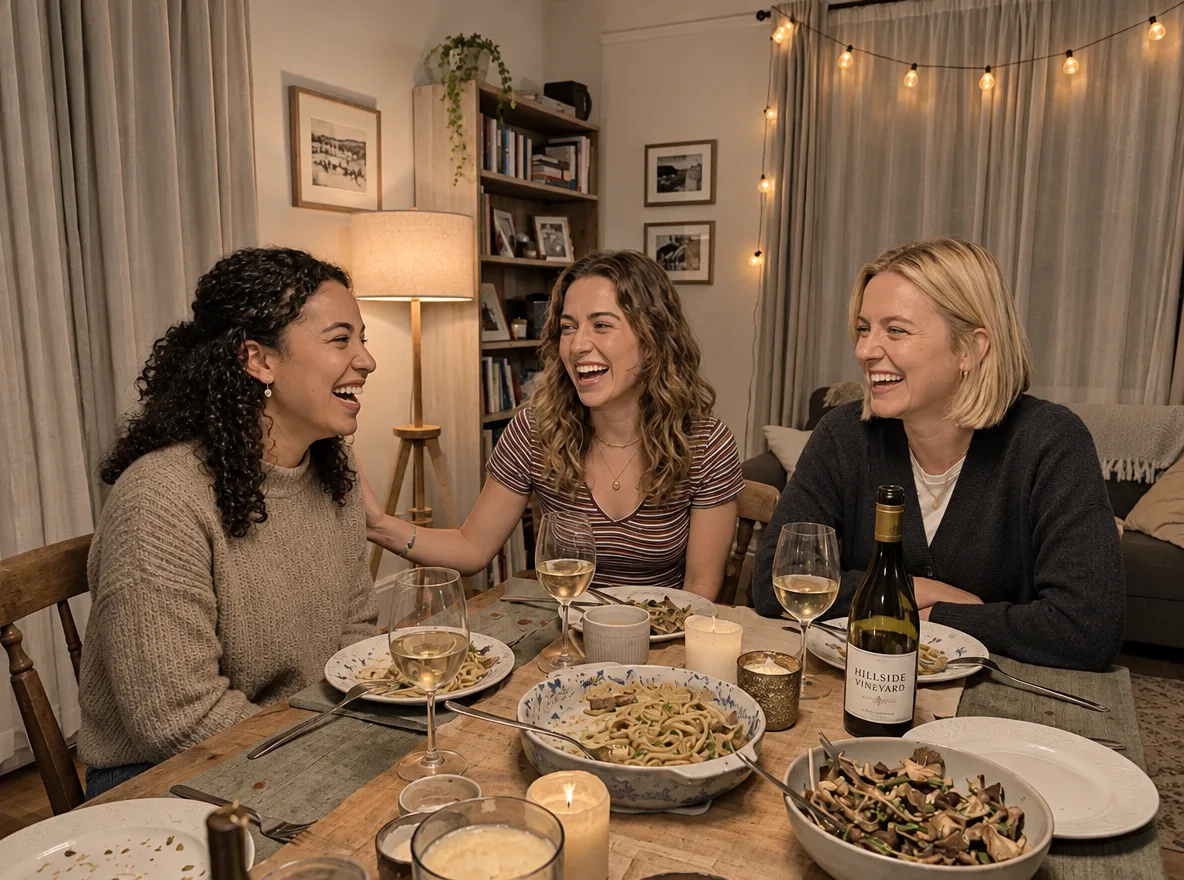
GPT Image 2.6 Brighten an Underexposed Photo
Fix this underexposed photo: raise the exposure so the faces and the table are clearly visible, recover detail in the shadows, neutralize the color cast and reduce noise. Keep the scene, people and composition exactly the same, and keep the light looking natural.
Creative styles
These turn a photo into a figure, a watercolor, a clay character or a render. On the collectible figure GPT Image 2.6 wrote clean text on the box, and also printed a real toy maker's logo (blurred here).
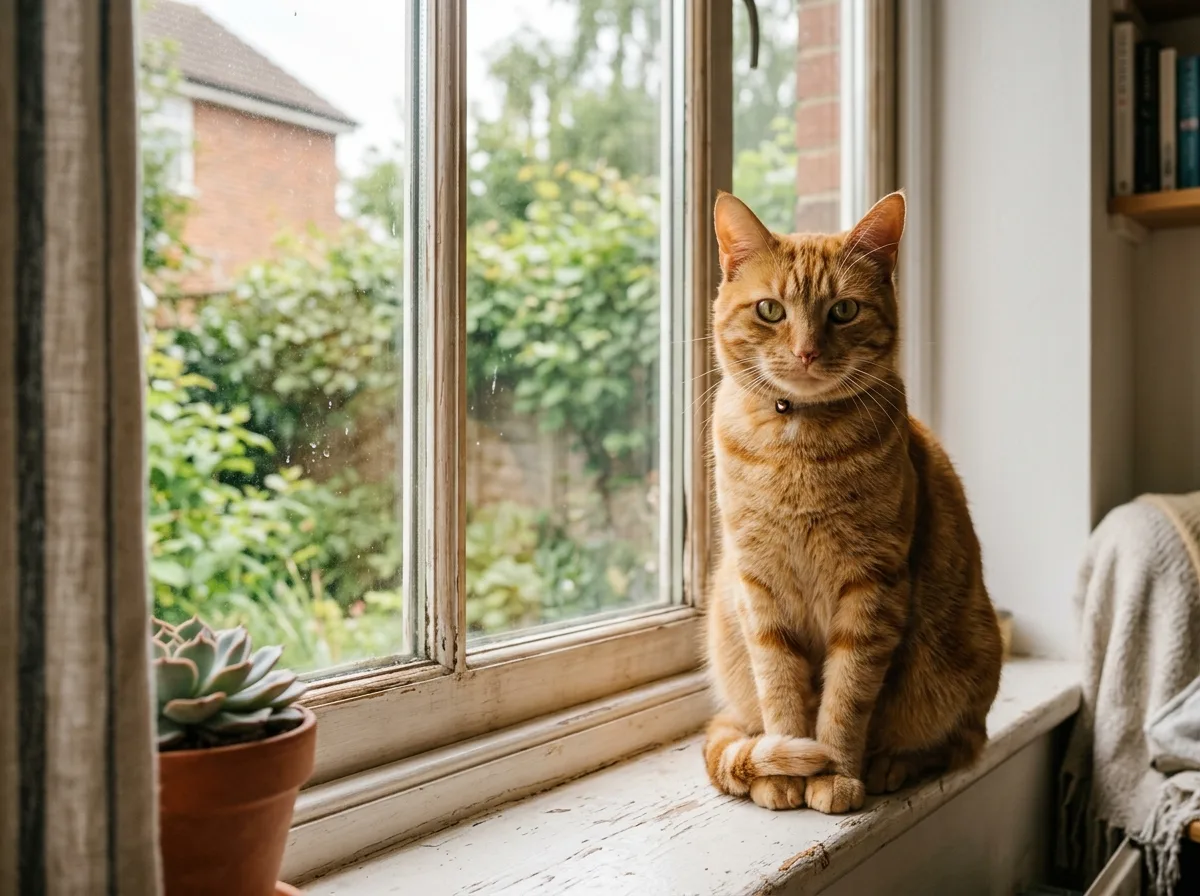
Before 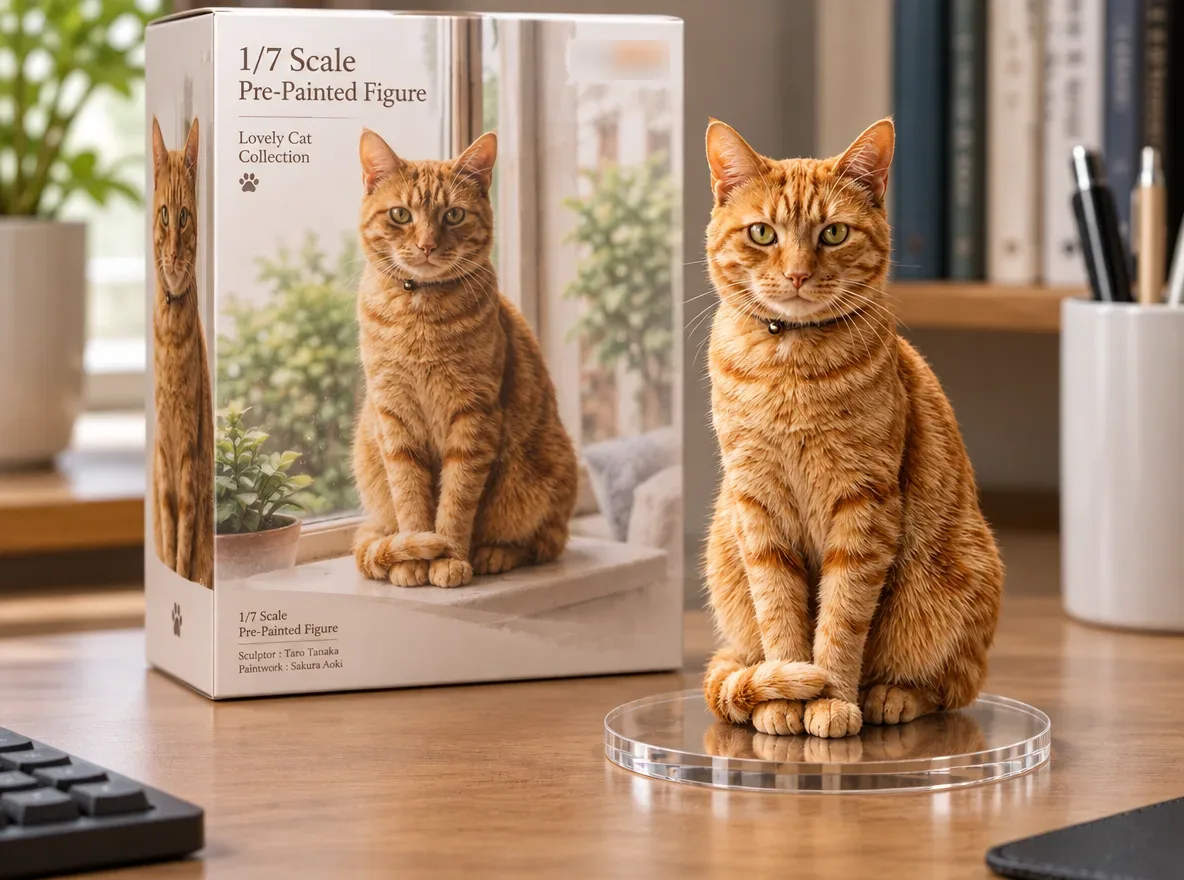
GPT Image 2.6 Turn Your Pet into a Collectible Figure
Turn the animal in this photo into a 1/7 scale collectible figure standing on a round clear acrylic base on a computer desk. Behind it, place a toy packaging box printed with the same character. Keep the animal's markings, colors and pose. Realistic studio product photo with soft light.

Before 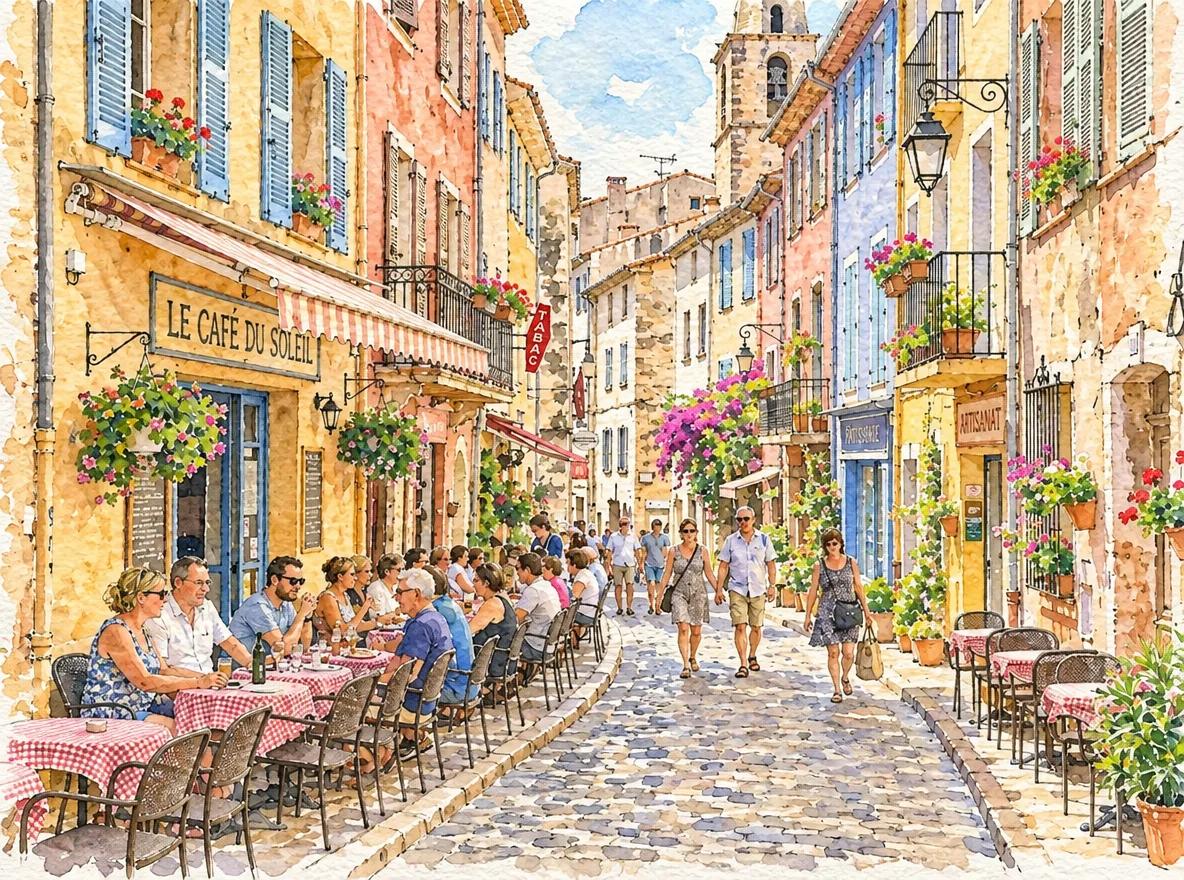
GPT Image 2.6 Photo to Watercolor Illustration
Redraw this photo as a loose watercolor illustration on textured paper, with soft color washes, visible brush strokes and fine ink outlines. Keep the composition, buildings and main shapes recognizable. Light, airy palette with white paper showing through.
Before 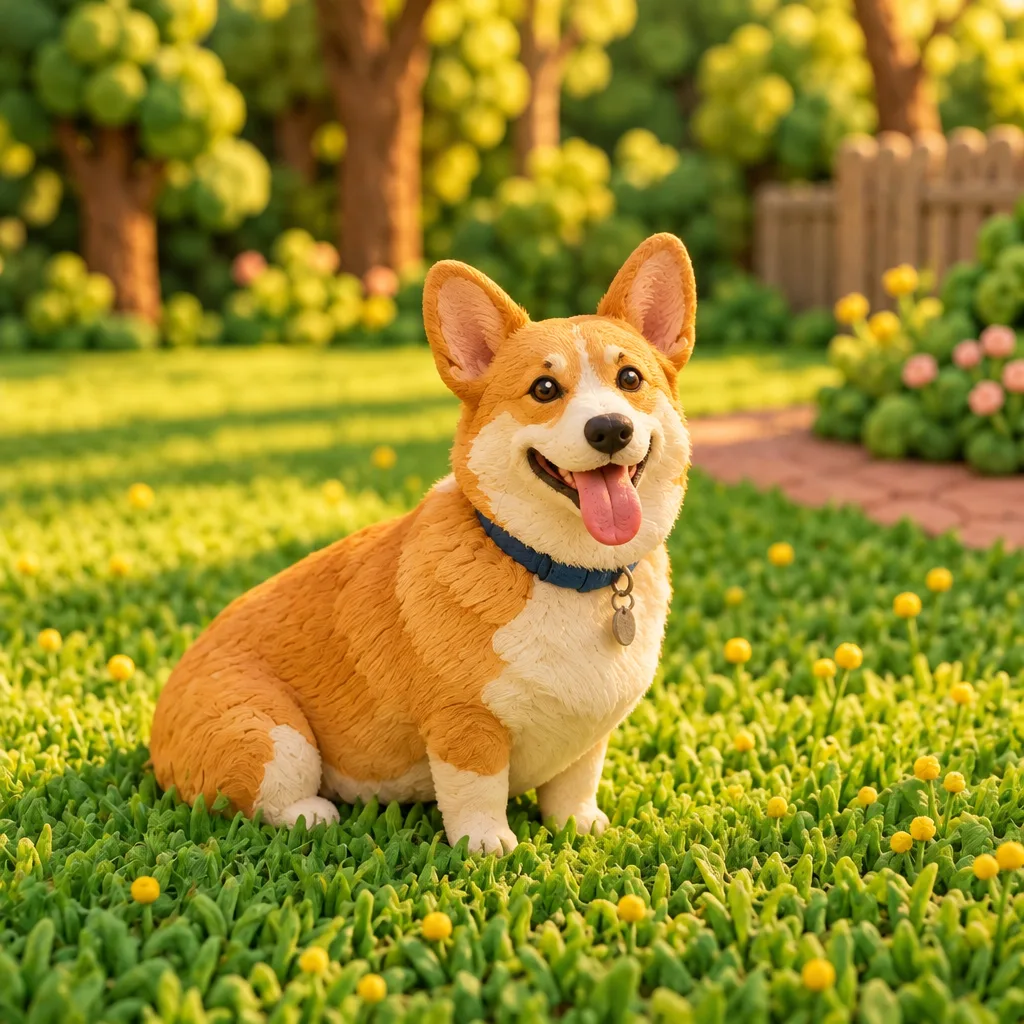
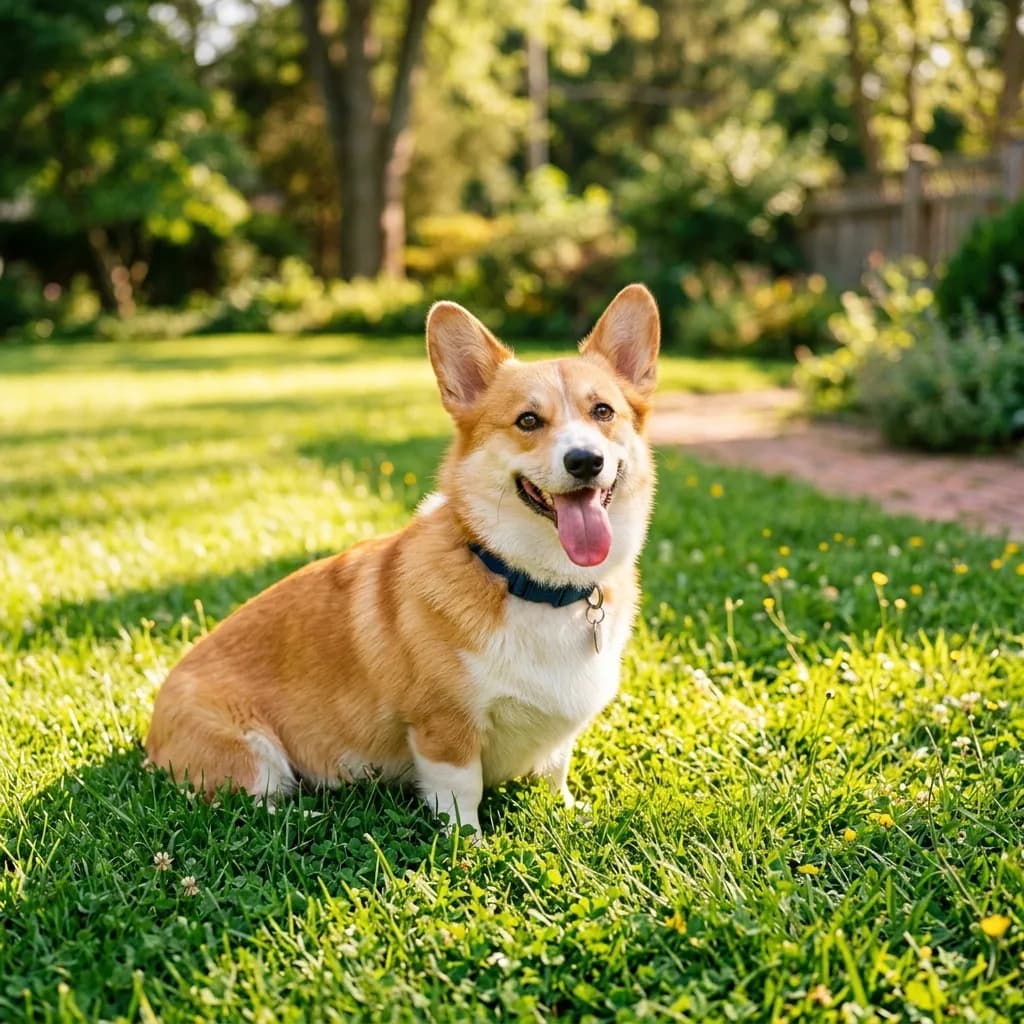
GPT Image 2.6 Photo to 3D Clay Character
Transform this photo into a handmade 3D clay animation style, with soft rounded shapes, visible fingerprint texture in the clay and a miniature set. Keep the subject's pose, colors and key features recognizable. Warm soft lighting, playful stop-motion look.
Before 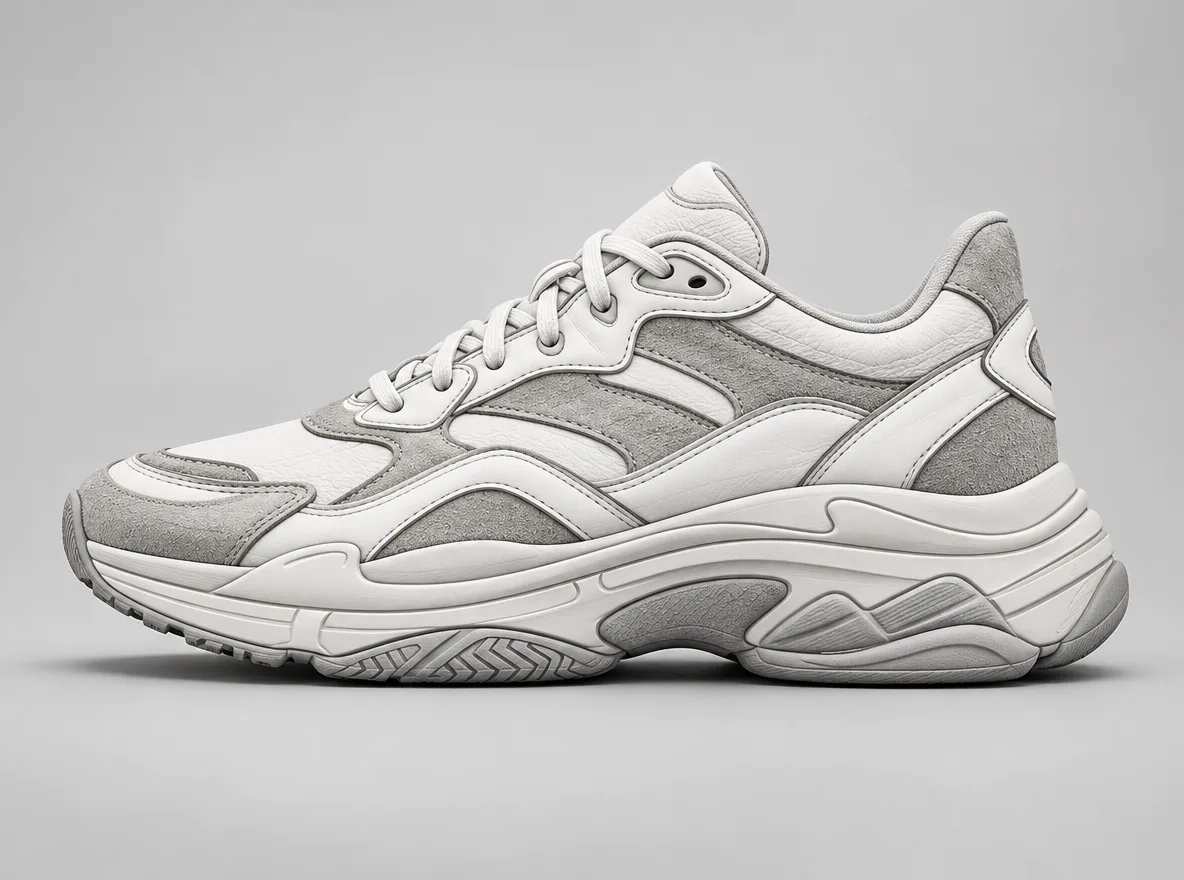
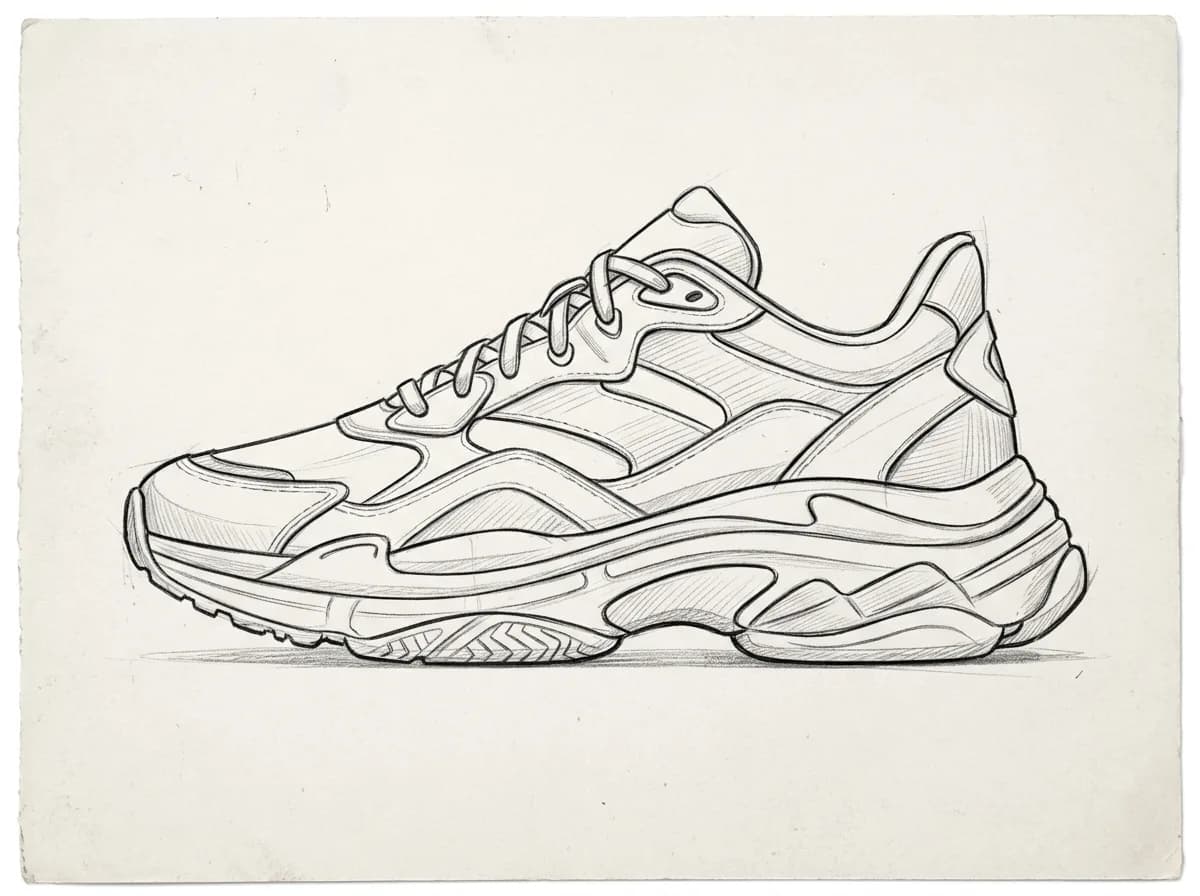
GPT Image 2.6 Sketch to Product Render
Turn this pencil sketch into a photorealistic product render. Follow the sketch's shape, proportions and details exactly. Use realistic materials: white leather upper, gray suede panels and a rubber sole, on a light gray studio background with soft shadows.
IMG_1 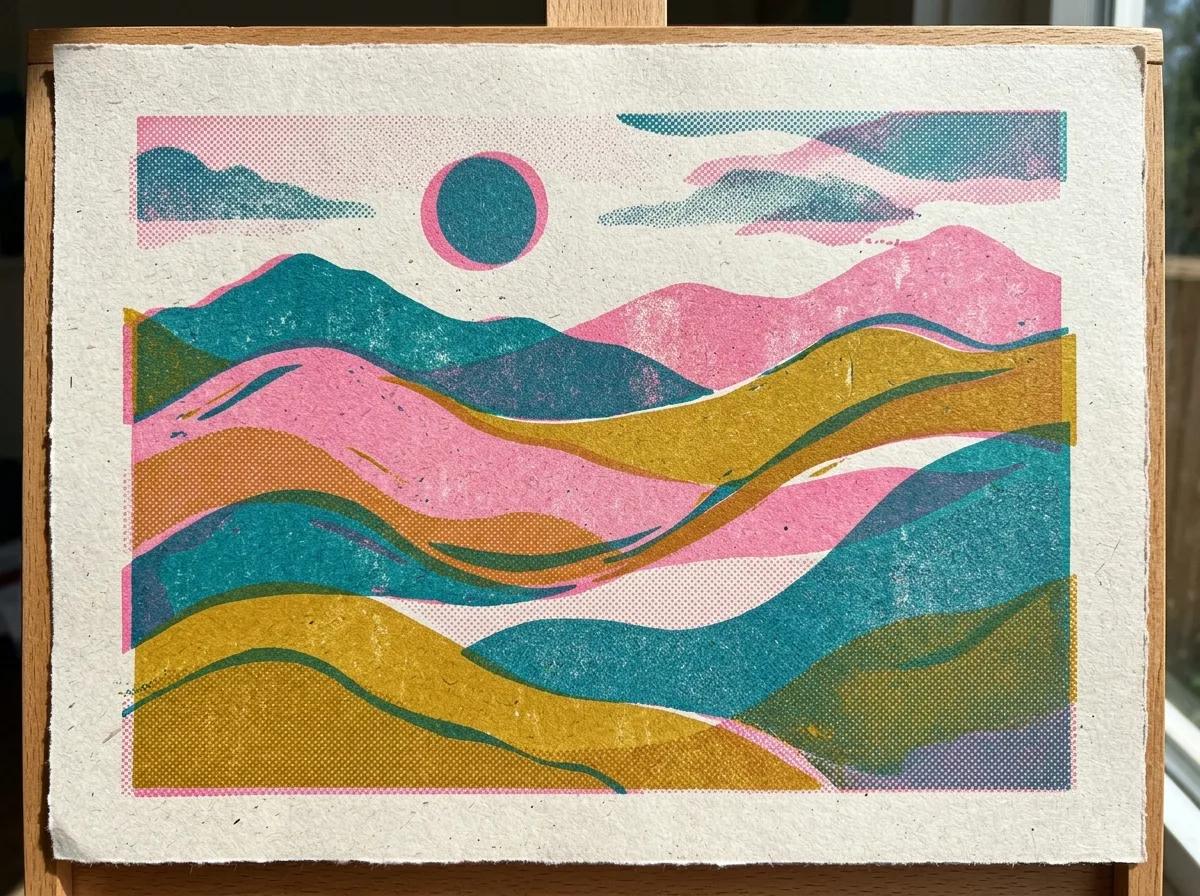
IMG_2 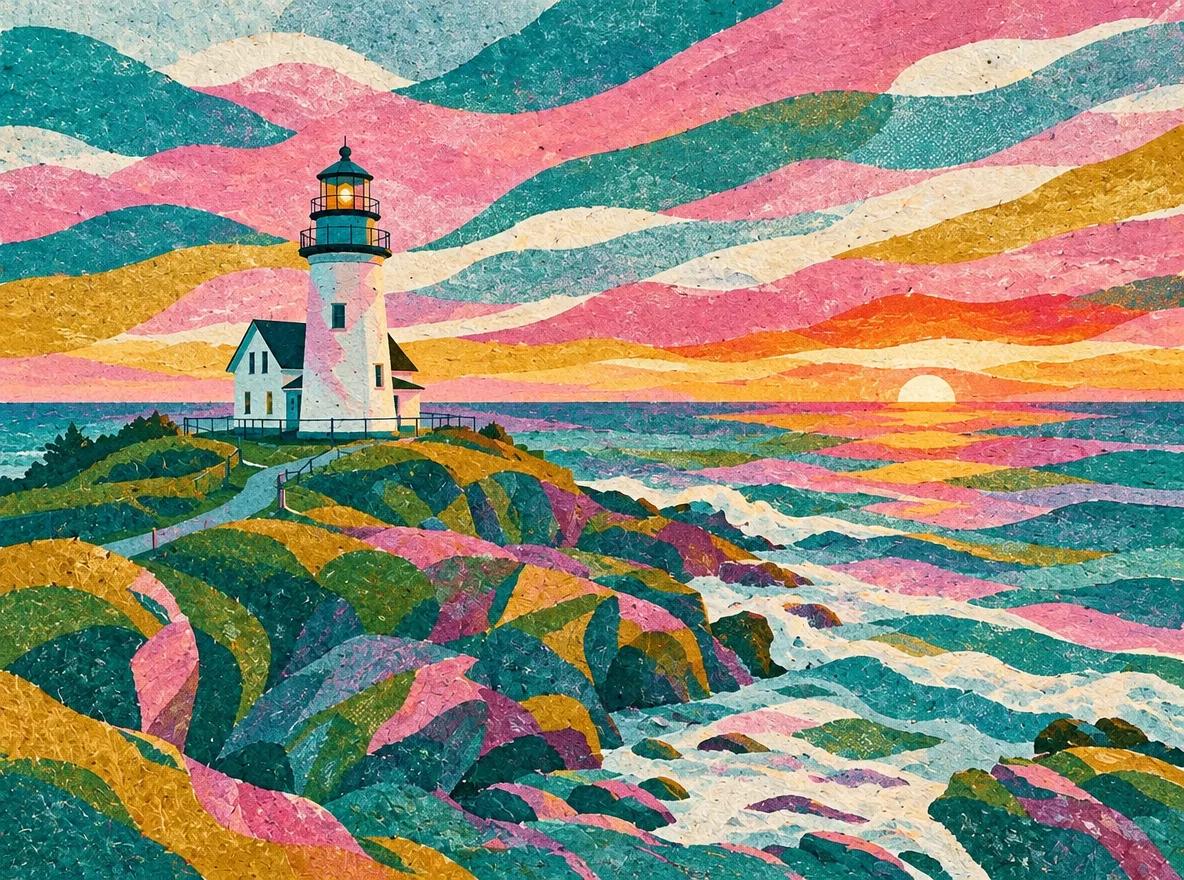
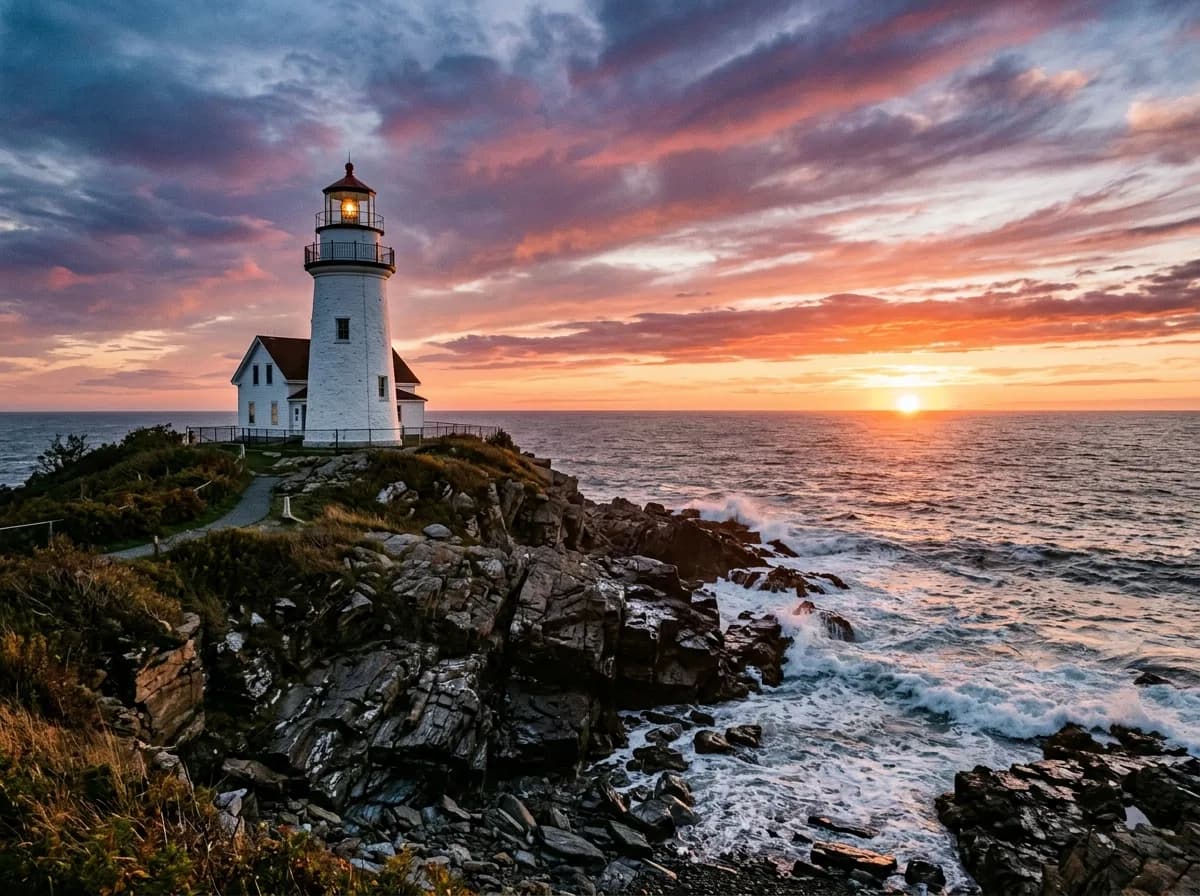
GPT Image 2.6 Borrow the Style of a Reference Image
Needs two photos, uploaded in order
Redraw IMG_1 in the visual style of IMG_2: use its color palette, texture and brushwork. Keep IMG_1's composition, subject and proportions intact. Do not copy any objects from IMG_2.
Frequently asked questions
Do these prompts work in ChatGPT?
They should: ChatGPT Images 2.6 is the same model. We ran every prompt on YepShot through fal.ai's GPT Image 2.6 endpoint, not inside ChatGPT, so results there can differ. Attach your photo, paste the prompt and send it.
What settings did you use?
Stills: the Flare variant at medium quality, 1K, aspect ratio auto, one run per prompt. GIFs: medium quality, 9 frames, 1.8 seconds. We did not run the high and max quality levels. Sunburst we ran on 10 of the stills; those results are on the GPT Image 2.6 page.
Are these text-to-image prompts?
No. Each one is an instruction for editing a photo you upload. Without a photo, the model has nothing to keep unchanged, and most of these prompts start by saying what must stay.
Which prompts need a brushed area?
8 of the 55, each marked on its card. Brush over the part to change before you run the prompt; the prompt then says what to do inside that area.
What does it cost to run one on YepShot?
A 1K edit with GPT Image 2.6 at standard quality is 6 credits and a GIF is 7. New accounts get 18 free credits.
Can I use the same prompts with Nano Banana 2.1?
Yes. The still prompts were written for Nano Banana 2.1 and run on GPT Image 2.6 unchanged. The comparison page shows both results for every one of them.
Does GPT Image 2.6 add things the prompt didn't ask for?
Sometimes. In these runs it printed real brand names in three results (two book titles, a toy maker's logo and a headset logo, all blurred on this page), cropped an old photo and kept a TV remote in a product flat lay. Look over a result before you use it in a listing or an ad.